Lorex Secure / FLIR Secure App: Creating and managing groups
The Lorex Secure / FLIR Secure app allows you to select cameras that are connected to your FLIR Secure account and group the cameras together with group names.
Prerequisites:
- Install the Lorex Secure app, available for Android on the Google Play Store or iOS (Apple) on the App Store.
OR - Install the FLIR Secure app, available for Android on the Google Play Store or iOS (Apple) on the App Store.
- Ensure you have connected to your DVR / NVR system or HD WiFi camera using the Lorex Secure / FLIR Secure app.
- Click here for information on how to set up remote access to your DVR / NVR system.
- Click here for information on how to set up remote access to your HD WiFi camera.
To create a group:
-
Launch the Lorex Secure / FLIR Secure app on your smartphone or tablet.
-
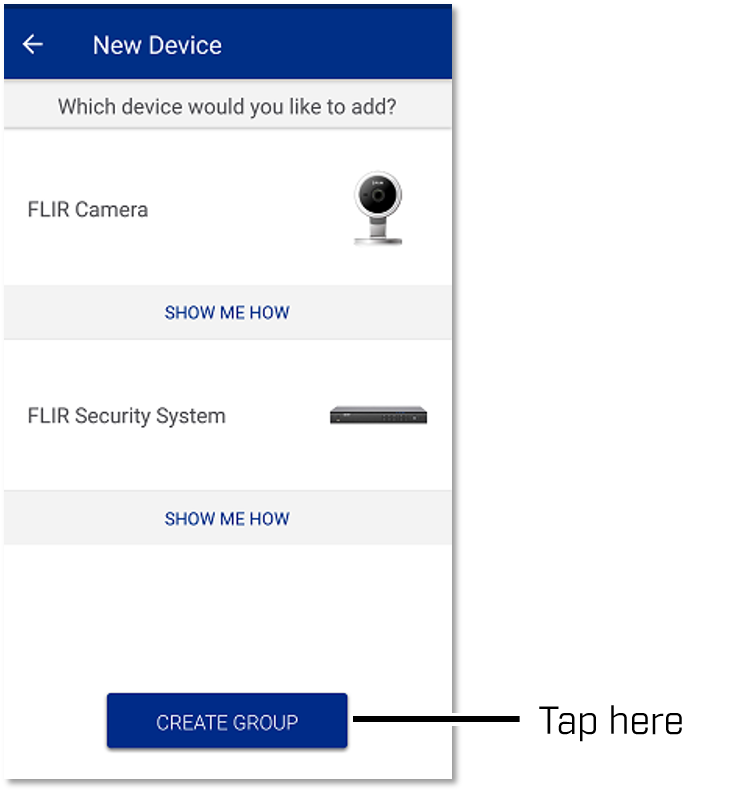
Tap the Plus icon (
 ) to open the New Device window.
 -
Tap CREATE GROUP.
-
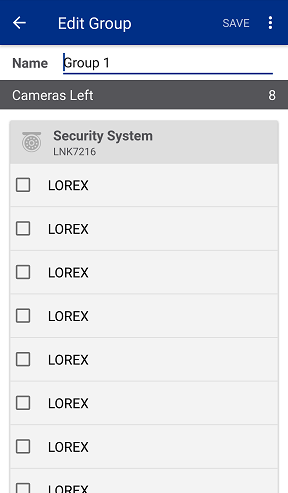
Enter a Group Name of your choice.
-
Select up to a maximum of 8 cameras you want to include in the group, then tap Create.
You can also edit a group using the Lorex / FLIR Secure app.
To edit a group:
-
Tap the Groups tab.
-
Tap the Edit icon (
 ) next to the group you want to edit to open the Edit Group window.
 -
Select cameras that you want to add or remove.
-
Enter a new Group Name, then tap Save.
To delete a group:
- Tap the Groups tab.
- Tap the Edit icon () next to the group you want to edit to open the Edit Group window.
- Tap the Options icon (
 ), then tap Delete.
 - Tap Delete again in the confirmation window.