Accessories: Removing the FLIR FX camera from the base
There are four different accessories compatible with the FLIR FX camera:
- Indoor Stand
- Outdoor Housing
- Sports Case
- Dash Mount
IMPORTANT: Be careful to avoid dropping the camera, or damaging the accessory when installing or removing the camera from any of the stands or cases.
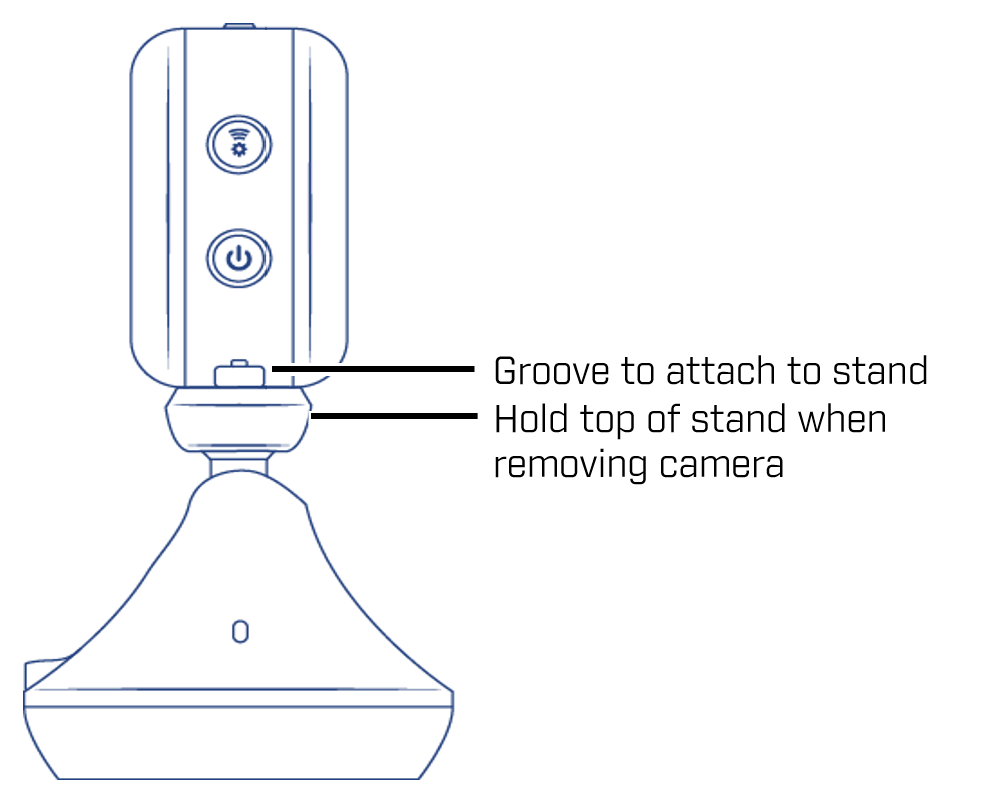
To remove the camera from the Indoor Stand:
-
Firmly hold onto the top portion of the stand, just below the camera with one hand.
-
Using your other hand, hold the camera on both sides.
-
Locate the groove on the base of the camera where it will slide off the stand.
-
Slide the camera sideways off the base by firmly pushing on the side with the power button.
Click here for more information on the indoor stand.
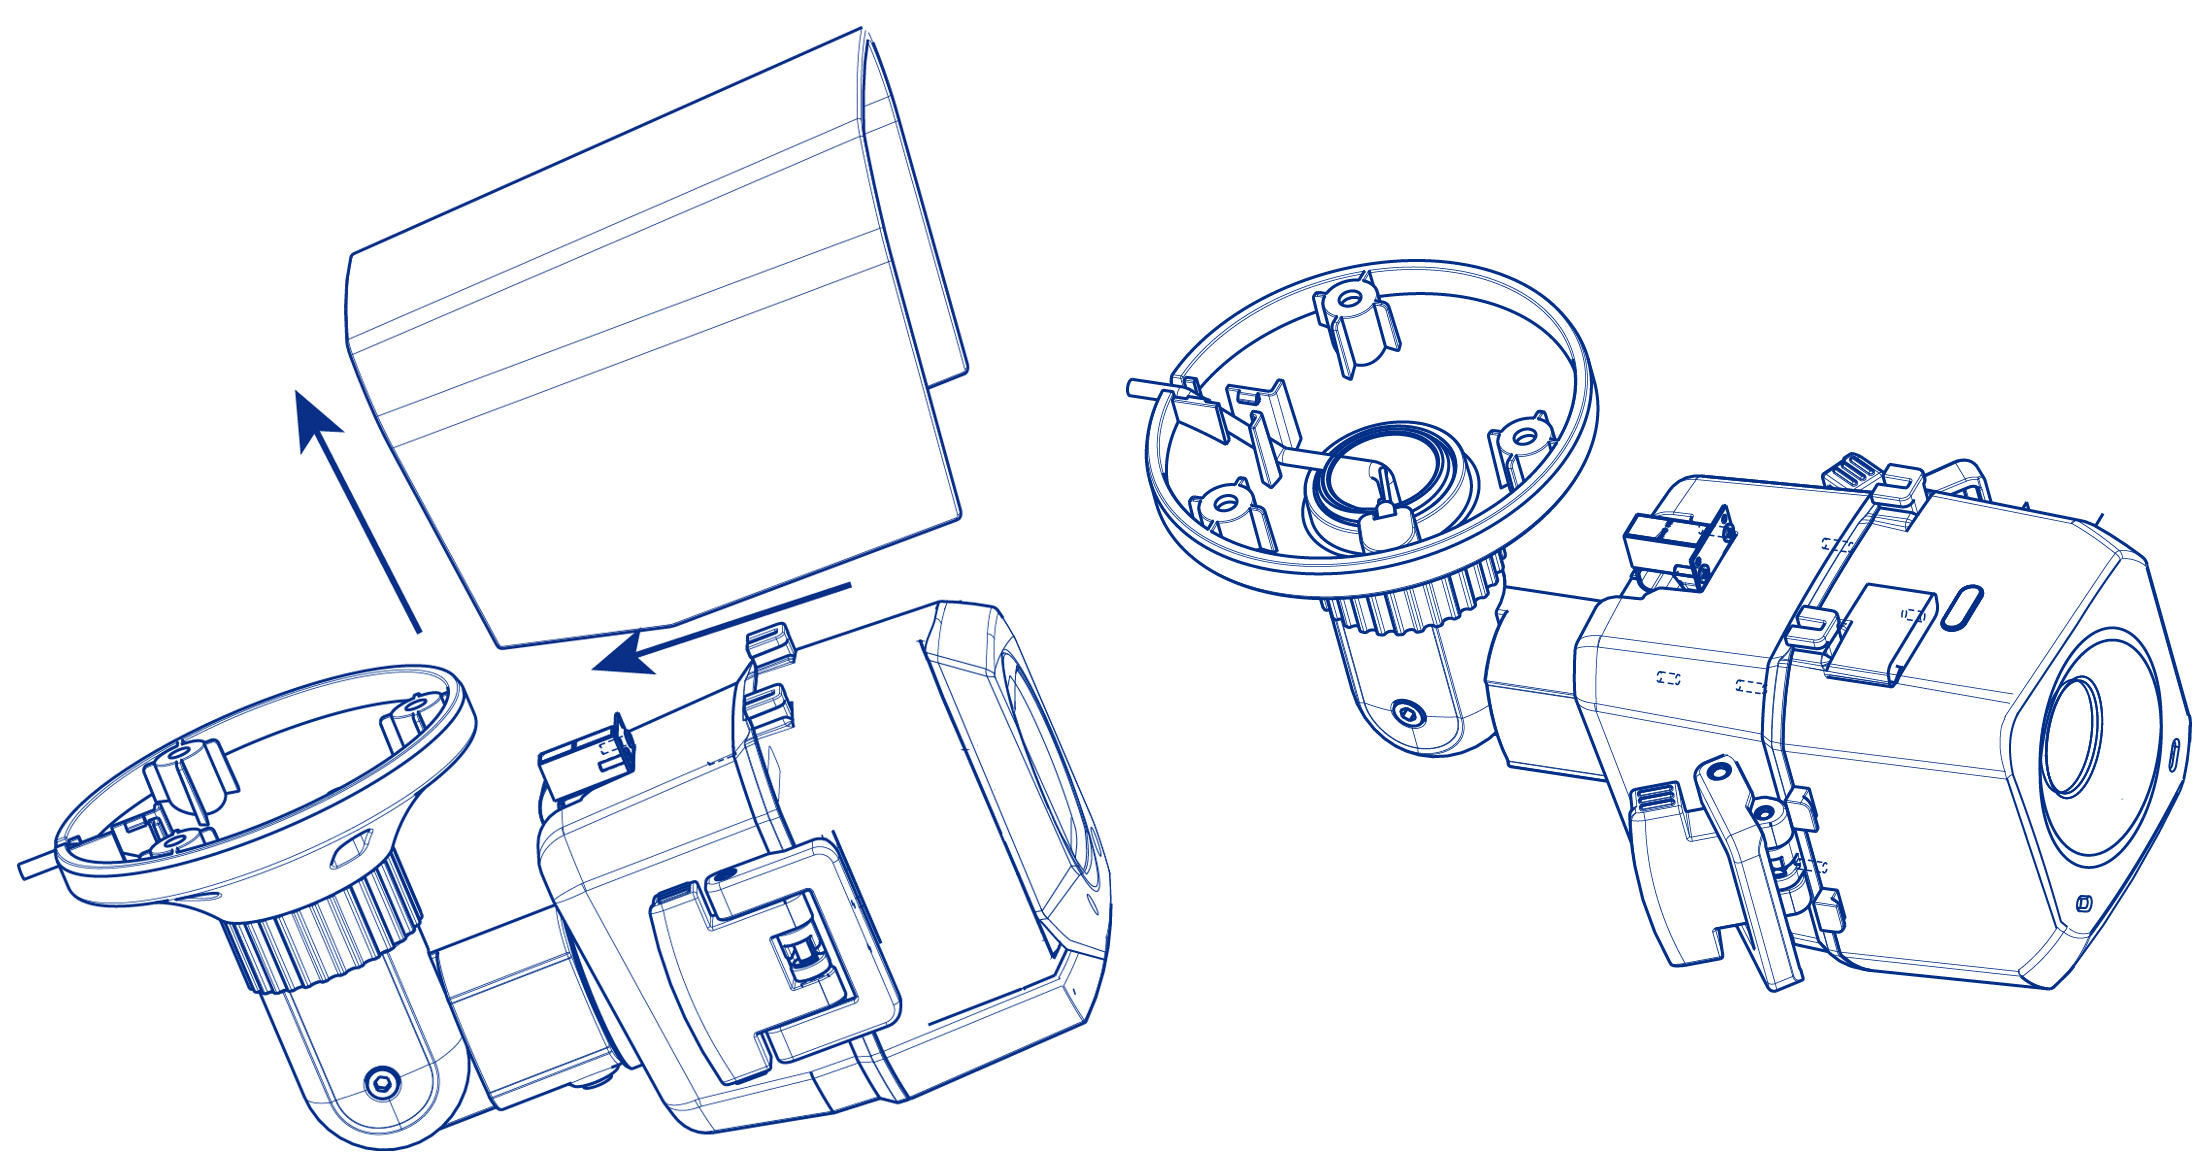
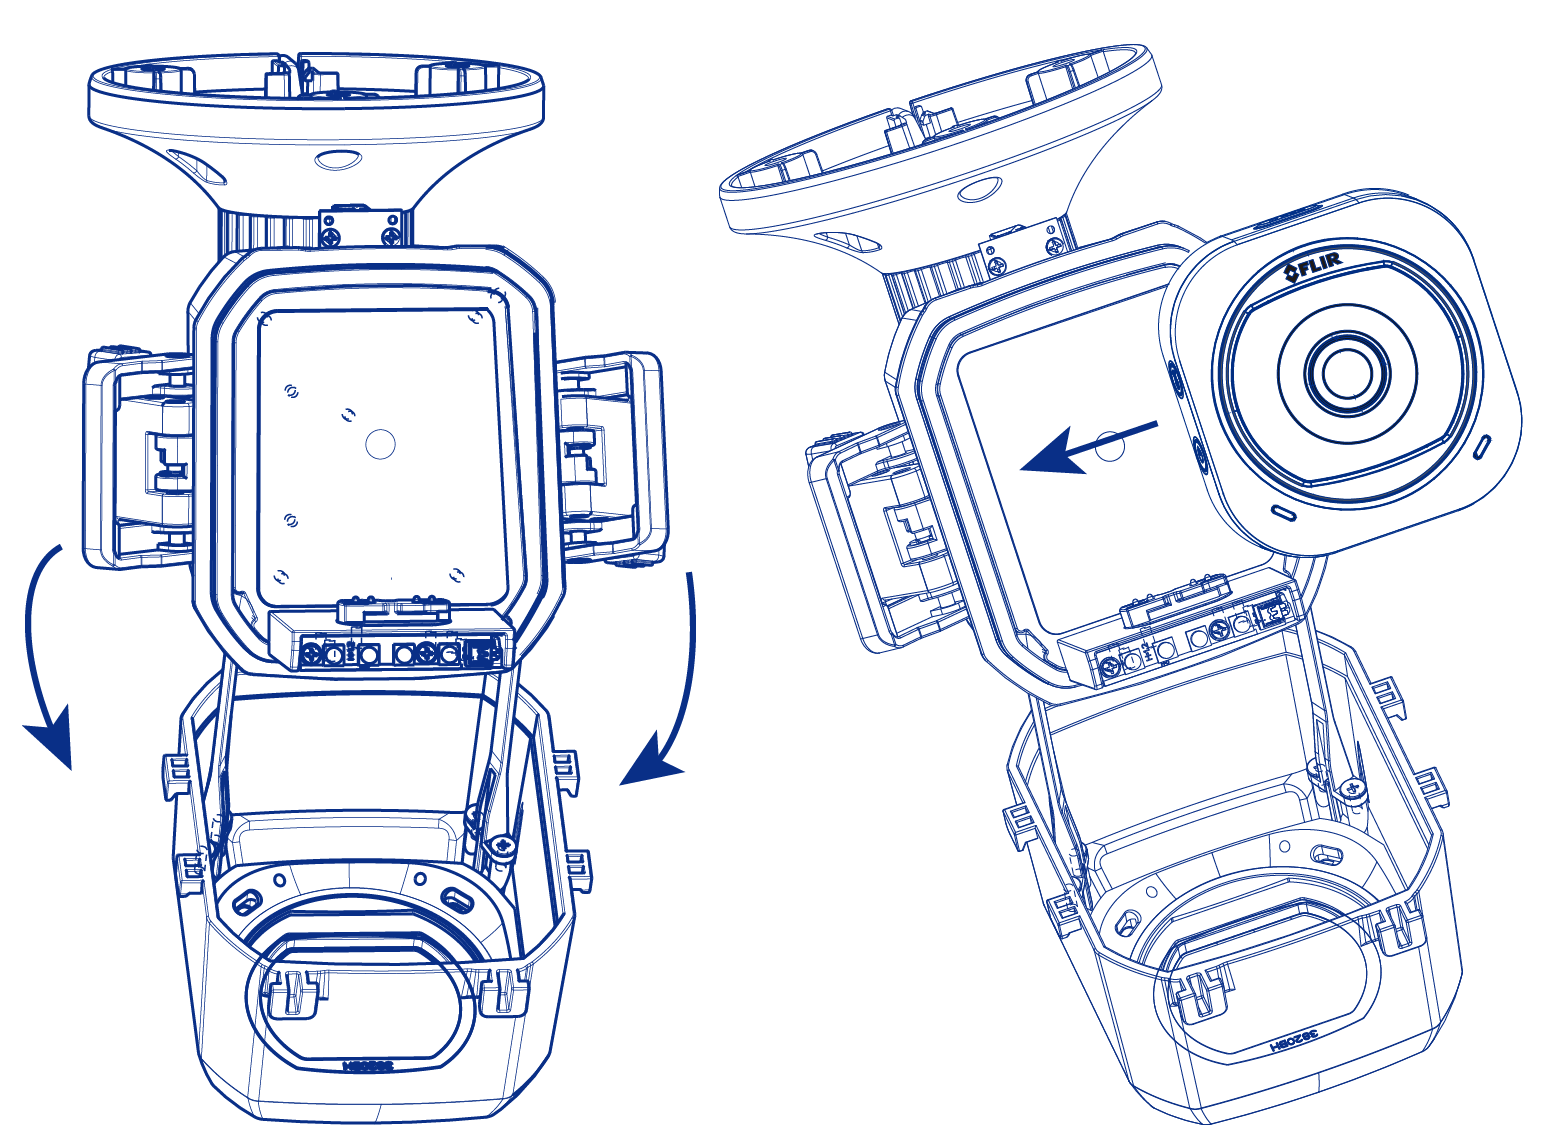
To install the camera in the Outdoor Housing:
-
Slide the sunshade back and remove from the housing.
-
Open the latches.
-
Pull the camera compartment open.
-
Slide the camera left to place it on the mount.
-
Replace the camera compartment, close the latches, and replace the sunshade.
To remove the camera from the Outdoor Housing:
- Slide the sunshade back and remove from the housing.
- Open the latches.
- Pull the camera compartment off the mount.
- Slide the camera right to remove it from the mount.
- Replace the camera compartment, close the latches, and replace the sunshade.
Click here for more information on the outdoor housing.
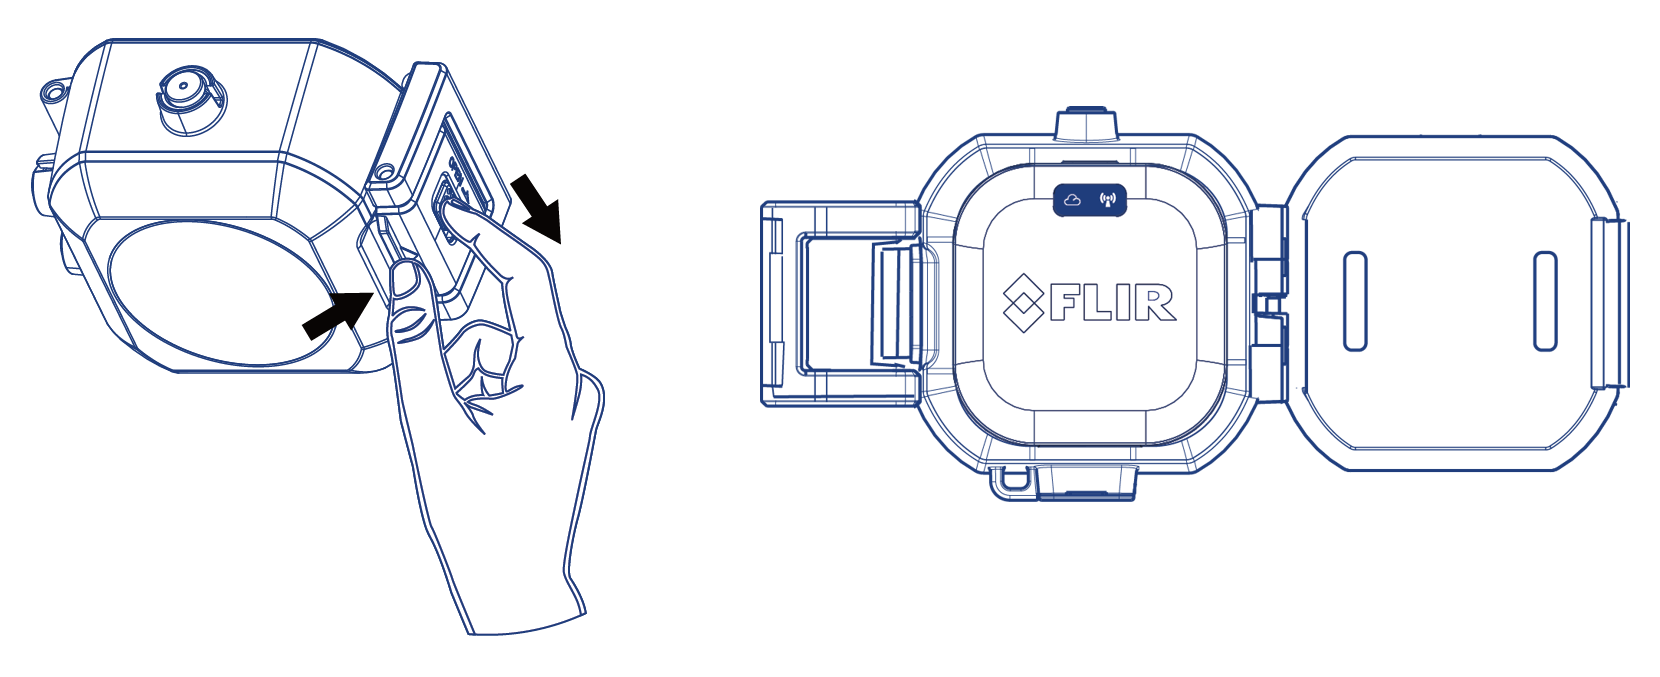
To install the camera in the Sports Case:
For maximum battery life, it is recommended to charge the camera for at least 2 and a half hours before installing the sports case.
-
Slide the open button and pull the latch open from behind the triangle to open the latch.
-
Place the camera inside the case with the FLIR logo facing the opening.
-
Close the case and push the latch forward to lock it.
RECOMMENDED: Make sure the latch is completely locked to ensure a waterproof seal.
-
To mount the camera, screw the case onto the included 3M surface mount and peel the adhesive to stick the camera to an object's surface.
To remove the camera from the Sports Case:
- Unscrew the case from the surface mount.
- Slide the open button and pull the latch open from behind the triangle to open the latch.
- Remove the camera from the case.
Click here for more information on the sports case.
To remove the camera from the Dash Mount:
- Firmly hold onto the top portion of the dash mount with one hand.
- Using your other hand, hold the camera on both sides.
- You should see a groove on the base of the camera where it will slide off the stand.
- Slide the camera sideways off the base by firmly pushing on the side with the power button.
Click here for more information on the dash mount.