LHV / LNR Series: Setting up recording schedules
You can set a custom recording schedule according to your needs. For example, you can set the system to record continuously during business hours and record on motion detection only outside of business hours. A custom recording schedule helps reduce the amount of hard disk drive (HDD) space required, increasing the time your system can retain recordings.
To set or modify the recording schedule:
-
Right-click on the Live View to access the Quick Menu.
-
Click Main Menu and then click the Setting icon (
 ).
). -
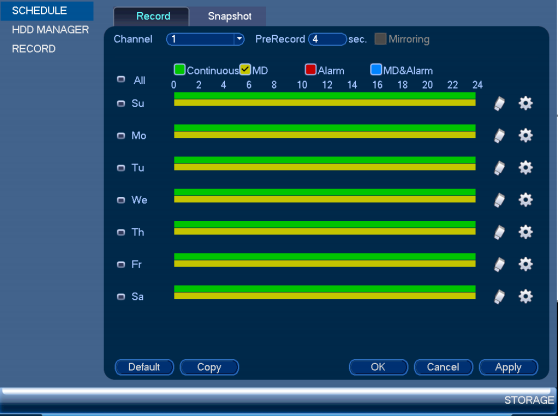
Click Storage > Schedule.
-
Click the Record tab.
-
In the Channel drop-down, select the channel to record, or select All to configure all channels with the same settings.
-
Configure the schedule as needed:
- Check the Continuous or MD (motion detection) checkbox to select a recording type.
- Click and drag on different days to customize recording schedules. The schedule is set up as a grid, with each block representing one hour.
- Check the All checkbox to link the recording schedules for all days, or click the box next to individual days to link those recording schedules together.
- Under PreRecord enter the duration in seconds for pre-recording.
-
Once configured, click Apply to save the settings, and then click OK to exit.