Wireless Home Monitor: Remote access through Skype on a PC
If using a computer away from your home network the Wireless Home Monitor can be accessed via Skype. You must first start by installing the necessary drivers.

To install the camera drivers for PC:
The camera drivers can be found on the included software CD or can be found by searching your model number from www.lorex.com and clicking Downloads.
-
Insert the software CD into the computer and click Run Lorex.exe or run the downloaded software.
-
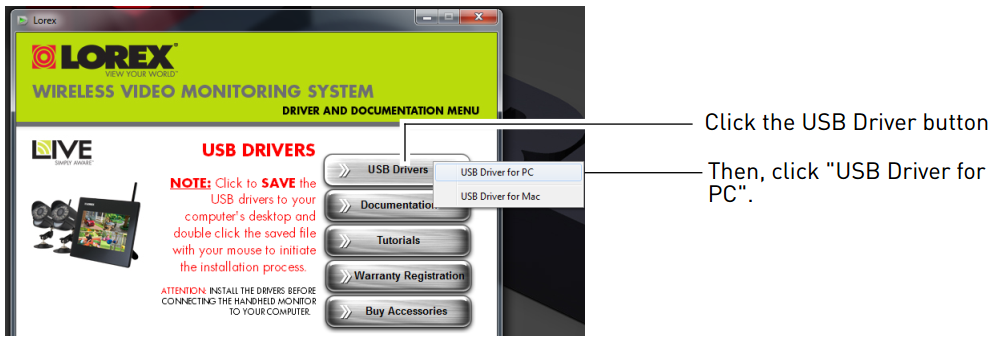
Click USB Drivers and then click USB Drivers for PC.
-
Double-click the .zip file to extract contents.
-
Open the extracted folder and double-click dpinstX86 if using a 32-bit system or dpisntX64 if using a 64-bit system.
TIP: If unsure of what system type you are using, in Windows Explorer, right-click Computer and click Properties to check the System Type.
-
Follow the on-screen instructions to complete driver installation.
Connecting the video monitor on a PC:
-
Turn on the camera followed by the video monitor. Ensure that video image is showing on channel 1.
IMPORTANT: Pair the camera that needs to be viewed the most to channel 1.
-
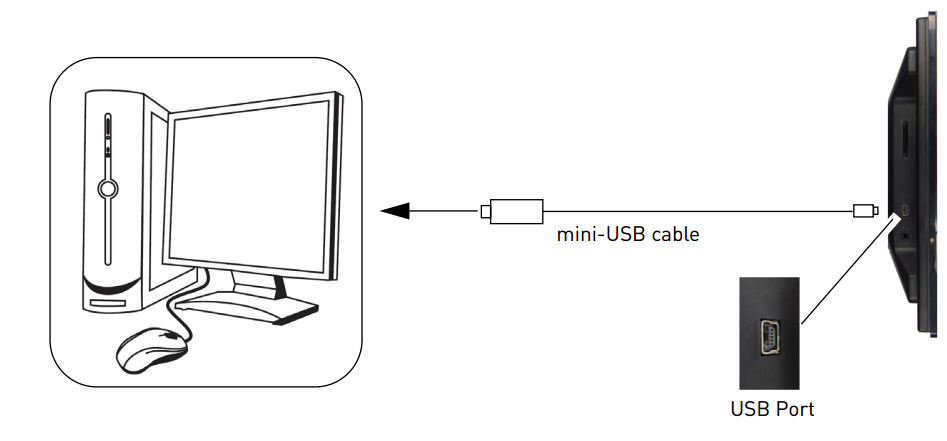
Using the included mini-USB cable connect the monitor to the computer’s USB port. The video monitor will display USB PC CAMERA MODE.
Once you have connected your Wireless Home Monitor to your PC, you can create your Skype account.
Creating a Skype / Microsoft account:
IMPORTANT: For viewing cameras through Skype, two Skype accounts are required, one for the camera and one for viewing.
-
Launch Skype if currently signed in click Skype > Sign Out.
-
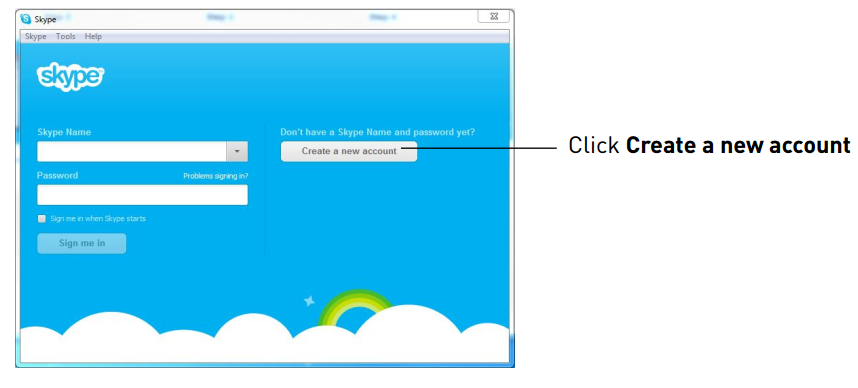
From the Skype Login window, click Create a new account.
-
Follow the on-screen instructions to create a new account, upon initial login the Setting up Skype Wizard starts. Click Continue.
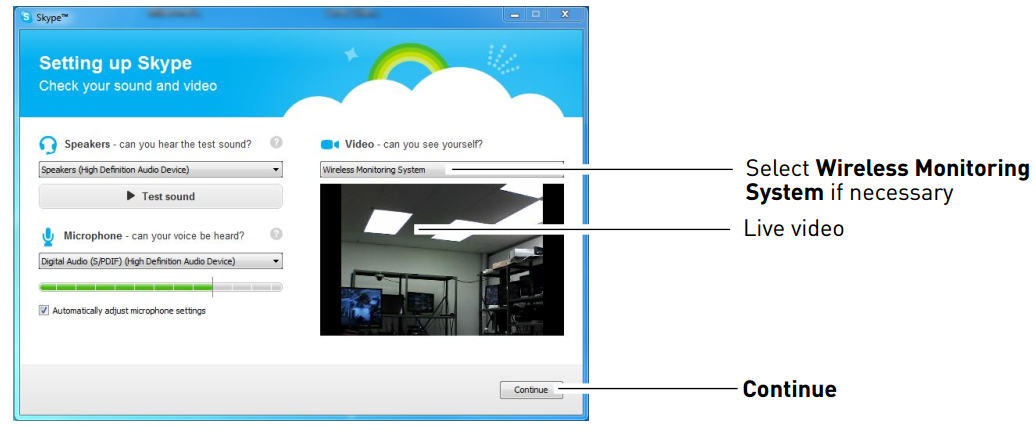
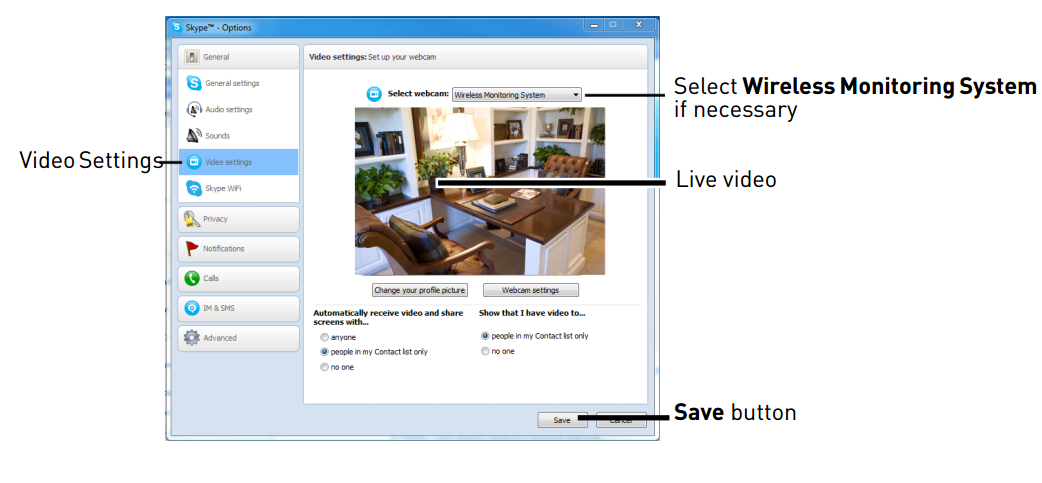
TIP: If the Setting up Skype Wizard does not run, click Tools > Options > Video Settings.
-
Under Video, there is an image from the camera. Select Wireless Monitoring System from the Select webcam drop-down menu.
REMINDER: If there isn't any images from the camera, ensure that you have paired your camera with your Wireless Home Monitor.
-
Click Save to save video settings.
-
Click Continue.
-
Add a profile picture or click Add Later to ignore this step.
-
Click Start using Skype.
You can now configure Skype settings to set who you can receive calls from.
To configure Skype settings:
-
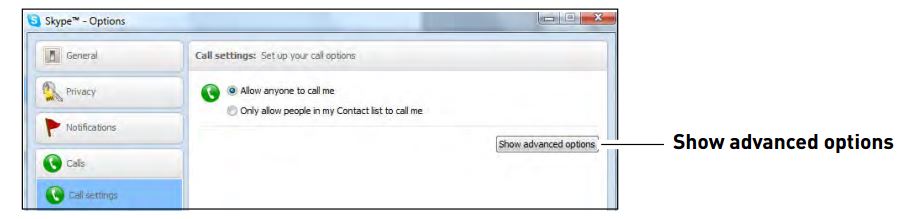
Click Tools > Options > Calls > Show Advanced Options.
-
Under Allow calls from, select people in my Contact list only.
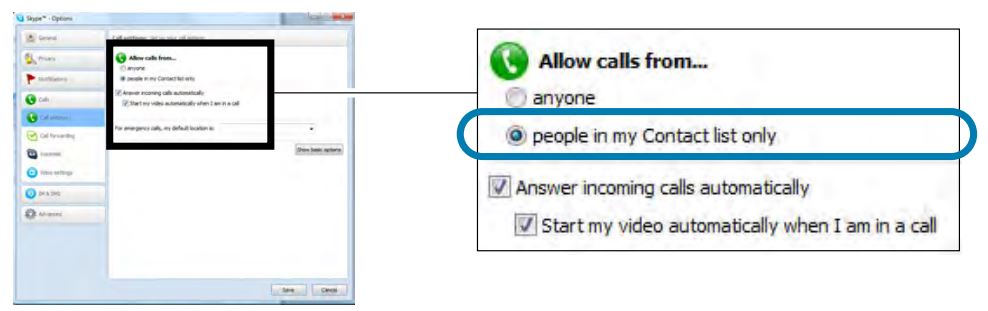
LIMITATION: This will prevent the computer, smartphone, or tablet from accepting Skype calls from anyone who is not on the contact list for its account.
-
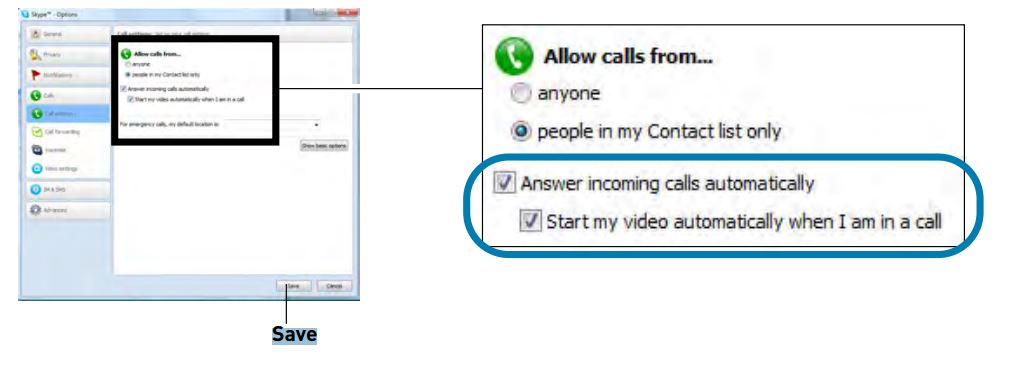
Check Answer incoming calls automatically and Start my video automatically when I am in a call. Click Save.
Once you have completed this step, you can connect to a personal Skype account by sending a contact request.
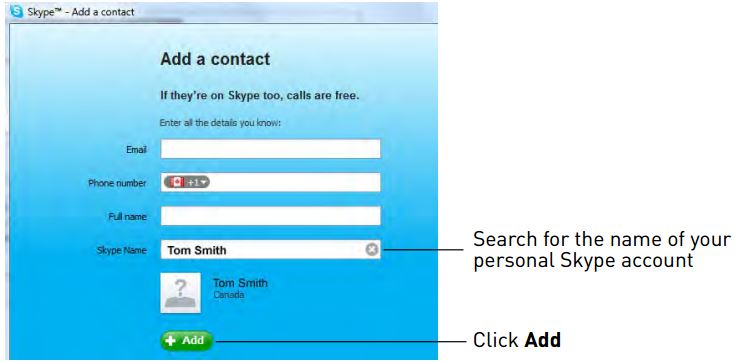
To send send a contact request from the camera’s Skype account to a personal account:
-
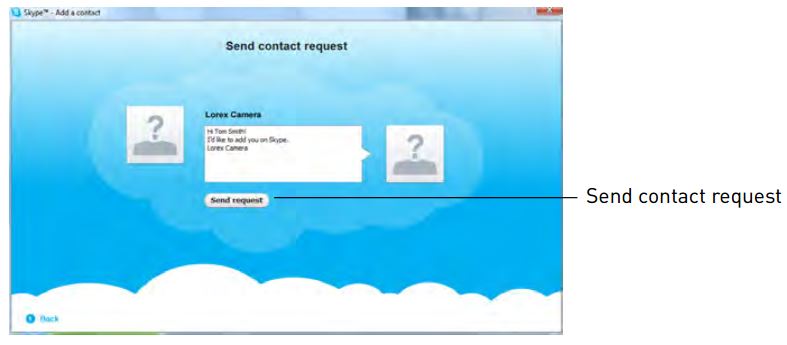
Click Add contact button and search the name of the personal account and click Add.
-
Click Send Request.
Finally, you must be sure to test the Skype connection from a different PC, smartphone, or tablet.
To test the connection:
IMPORTANT: This step requires using Skype from a different computer, smartphone, or tablet.
-
Log in to your personal account on Skype.
-
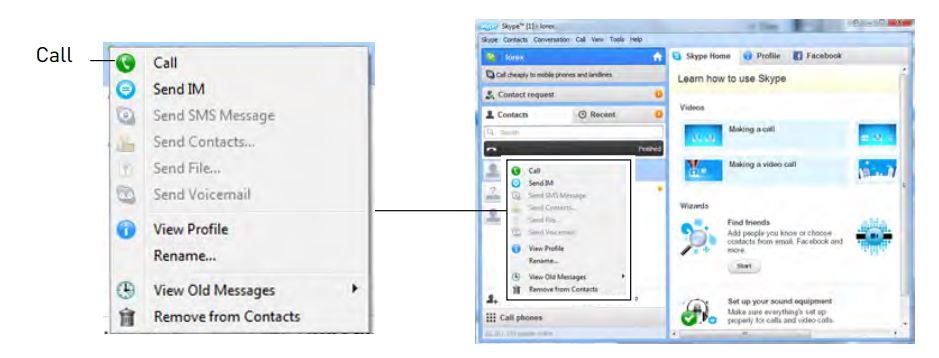
Accept the New Contact request from the camera’s Skype account.
-
Click Call.
REMINDER: The video may appear pixelated immediately after connecting, but should improve within a few seconds depending on Internet connection.