Hard Disk Drive: Installing an additional internal HDD
Lorex systems come with at least one pre-installed 3.5" Serial AT Attachment (SATA) hard disk drive (HDD). Depending on your model, there may be a second hard drive bay available to add extra recording space. Refer to your product specification sheet to verify if a second bay is present in your DVR / NVR, and for the system capacity limit before purchasing an additional HDD.
IMPORTANT: Ensure additional or replacement HDDs are security standard and the HDD capacity does not exceed the system limit.
To add an additional HDD:
REMINDER: These instructions are for the LNR600 series DVR. Refer to your user manual for model specific illustrations. Click here for downloads and documentation for your product.
-
Power off the DVR / NVR system and unplug all cables.
WARNING: Make sure that the system is off and the power cable is disconnected before attempting to open your DVR / NVR.
-
The DVR / NVR cover is secured with screws. Remove the screws and slide the cover off.
WARNING: The inner casing of the DVR / NVR has sharp edges that can lead to injury if not carefully handled. Be careful not to let any tools or loose parts touch sensitive components such as the circuit board.

-
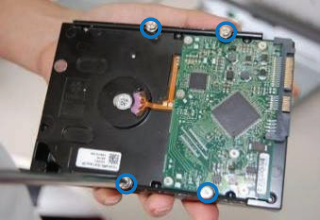
Insert HDD screws (4×) into the HDD and tighten them half way.
-
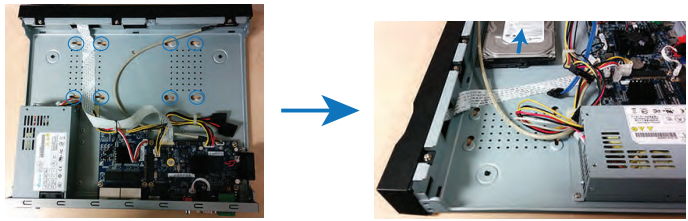
Place the HDD over the screw slots of an additional bay / port of your DVR / NVR on the bottom of the system and slide the HDD into place. The SATA connectors on the HDD should face the center of the unit.
-
Locate the extra SATA HDD connectors. Plug the two connectors into the HDD.
-
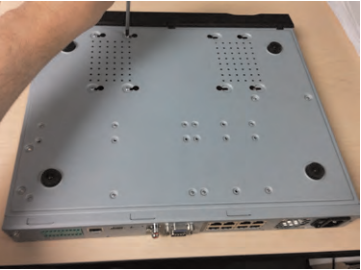
Carefully turn the DVR / NVR over. Tighten the HDD screws (4×) to secure the HDD.
-
Carefully replace the casing of the DVR / NVR and tighten the casing screws.
-
Reconnect the power source and monitor.
-
Format the new HDD prior to operation. Click here for instructions on how to format the HDD.