Lorex: Setting up a DDNS
Lorex maintains a free Dynamic Domain Name System (DDNS) for customers who purchase compatible products.
Prerequisites:
- Connect your DVR / NVR to your network router with an Ethernet cable.
- Complete port forwarding setup. Click here for instructions on how to set up port forwarding.
- Ensure you have the MAC address for your system. This is located in your Networking menu, or System Information on your DVR / NVR.
- Create an account. Click here for instructions on how to create an account.
To set up a free DDNS:
-
In your web browser, enter www.lorex.com to access the log in page.
-
Enter your Username and Password to log in to your account.
-
Click the DDNS tab (
 ), and click Set up a new DDNS.
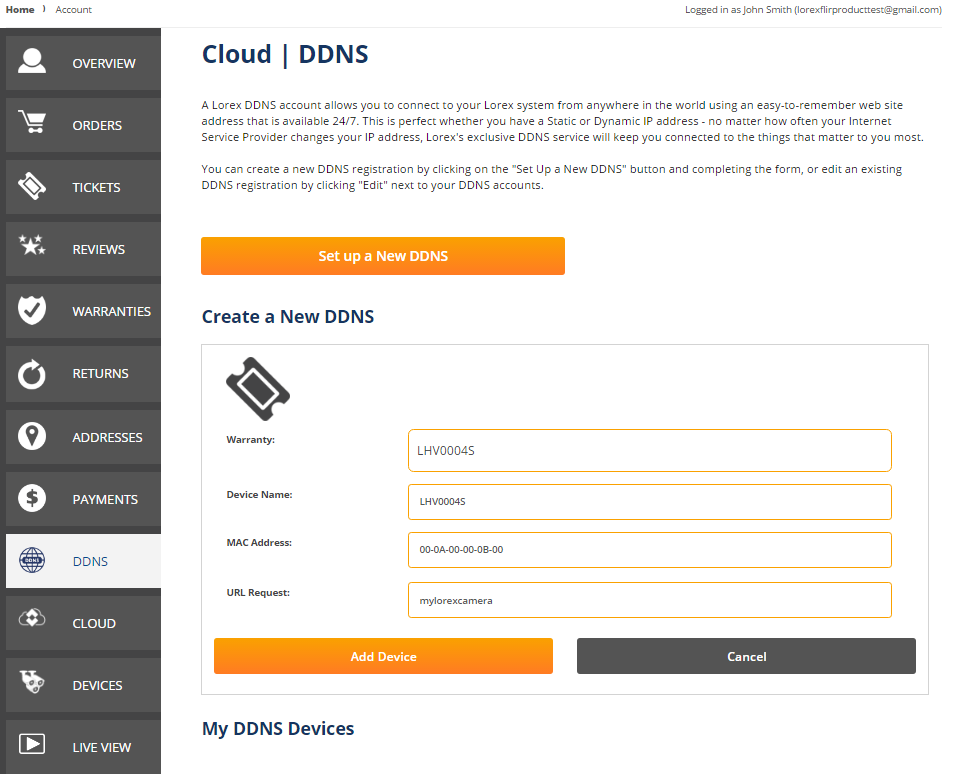
-
Enter a Device Name of your choice, the MAC Address, and the URL Request of your choice.
REMINDER: The URL request is the unique name that would be placed before your lorexddns.net link. For example, if you enter test, your URL request would be test.lorexddns.net.
-
Click Add Device. You will receive an email with your username, password, and URL.
-
In your DVR / NVR, right-click on the Live View to access the Quick Menu.
-
Click Main Menu, and then click the Setting icon (
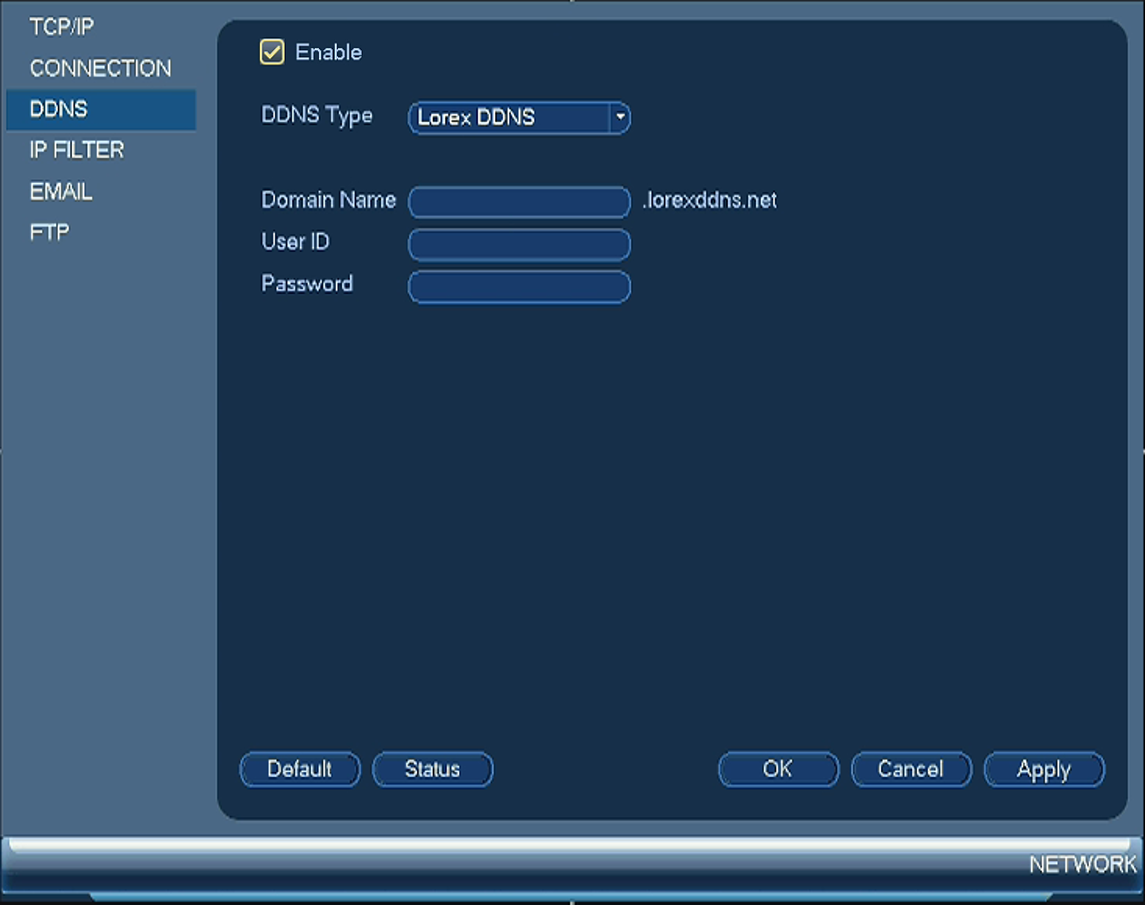
 ), and then click Network > DDNS.
 -
Ensure the Enable checkbox is selected.
-
Enter your updated DDNS under Domain Name.
-
Click Apply to save the settings, and then click OK to exit.
REMINDER: Your DDNS may take 10-30 minutes to update with the network.