LHV / LNR Series: Configuring a snapshot schedule
The first step to setting up snapshots is to enable them in your LHV / LNR Series DVR / NVR menu. By default, your LHV / LNR system may have snapshots constantly enabled / disabled. View your snapshot schedule and configure it to your needs.
To configure the snapshot schedule:
-
Right-click on the Live View to access the Quick Menu.
-
Click Main Menu then click the Setting icon (
 ).
). -
Click Storage > Schedule.
-
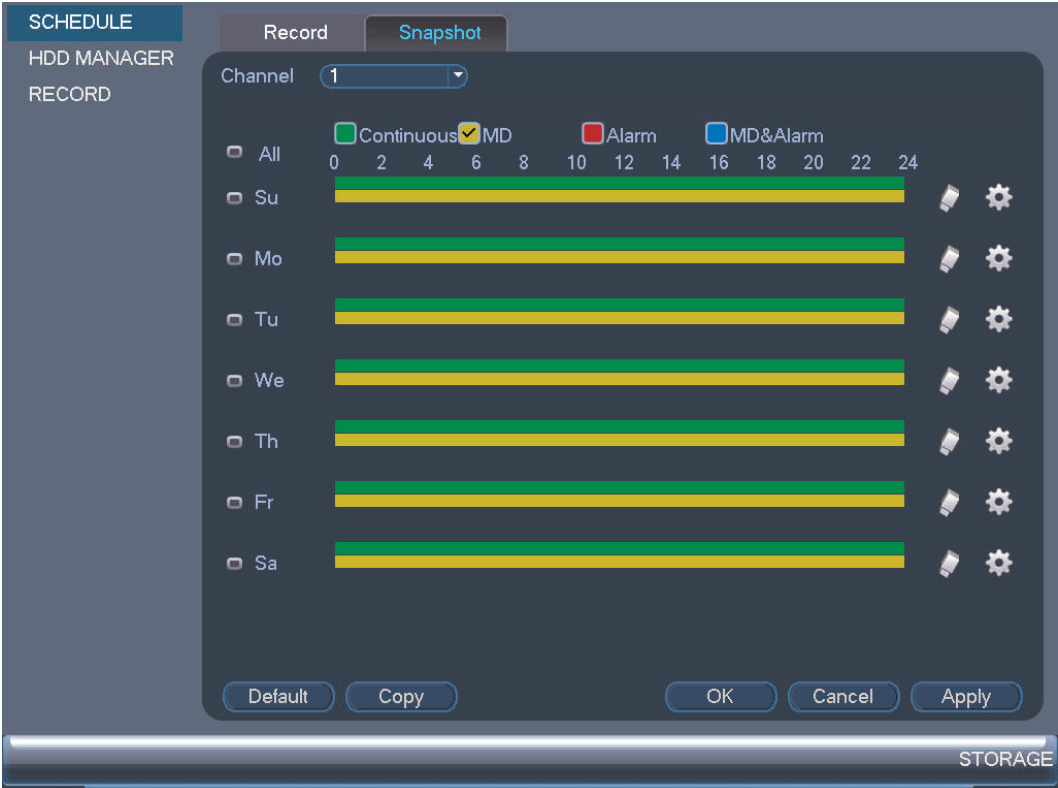
Click the Snapshot tab.
-
In the Channel drop-down, select the channel to configure.
-
Configure the schedule:
-
Check the Continuous or MD (motion detection) checkbox to select a recording type.
-
Click and drag on different days to customize snapshot schedules.
REMINDER: The schedule is set up like a grid, with each block representing 1 hour. There is a maximum of 6 schedule time blocks that can be set in the schedule per day.
-
-
Click Apply to save the settings, and then click OK to exit.
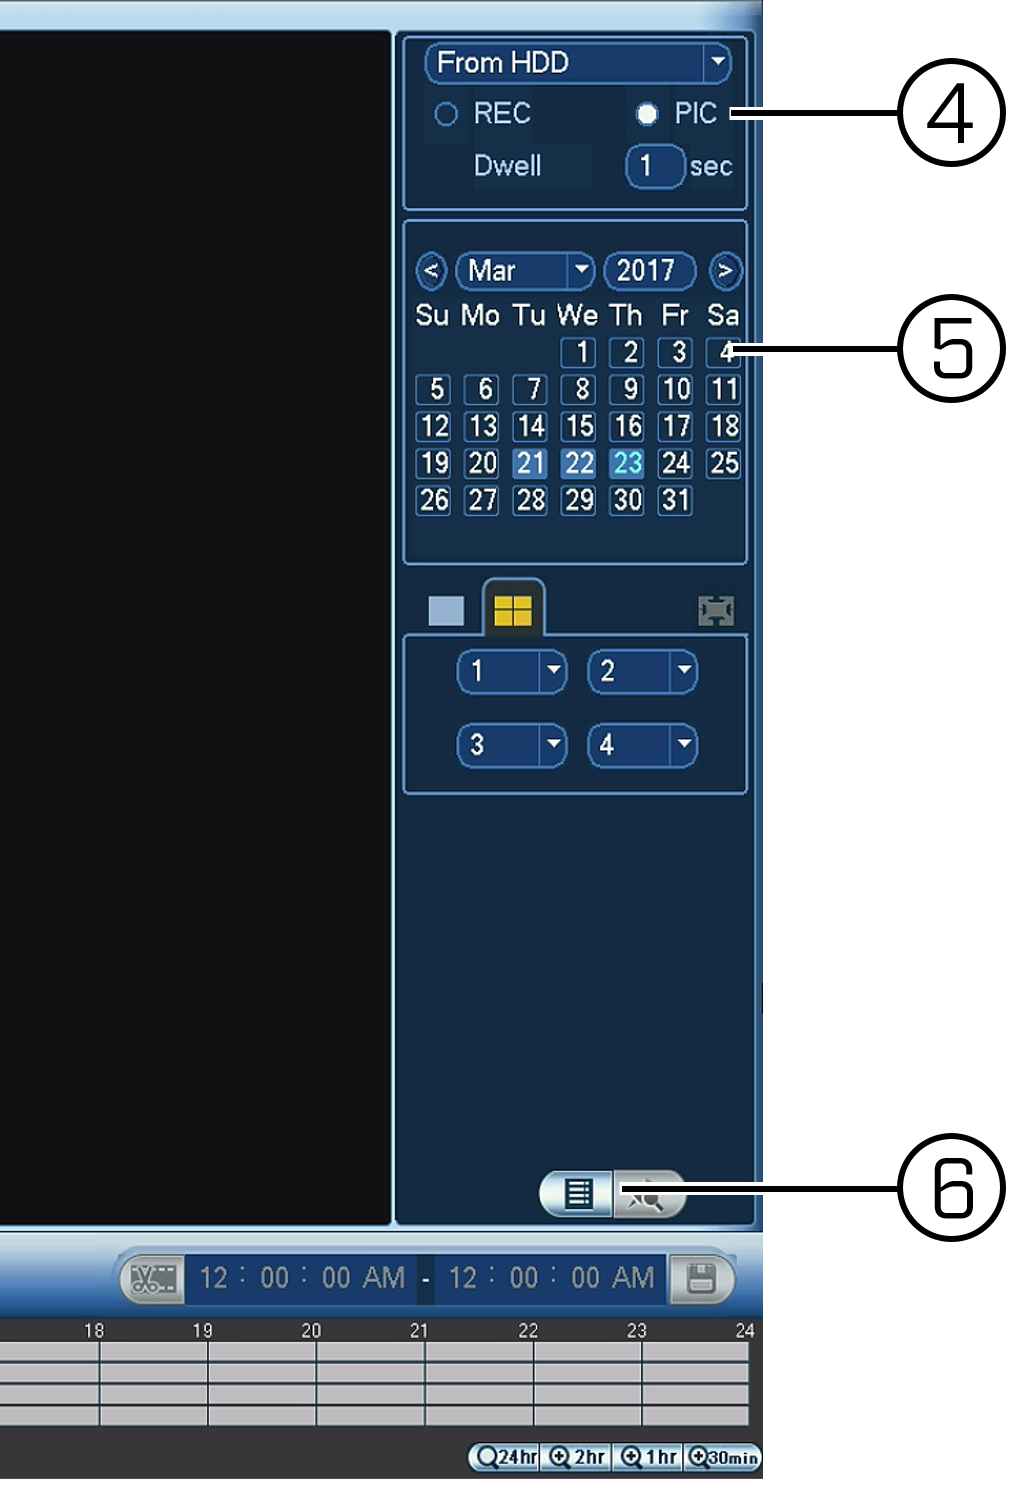
To locate and review your snapshots:
-
Right-click on the Live View window to open the Quick Menu.
-
Click Main Menu and click the Search icon (
 ).
). -
Click Search.
-
Click PIC.
-
Select a date to search.
-
Click the File List icon (
 ) to see a list of snapshots for that date.
 -
Click the Play Forward icon (
 ) to view each snapshot.