LHA / LNK Series: Configuring motion detection settings
You can configure your LHV / LNR Series DVR / NVR system to record motion detection events.
The following instructions require you to access your system using your DVR / NVR and a monitor.
To enable and configure motion detection:
-
In the taskbar, click the Main Menu icon (
 ), and then click Settings > Alarm > Motion.
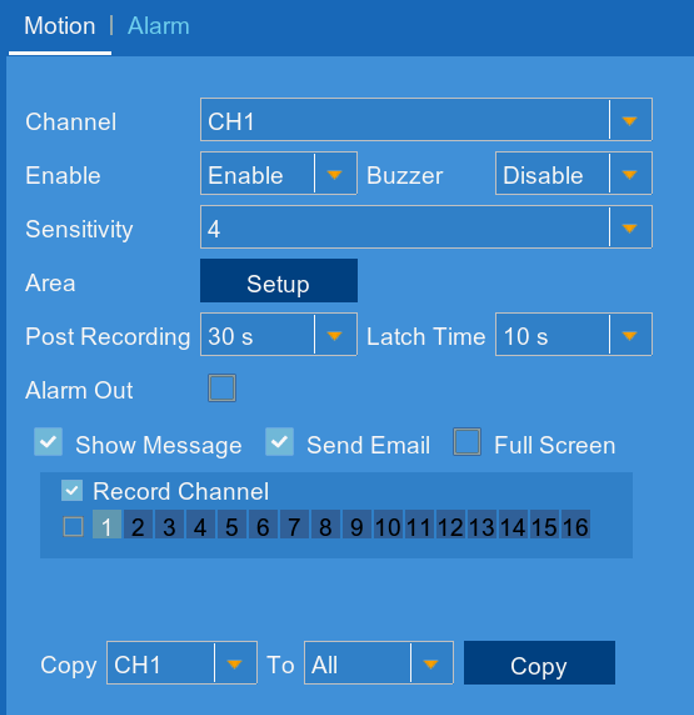
-
In the Channel drop-down, select a channel to configure motion detection.
-
In the Enable drop-down, select Enable.
-
In the Buzzer drop-down, select the duration the system will beep when an event triggers, or select Disable to disable the buzzer.
-
In the Sensitivity drop-down, select a sensitivity level for motion events. The lower the sensitivity value, the more movement is required to trigger motion detection. It is recommended to select a Sensitivity between 30~70.
-
Click Setup to configure the areas of the image that will be enabled for motion detection. The red grid indicates the active area for motion detection. Click and drag to add / remove the active area.
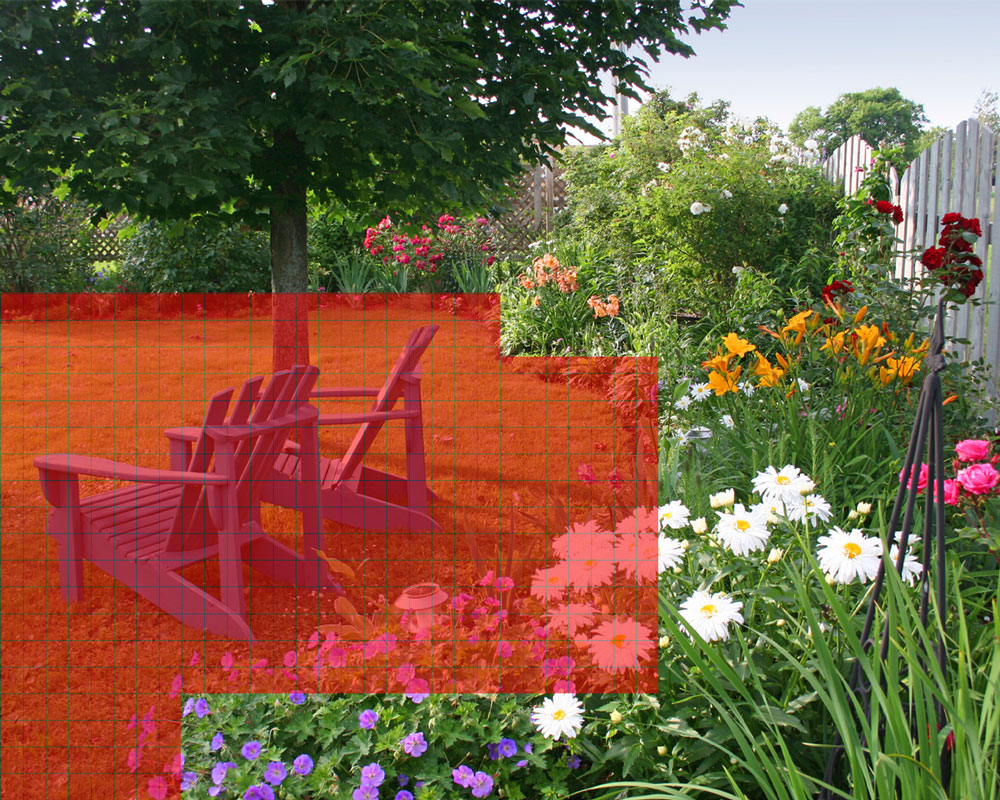
REMINDER: Motion detection will be disabled for areas of the image without red overlay. Disabling motion detection in certain areas of the image is an effective way to eliminate unwanted recordings and notifications caused contact movement like trees blowing in the wind or regular traffic.
-
Once you complete setting your active motion detection area, right-click anywhere on the screen to exit.
-
In the Post Recording drop-down, select how long the system will record video for after motion is detected.
-
Select the actions to occur when motion is detected:
- Show Message: Display a message on the system when motion is detected.
- Send Email: Receive an email notification when motion is detected. Ensure you have enabled email notifications.
- Full Screen: Check to have video from the selected channel appear in full screen when motion is detected.
- Record Channel: Record video from the selected channel(s) when motion is detected.
- Numbered Boxes: The channels to record when motion is detected. Click the checkbox to select all.
-
Click Save to save your motion detection settings.
-
Click OK.
Configuring motion detection settings using the FLIR Client 12 software for PC / Mac