LNR200 / LNR300 Series: Configuring the On-Screen Display (OSD) and camera name
The On-Screen Display (OSD) sub-menu allows you to configure custom names for your cameras or configure the on-screen text shown for your cameras.
The following instructions require you to access your system using your NVR and a monitor.
To configure the OSD and camera name:
-
Right-click on the Live View and click Menu.
-
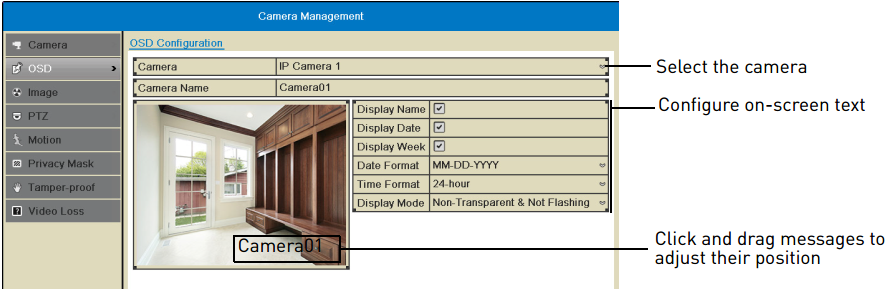
Click Camera and then click OSD.
-
In the Camera drop-down, select the camera you would like to modify.
-
Enter a desired Camera Name.
-
Check the Display Name checkbox to show the camera name.
-
Check the Display Date checkbox to show the current date and time.
-
Check the Display Week checkbox to show the day of the week in the date.
-
In the Date Format drop-down, select the desired date format.
-
In the Time Format drop-down, select 24-hour or 12-hour time.
-
In the Display Mode drop-down:
- Select Non-Transparent & Not Flashing to have the on-screen text shown at all times.
- Select Non-Transparent & Flashing to have the on-screen text flash on the screen.
-
Click and drag the boxes in the image preview to change the position of the on-screen display text.
REMINDER: The position of the on-screen text will not update until you click Apply.
-
Click Apply to save your changes.