LNR200 / LNR300 Series: Setting the system time
It is strongly recommended to set the date and time when first setting up your LNR200 / LNR300 Series NVR. Inaccurate time stamps may render your footage unusable for court evidence.
The following instructions require you to access your system using your NVR and a monitor.
To set the date and time:
-
Right-click on the Live View, and then click Menu.
-
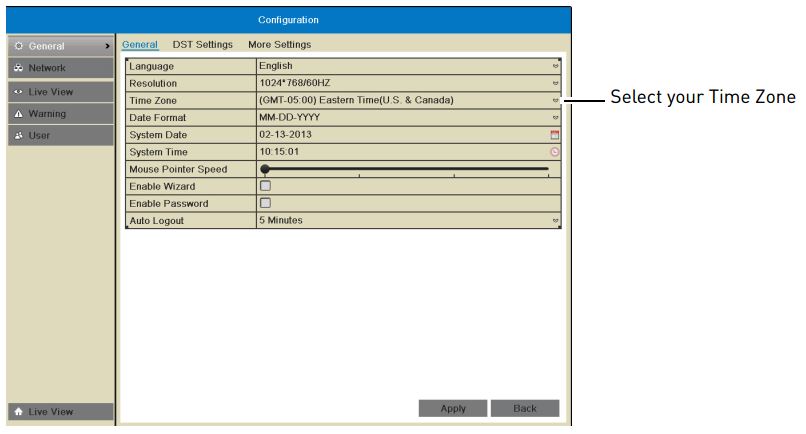
Click Configuration and then click General.
-
Click the General tab.
-
In the Time Zone drop-down, select your Time Zone.
-
Click System Date and use the on-screen calendar to select the current date.
-
Click System Time and use the up and down buttons to set the current time.
-
Click Apply to save changes.
If your region observes Daylight Savings Time (DST), follow the instructions below to configure your NVR to automatically update the time when the clock updates.
To configure Daylight Savings Time (DST) adjustments:
-
Right-click on the Live View, and then click Menu.
-
Click Configuration and then click General.
-
Click the DST Settings tab.
-
Check the Enable DST checkbox and configure the following:

- From: Select the start time for Daylight Savings.
- To: Select the end time for Daylight Savings.
- DST Bias: Select the amount of time the clock changes when DST starts and ends.
-
Click Apply to save changes.
You can also set the system time using a Network Time Protocol (NTP) server. Click here for more information on using NTP.