LNR200 / LNR300 Series: Adjusting motion detection settings
By default, motion detection is enabled on all cameras connected to your LNR200 / LNR300 Series NVR. You can enable / disable cameras for motion detection. You can also enable / disable parts of the image for motion detection. For example, you can disable motion detection where your camera overlooks a public street, but enable motion detection to trigger when someone enters your driveway.
If motion detection is not activating during an event, ensure motion detection is enabled for that camera. You may also need to increase the motion detection sensitivity, or adjust the enabled areas to cover more of the image.
The following instructions require you to access your system using your NVR and a monitor.
To configure motion detection settings:
-
Right-click on the Live View, and then click Menu.
-
Click Camera and then click Motion.
-
In the Camera drop-down, select the camera you want to configure.
-
Check the Enable Motion Detection checkbox to enable motion detection.
-
Use the Sensitivity slider to set motion detection sensitivity.
-
In the image area, configure motion detection areas:
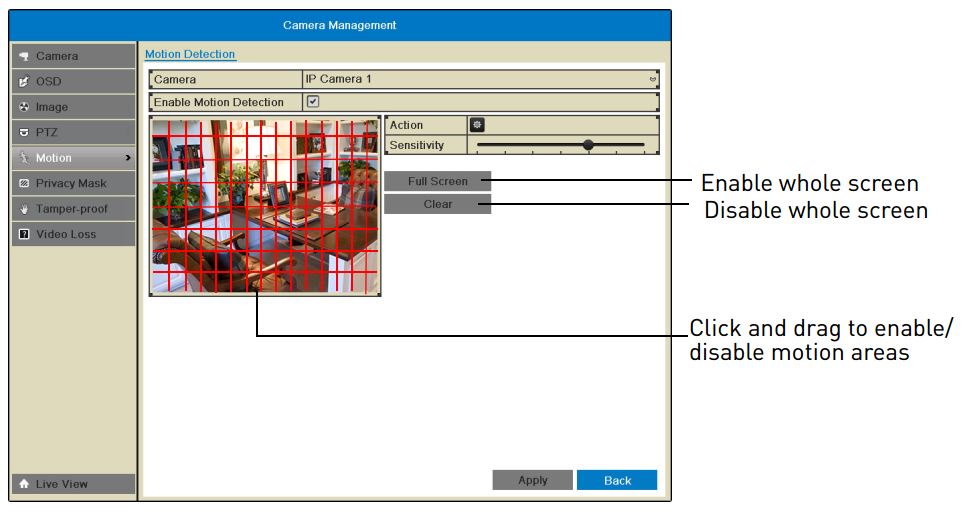
- Areas where the grid is filled in are enabled for motion detection.
- Click and drag to enable / disable areas of the screen for motion detection.
- Click Full Screen to enable the entire area for motion detection.
- Click Clear to disable the entire area for motion detection.
-
Click Apply to save changes.