FLIR Client 12 Software: Setting a picture schedule for Auto Capture
You can configure your DVR / NVR system to set a picture schedule for Auto Capture using the FLIR Client 12 software for PC / Mac.
Prerequisites:
- Ensure that you have downloaded and installed the FLIR Client 12 software on your PC / Mac
- Ensure that you have logged in and added your DVR / NVR system to the FLIR Client 12 software
- Ensure that you have enabled Auto Capture on your DVR / NVR system
To set a picture schedule:
-
Launch the FLIR Client 12 software for PC / Mac.
-
Click Remote Setting in the top-right corner of the window.
-
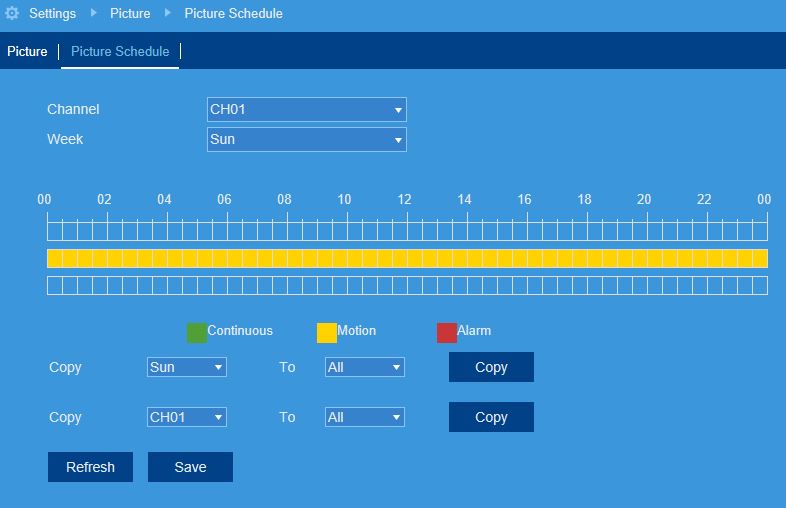
Under Settings, click Picture, the click the Picture Schedule tab.
-
In the Channel drop-down menu, select a channel to set a privacy zone for.
-
In the Week drop-down menu, select the day of the week you would like to set the schedule for.
-
The times of day during which continuous Auto Capture is enabled are represented by green bars, and motion by yellow. Click-and-drag to enable or disable continuous or motion captures during a certain time of day.
TIP: Repeat steps 5 and 6 for as many days of the week you would like to configure the schedule for.
-
If needed, use the Copy functions to copy the schedule for one day to other days of the week, or to copy one channel’s entire schedule to other channels.
-
Click Save.
Set a picture schedule for Auto Capture using the LHA / LNK Series DVR / NVR system