FLIR Client 12 Software: Adding, editing, and deleting IP Cameras
You can add, edit, or delete IP cameras from your LNK Series NVR from the local area network (LAN) using the FLIR Client 12 software for PC / Mac. IP cameras connected directly to the NVR automatically appear in the IP Cameras menu.
Prerequisites:
- Ensure that you have connected your IP camera(s) to the same network as your NVR. Refer to your included Quick Start Guide for details. Click here for downloads and documentation for your product.
- Ensure that you have downloaded and installed the FLIR Client 12 software on your PC / Mac. Click here for more information on locating software downloads.
To add an IP camera:
-
Launch the FLIR Client 12 software for PC / Mac.
-
Click Remote Setting in the top-right corner of the window.
-
Under Settings, click Display to open the IP Camera tab.
-
Click Quick Add to search for and add IP cameras from the LAN.
OR -
Click the Add icon (
 ) next to an empty channel to manually add an IP camera.
 LIMITATION: LHK Series NVRs only support Lorex IP cameras. Visit www.lorex.com/compatibility for a complete list of compatible IP cameras. When adding Lorex PTZ cameras, ensure that you change the Protocol from Private to ONVIF.
To edit IP cameras:
-
Click the Edit icon (
 ) to edit a connected IP camera using the camera attributes window:
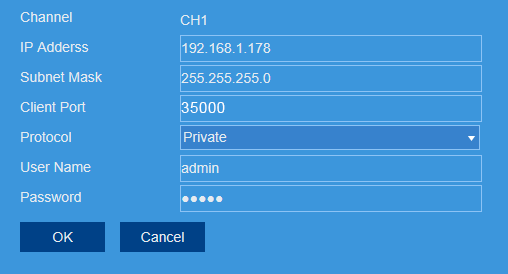
To delete an IP camera:
- Click the Delete icon (
 ) to delete a connected IP camera.
REMINDER: Deleting an IP camera removes it from the channel it is currently connected to. You can add these cameras to the system again at any time. You can only delete cameras from the LAN, and not those which are connected directly to the NVR.