B451AJ - Customizing motion detection for the 2K Wired Video Doorbell
Motion detection settings
This article will give you instructions to customize motion detection for the 2K Wired Video Doorbell.
To customize or enable/disable motion detection and person detection:
- Launch the Lorex App.
- Tap the
 icon above the video doorbell thumbnail in the Devices screen.
 - Tap Motion Detection Settings.

Note: If motion detection is disabled, person detection will automatically disable and you will not receive any motion detection notifications in the Lorex App.
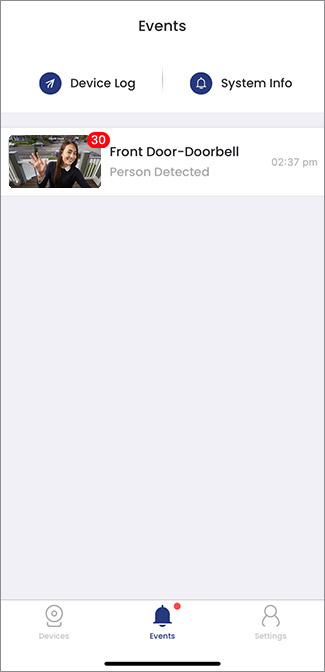
Event types
The 2K Video Doorbell has Person Detection and Motion Detection enabled by default. You will only receive notifications in the Lorex App when a person is detected and your events will only display person detection events and doorbell call events.
The following instructions will walk you through event types.
- Open the Lorex App.
- Tap the video doorbell to go to Live View.
- Tap on Timeline to reveal all events on the timeline bar.
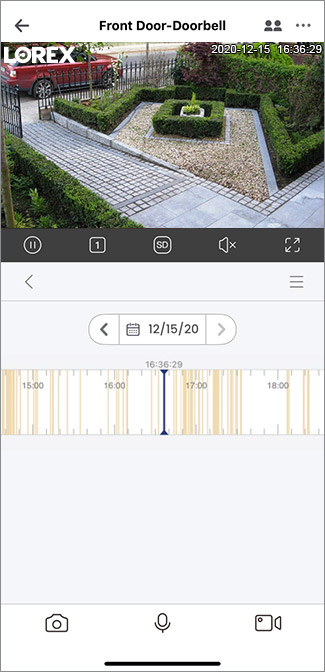
- Tap the three lines on the top right of the timeline to filter through the event types.
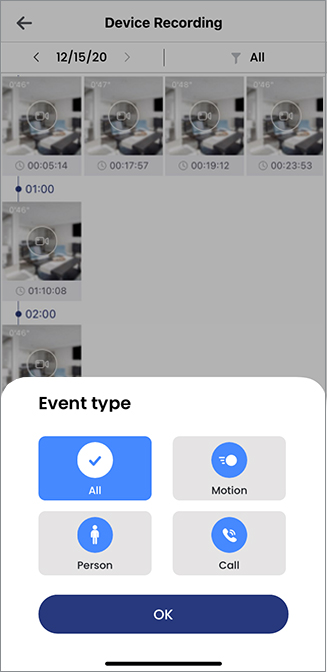
Note: All event types, including both motion events and person detection events, are saved on the microSD card.
Setting up Motion Zones™
The following instructions will walk you through setting up your Motion Zones™ in the Motion Detection Settings.
- Open the Lorex App.
- Tap on the three dots on the top right of the video doorbell (Device Settings) > Motion Detection Settings > Motion Zones™.
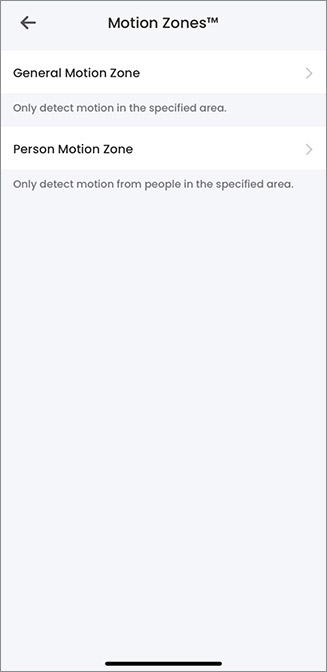
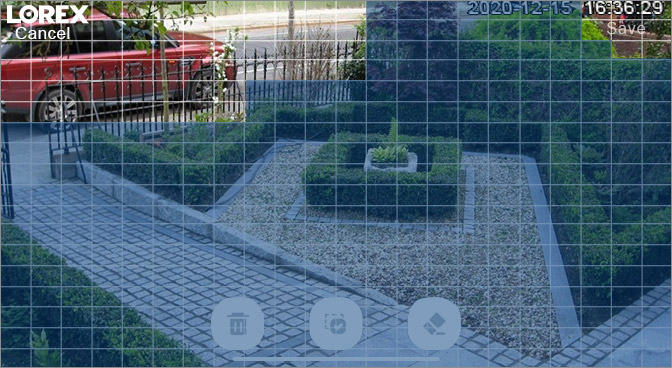
- Tap General Motion Zones to configure the areas of the image that will be enabled for motion detection. The blue grid indicates the active area for motion detection.
- Tap the drawing icon
 and drag to add / remove the active area.
 - Tap Save.
- Tap Person Motion Zones to configure the areas of the image that will be enabled for person detection. The blue overlay indicates the active area for person detection.
- Select any anchor point from the blue overlay and adjust the size/shape for the area you want to monitor.
- Tap the screen to display the drawing buttons.
- Tap the drawing icon
 to add more zones. You can set up to 3 different zones.
 - Tap Save.
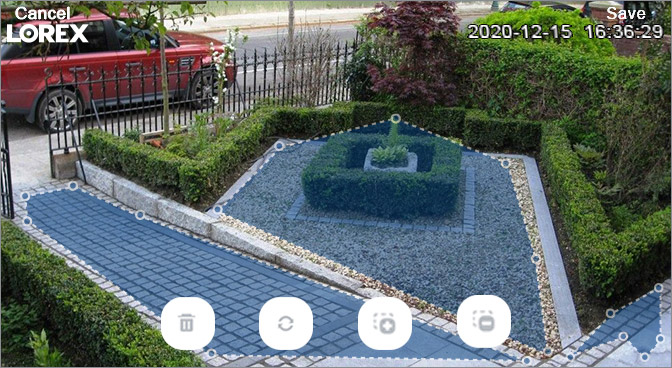
Reminder: Motion detection will be disabled for areas of the image without the blue overlay. Disabling motion detection in certain areas of the image is an effective way to eliminate unwanted recordings and notifications caused by contact movement like trees blowing in the wind or regular traffic.
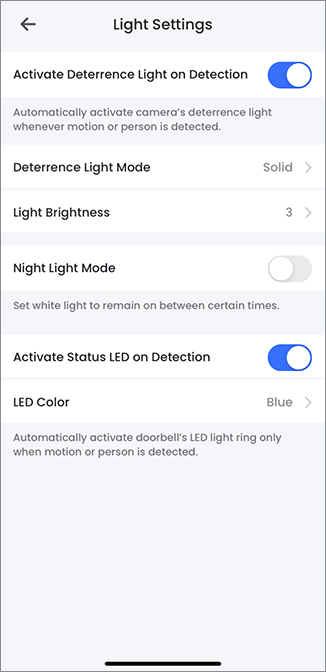
Activate Deterrence Light on Detection
Enabling the Active Deterrence Light on Detection will reveal more options for customization, such as the Deterrence Light Mode, adjusting the Active Deterrence light brightness level, using the Night Light Mode function for your door, or customizing the status indicator LED colors when motion is detected.
To enable Active Deterrence Light on Detection:
- Launch the Lorex App.
- Tap the icon above the channel thumbnail on the Devices screen.
- Tap Motion Detection Settings then Light Settings.
- Tap the
 icon to enable Activate Deterrence Light on Detection.
 - Once enabled you can configure these settings:
- Deterrence Light Mode: Set the type of light that's activated when motion is detected.
- Light Brightness: Set the brightness from 1 (minimum) to 4 (maximum).
- Night Light Mode: Set the night light to remain on between certain times. By default the night light is scheduled from 12 am-5 am and 5 pm-12 am.
- Edit Schedule (Night Light Mode must be enabled): Edit or create a schedule for the night light.
- Activate Status LED on Detection: Enable the status indicator light to turn ON when motion is detected.
- LED Color: Choose a color for the status indicator when motion is detected.