Lorex Support
How can we help?
Browse by product
Looking for a specific product? Use the search bar below.
All Lorex cameras and recorders have a model number, serial number and country of origin. Your device model or serial number are needed for specific product support, updating the correct firmware for your device, warranty claim, and warranty registration.
Recorders
Where do I find the serial number and model number?
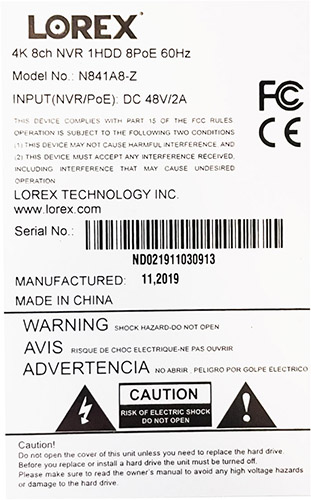
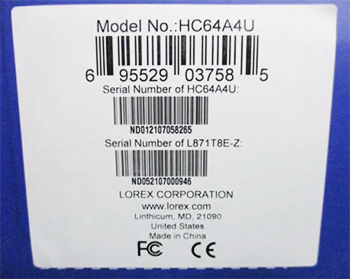
The serial number and model number of your recorder are generally found together on the rating label on the top or bottom of the device. See below for an example of the rating label sticker:
If the serial number or model number cannot be found on the bottom of the recorder, you may be able to access them on the recorder's System Information screen.
Where do I find the country of origin?
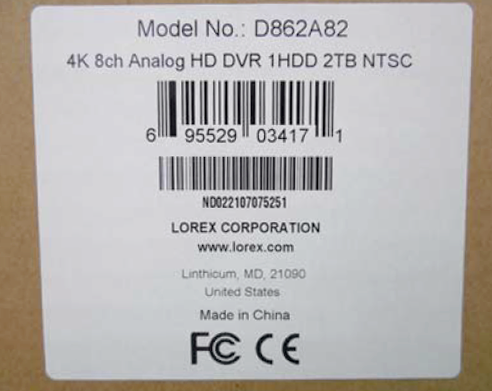
You can find the country of origin on the rating label on the recorder and on the packaging sticker on the side or bottom of the device packaging. See below for an example of the packaging sticker:
Cameras
Where do I find the serial number and model number?
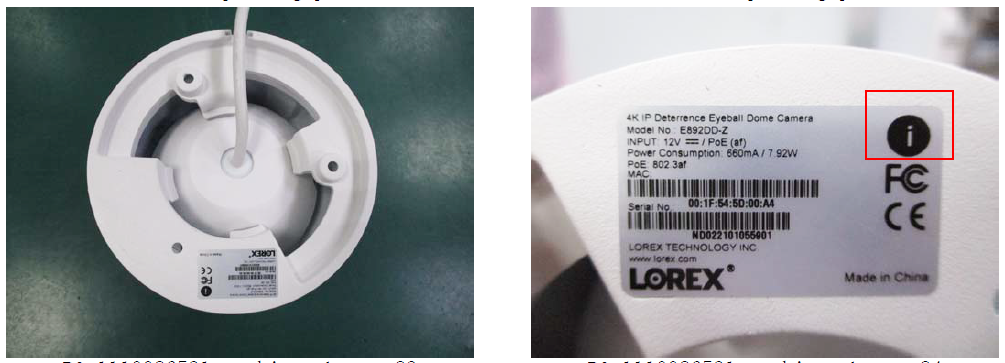
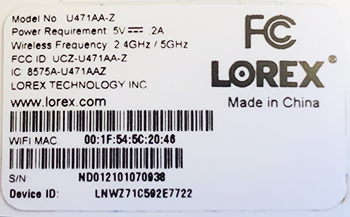
The serial number and model number of the camera are found together on a rating label attached to the bottom or side of the device. See below for an example of the rating label sticker:
Where do I find the country of origin?
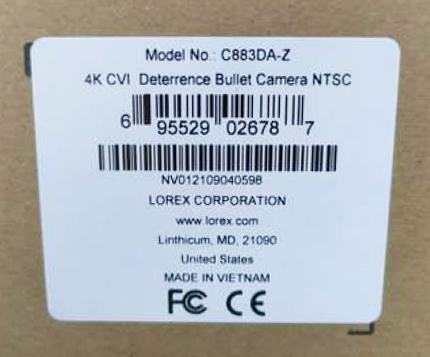
You can find the country of origin on the rating label and on the packaging sticker on the side of the device packaging. See below for an example of the packaging sticker:
IoT Devices
Where do I find the serial number and model number?
The serial number and model number are found together on the rating label attached to the bottom or side of the device. See below for an example of the rating label sticker:
Where do I find the country of origin?
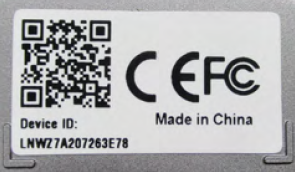
You can find the country of origin on the rating label, the QR code sticker on the device and on the packaging sticker on the side of the device packaging. See below for an example of the QR code sticker:
See below for an example of the packaging sticker:


Most popular articles
Wi-Fi Security Cameras - How to Troubleshoot Offline Status
Lorex Software & Mobile App Downloads
N910 Series - 4K+ Ultra HD 12MP 16 Camera Capable NVR
How to Reset Your Password
Lorex App - How to Change or Reset Your Recorder's Password
N864 Series - Lorex Fusion 4K 16ch Wired NVR System
DVR / NVR - How to manually upgrade the firmware of your recorder
N884 Series - Lorex 4K Pro Series Network Video Recorder
B451AJ Series - 2K Wired Video Doorbell
D881 Series - 4K Fusion Wired DVR System