LHB Series: Installing your Wire-Free cameras
Your LHB Series DVR comes with included Wire-Free cameras that can be installed in the location of your choice.
Prerequisites:
- Ensure that you have set up your Wire-Free camera and receiver.
- Ensure that you have connected your DVR to your wireless receiver.
- Ensure that you have removed the power pack from each Wire-Free camera.
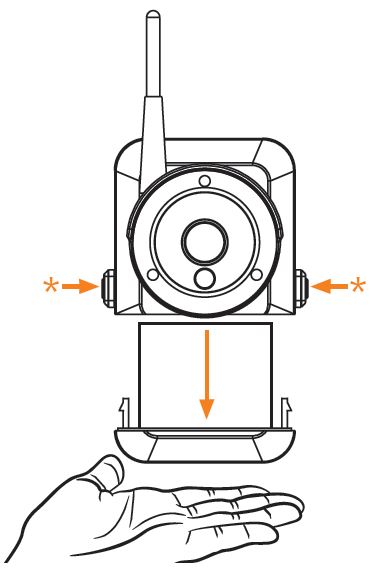
To remove the power pack:
Press both release buttons and pull down on the power pack.
IMPORTANT: Place your hand under the power pack to prevent it from falling.
Installation Tips
The Wire-Free cameras use a passive infrared (PIR) motion sensor to ensure video is only recorded when motion is detected. Follow the tips below for more accurate motion detection and to optimize battery life:
-
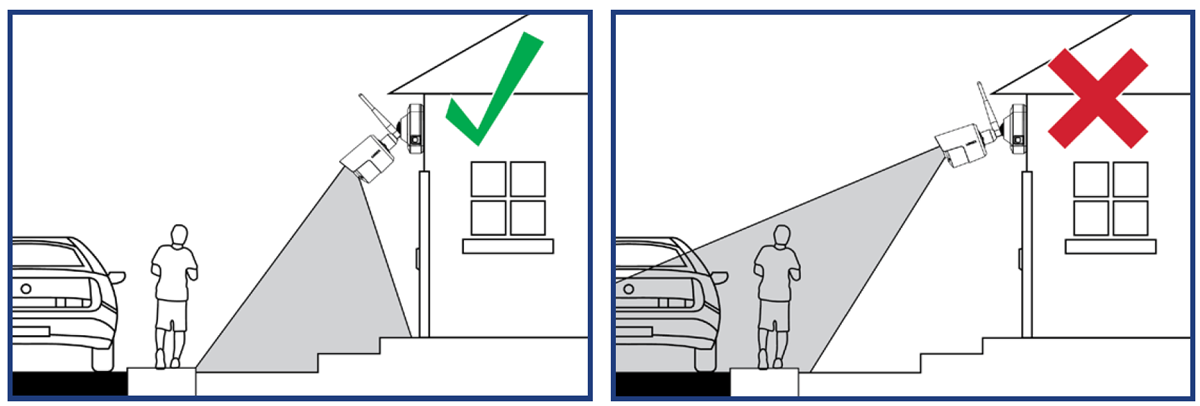
It is recommended to place your camera at least 7ft (2.1m) above the ground and angle it slightly downward toward the monitoring area, excluding any busy areas (e.g., sidewalks or roadways).
-
Ensure the camera image is free of obstructions (i.e., tree branches).
-
Position the camera no more than 20ft (6.1m) away from the area you wish to monitor.
-
For best performance, position the camera so that objects of interest will move from side-to-side across the camera image, rather than moving towards or away from the camera.
-
Install the camera within range of the wireless receiver. Refer to your product specification sheet for details. Click here for downloads and documentation for your product.
-
This camera is weather resistant for outdoor use (IP65 rated). Installation in a sheltered location is recommended.
-
Battery life will vary based on temperature, settings and number of events
To install your Wire-Free cameras:
-
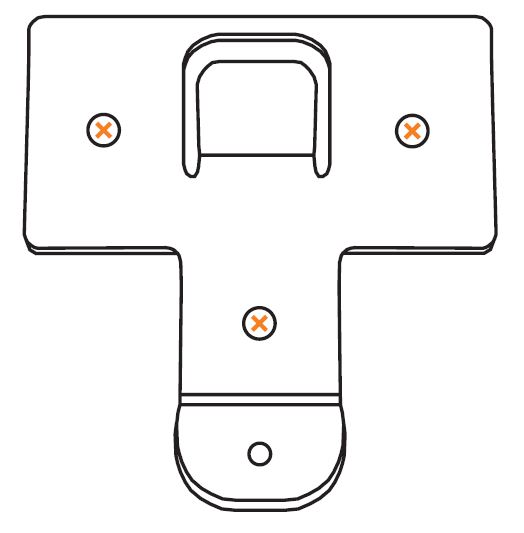
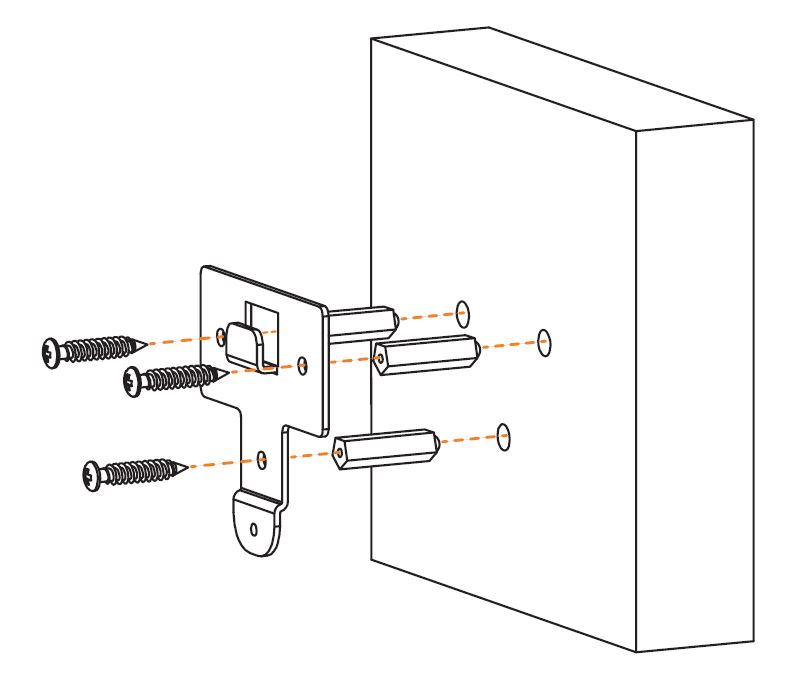
Set the mounting bracket in the desired mounting position. Mark holes through the mounting bracket (shown as orange X’s below).
-
Using the marks from step 1, drill holes into the mounting location.
-
Insert the included mounting screws (x3) into the 3 holes closest to the top of the mounting bracket.
REMINDER: Insert the included drywall anchors if you are mounting the camera onto drywall.
-
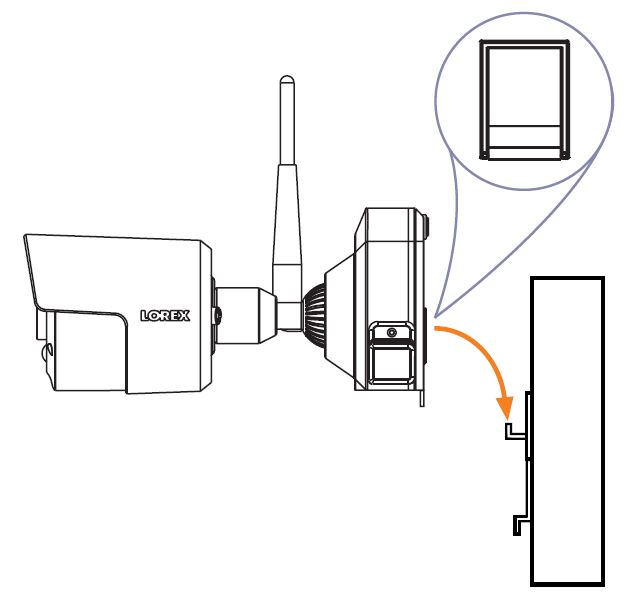
Lower the camera base onto the mounting bracket so the tab in the mounting bracket locks into the slot on the camera base.
-
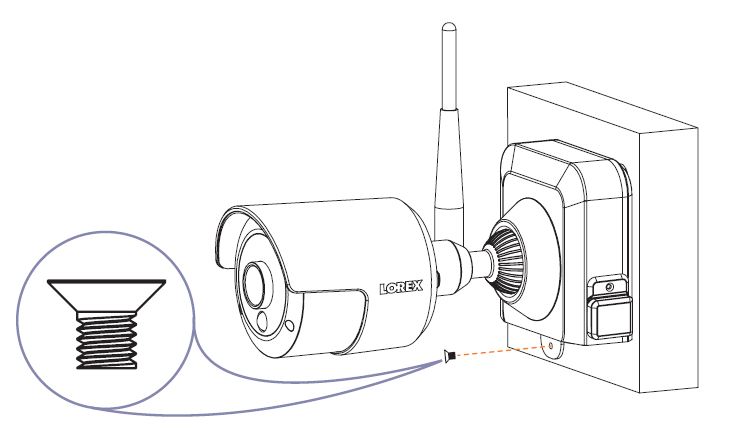
Insert the security screw through the fastener on the camera base to secure the camera to the mounting bracket. Tighten using the included Allen key.
-
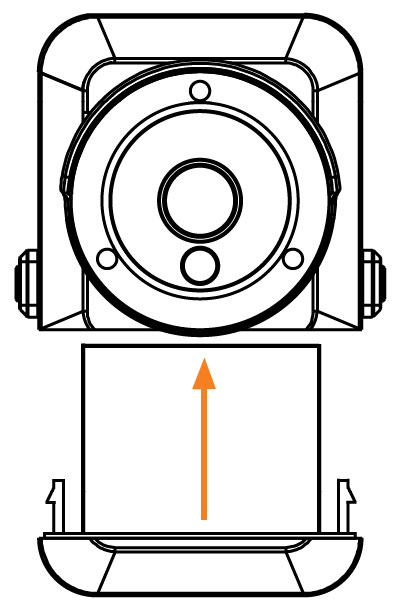
Insert the included power pack into the bottom of the camera base. Push up until the power pack clicks into place.
-
(OPTIONAL) Lift up the rubber seal on the right-side release button. Insert the locking screw and tighten using the included Allen key to secure the power pack in place.
REMINDER: You will need to loosen the locking screw to remove the power pack in the future.
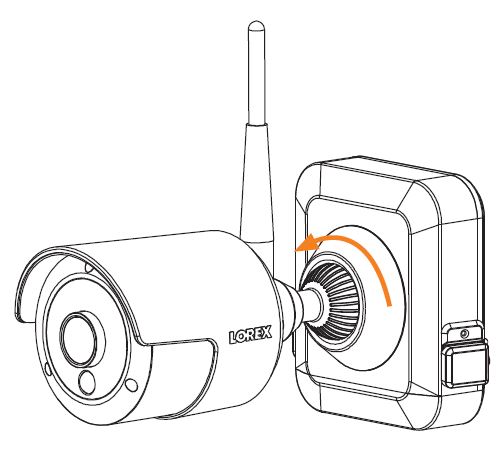
-
Twist the adjustment ring near the camera base counterclockwise to loosen and reposition the camera. Hold the camera in the desired angle and tighten the adjustment ring completely to secure the camera in place.