V261LCD Series - 1080p Wired Floodlight Camera: Lorex App Setup
To remotely access your floodlight camera, you have to connect the camera to the Lorex App.
Scan the QR code
Step 1. Download and install the free Lorex App from the App Store or Google Play Store.
Step 2. Tap the Lorex App icon to launch the app. Tap Sign up, then follow the on screen prompts to create an account. Record your account details below and store in a secure location (:
Email: Account Password:
Step 3. Wait for the floodlight to start up. This may take up to 5 minutes after reconnecting power at the breaker.
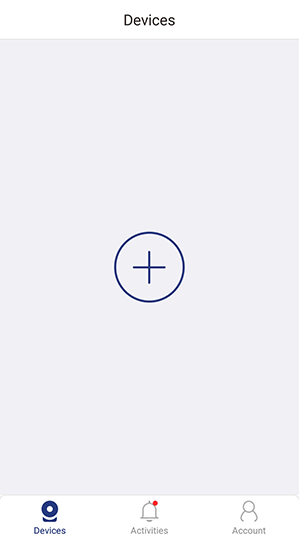
Step 4. Once the status LED on the floodlight is flashing green, tap + in the Lorex App.
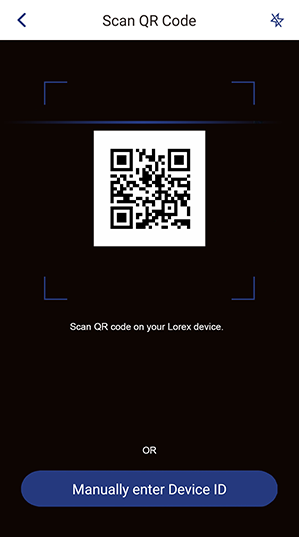
Step 5. Scan the QR code on the side of the floodlight camera using your mobile device’s camera.
NOTE: If your mobile device cannot scan the QR code, tap Manually enter Device ID.
Link the floodlight
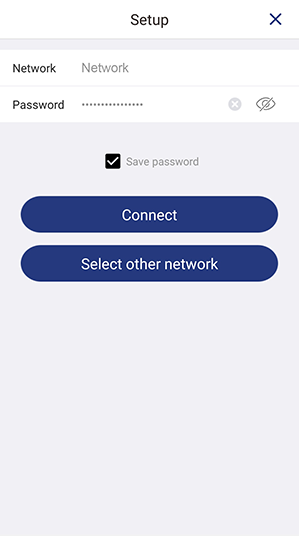
Step 1. Once the status LED on the floodlight is flashing green, tap Next in the Lorex App. The app will connect your mobile device to the floodlight’s hotspot.
Step 2. Create a secure password for the floodlight. Record your floodlight password below and store in a secure location:
Floodlight Password:
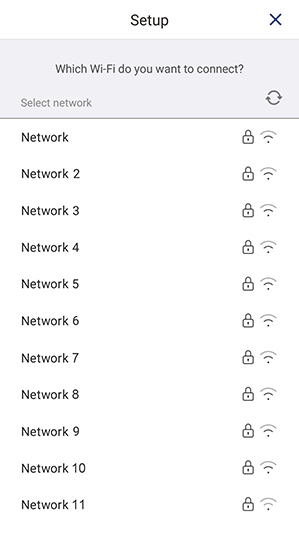
Step 3. Select your Wi-Fi network from the list, then enter the Wi-Fi password to connect your floodlight to the Internet.
NOTE: If the Wi-Fi connection is weak, try moving your router closer or adding a Wi-Fi extender.
Step 4. Once the status LED on the floodlight is solid green, tap Next to add the floodlight to your Lorex App account.
Step 5. Set a name for the floodlight and configure date & time preferences, then tap Complete.
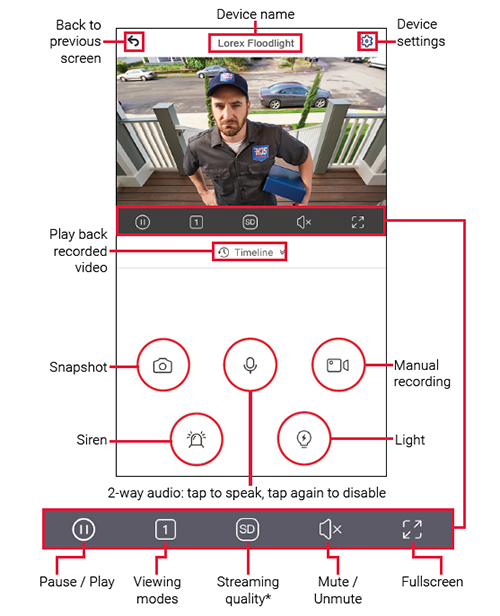
Live viewing screen
Configure motion detection
Step 1. Tap Device Settings.
Step 2. Tap Floodlight Settings.
Step 3. Mode is set to Motion Activation by default. Tap to change the floodlights from being activated by motion detection to Manual. Manually turn the floodlights on and off in the live screen view.
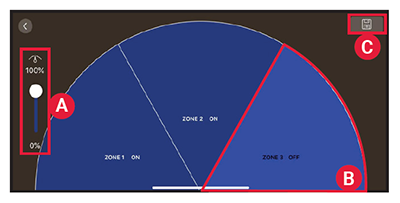
Step 4. Tap PIR Area.
- A. Slide the bar on the left to adjust the distance at which motion will activate your floodlights.
- B. Tap the Zone(s) on or off to activate motion detection from three different areas.
- C. Tap Save.
Step 5. Light Duration is set to 1 minute by default.Tap to change the floodlight’s length of time when activated from motion detection.
Overview of the most common screens and controls in the Lorex App. For complete instructions on using the app, see the Lorex App manual on the floodlight’s product page at lorex.com.