W461ASC - 2K Indoor Wi-Fi Security Camera : Getting Started
This article provides detailed instructions to setup your Lorex 2K Indoor Wi-Fi Security Camera (W461ASC) with the Lorex App.
To setup your camera
Note: Ensure you update to the latest app and camera firmware version.
-
Attach the provided power adapter to the camera. The device is ready for setup as soon as the status indicator is flashing green and chimes.
Note: Ensure your camera is plugged in and powered ON throughout the setup.
Optional: Attach the weatherproof extension cable to the camera. -
Download the Lorex App by scanning the following QR Code. You can also visit Google Play or Apple Store to download Lorex App.
-
Open the Lorex App.
-
Create an account or login with your credentials.
To connect your camera with the Lorex App
- Launch the Lorex App.
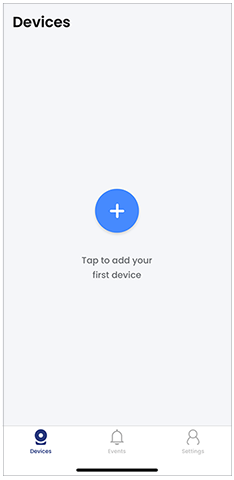 2. In the Devices Screen, tap
 ![]() icon to add a new device.
icon to add a new device.
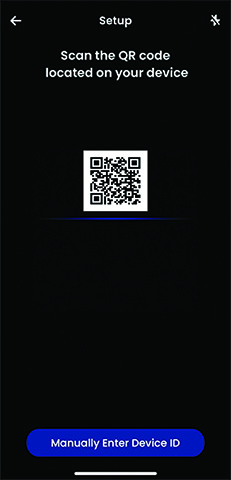
- Scan the device QR code on your Lorex Wi-Fi camera using your mobile device.
Note: If your mobile device cannot scan the QR code, tap Manually Enter Device ID. Ensure you hear the camera startup chime and the camera LED is flashing green.
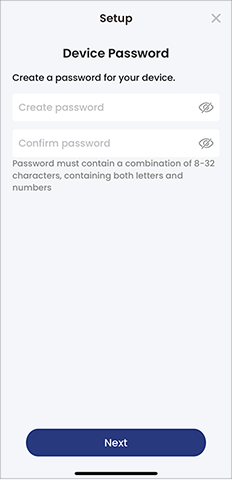
- Create a secure password for your Lorex HD Wi-Fi camera.
-
Choose your Wi-Fi network from the list of available networks and enter the Wi-Fi password.
-
Wait until the camera chimes and the LED turns solid green, then tap Next.
-
Create a name for your Lorex device by selecting from a list of pre-defined names OR enter a custom name in the text box.
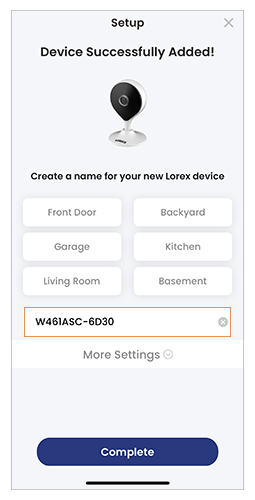
-
Click Complete.
Your Lorex 2K Indoor Wi-Fi Security Camera is now successfully connected with the Lorex App application!