The following article provides instructions for adjusting your Lorex Fusion Collection settings.
Turn off duplicate notifications
After completing the Fusion setup, your Wi-Fi camera or accessory is connected to the Lorex App twice - once as a single device and then a second time as a device connected to your recorder. To avoid receiving duplicate notifications from the same camera or accessory, you will need to Turn off Alerts for your Wi-Fi device connected to your recorder.
To turn off duplicate notifications:
- Open the Lorex App.

Under your Fusion recorder, swipe left to find your Fusion Wi-Fi camera or accessory.
Tap on your Fusion Wi-Fi device’s notification icon
 .
.
 .
.
- Tap on Turn off Alerts, and then Save.
Adjust the recording settings for your Fusion Wi-Fi camera or accessory
After Fusion setup, your Lorex Fusion Wi-Fi camera’s recording settings will automatically adjust to Continuous, recording 24/7 directly to your recorder’s hard disk drive.
To adjust the recording settings (new local UI):
- From the Live View display, right-click to open the Quick Menu, then click Main Menu.
- Click Devices, then Record Settings. Click the Record Settings tab from the side panel.
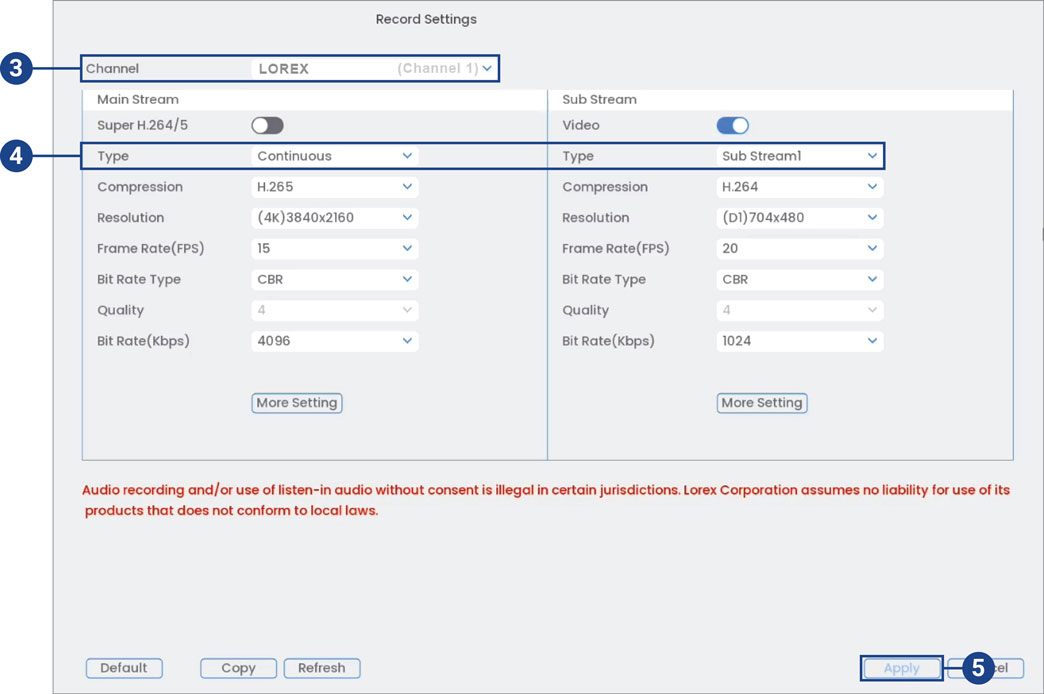
- Under Channel, select your Wi-Fi device.
- Under Type, select the recording type.
- Continuous: The video will record automatically according to the time on the schedule.
- MD (Motion Detection): The video will record when motion is detected.
- Click Apply.
To adjust the recording settings using the previous local UI, navigate to Main Menu > CAMERA > Recording > Recording and follow the same steps as above.
Set the recording schedule for your Fusion Wi-Fi camera or accessory
You can set a custom recording schedule according to your needs. For example, you can set the system to record continuously during business hours and record on motion detection only outside of business hours.
- From the Live View display, right-click to open the Quick Menu, then click Main Menu.
- Click System, then Storage. Click the Schedule tab from the side panel.
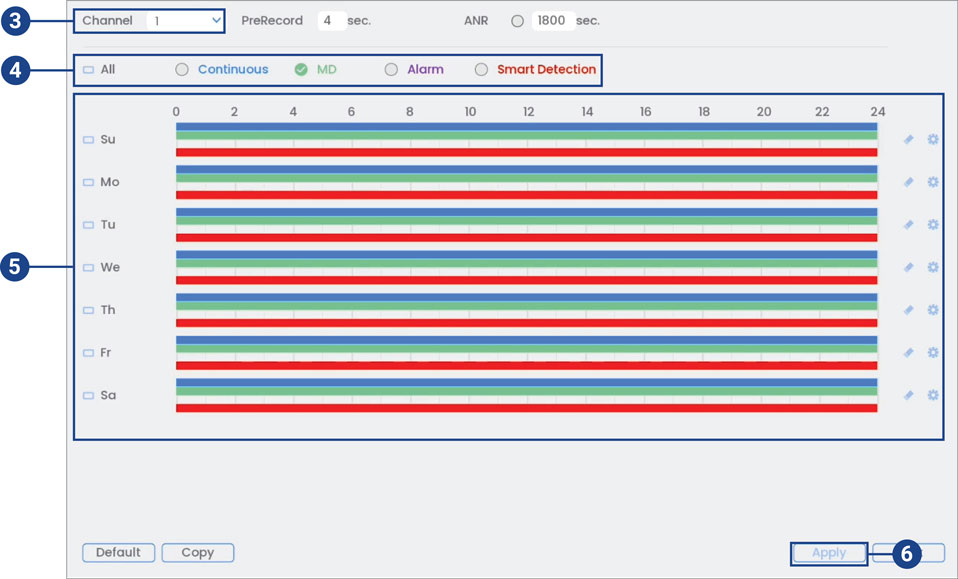
- Under Channel, select your Wi-Fi device.
- Check the recording type you would like to adjust, or check All.
- Adjust the recording schedule as needed:
- Click-and-drag on each day to customize the recording schedule. The schedule is set up as a grid, with each block representing two hours.
- Click
 beside 2 or more days to link schedules (
 ). This allows you to quickly change multiple schedules at once.
 - To make fine adjustments to a schedule, click
 . This will allow you to set exact start and end times for a schedule.
 - To disable all recording of the selected type on the selected day, click
 .
.
- Click Apply.
To set the recording schedule using the previous local UI, navigate to Main Menu > STORAGE > Schedule and follow the same steps as above.
Link sensors to cameras
Once you've completed the Fusion setup, you can link motion and door/window sensors to any compatible camera, so that when the sensors are triggered the linked automatically cameras record.
- Open the Lorex App.

- Tap on the Sensor Hub's connected sensor's
 icon.
icon.

- Tap on the sensor that you want to link.

- Tap on Link Camera.

- Tap on the camera that you want to link.
- Tap Save.
To learn more about using your Lorex Fusion system, visit the Fusion page or refer to the Lorex Fusion: Frequently Asked Questions article.
Was this article helpful?
That’s Great!
Thank you for your feedback
Sorry! We couldn't be helpful
Thank you for your feedback
Feedback sent
We appreciate your effort and will try to fix the article