LNR200 / LNR300 Series: Setting up recording schedules
You can set a custom recording schedule on your LNR200 / LNR300 Series NVR. Use the recording schedule to configure when cameras will use continuous or motion detection recording. A custom recording schedule helps reduce the amount of hard disk drive (HDD) space required, increasing the time your system can retain recordings.
To configure the recording schedule:
-
Right-click on the Live View, and then click Menu.
-
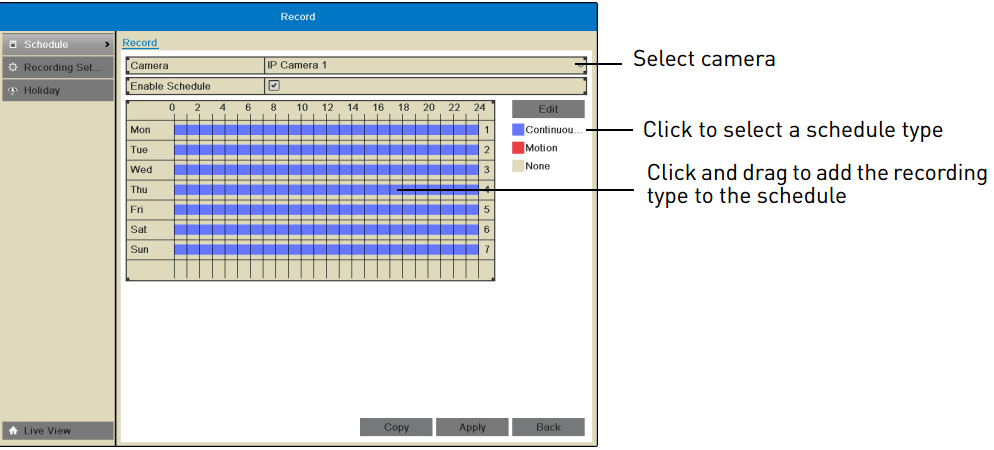
Click Record and then click Schedule to open the Record tab.
-
In the Camera drop-down, select the camera you want to configure.
-
Check the Enable Schedule checkbox.
-
Under Edit on the right-side of the screen, select the schedule type:

- Continuous & Motion: Camera will record at all times and mark motion events.
- Motion (Motion Detection Recording only): Camera will record only when motion is detected.
- None: Camera will not record.
-
Click and drag inside the schedule to apply the selected schedule type.
TIP: To copy the schedule to other cameras, click Copy. Check cameras you would like to copy the schedule to. Check / un-check IP Camera to copy the schedule to all cameras. Click OK to copy the schedule.
-
Click Apply to save changes.