L8559 Series - 4K NVR & Battery-Operated Camera System : Installation
This article provides instructions to install your 4K NVR & Battery-Operated Camera System (L8559 Series).
What's Included*?
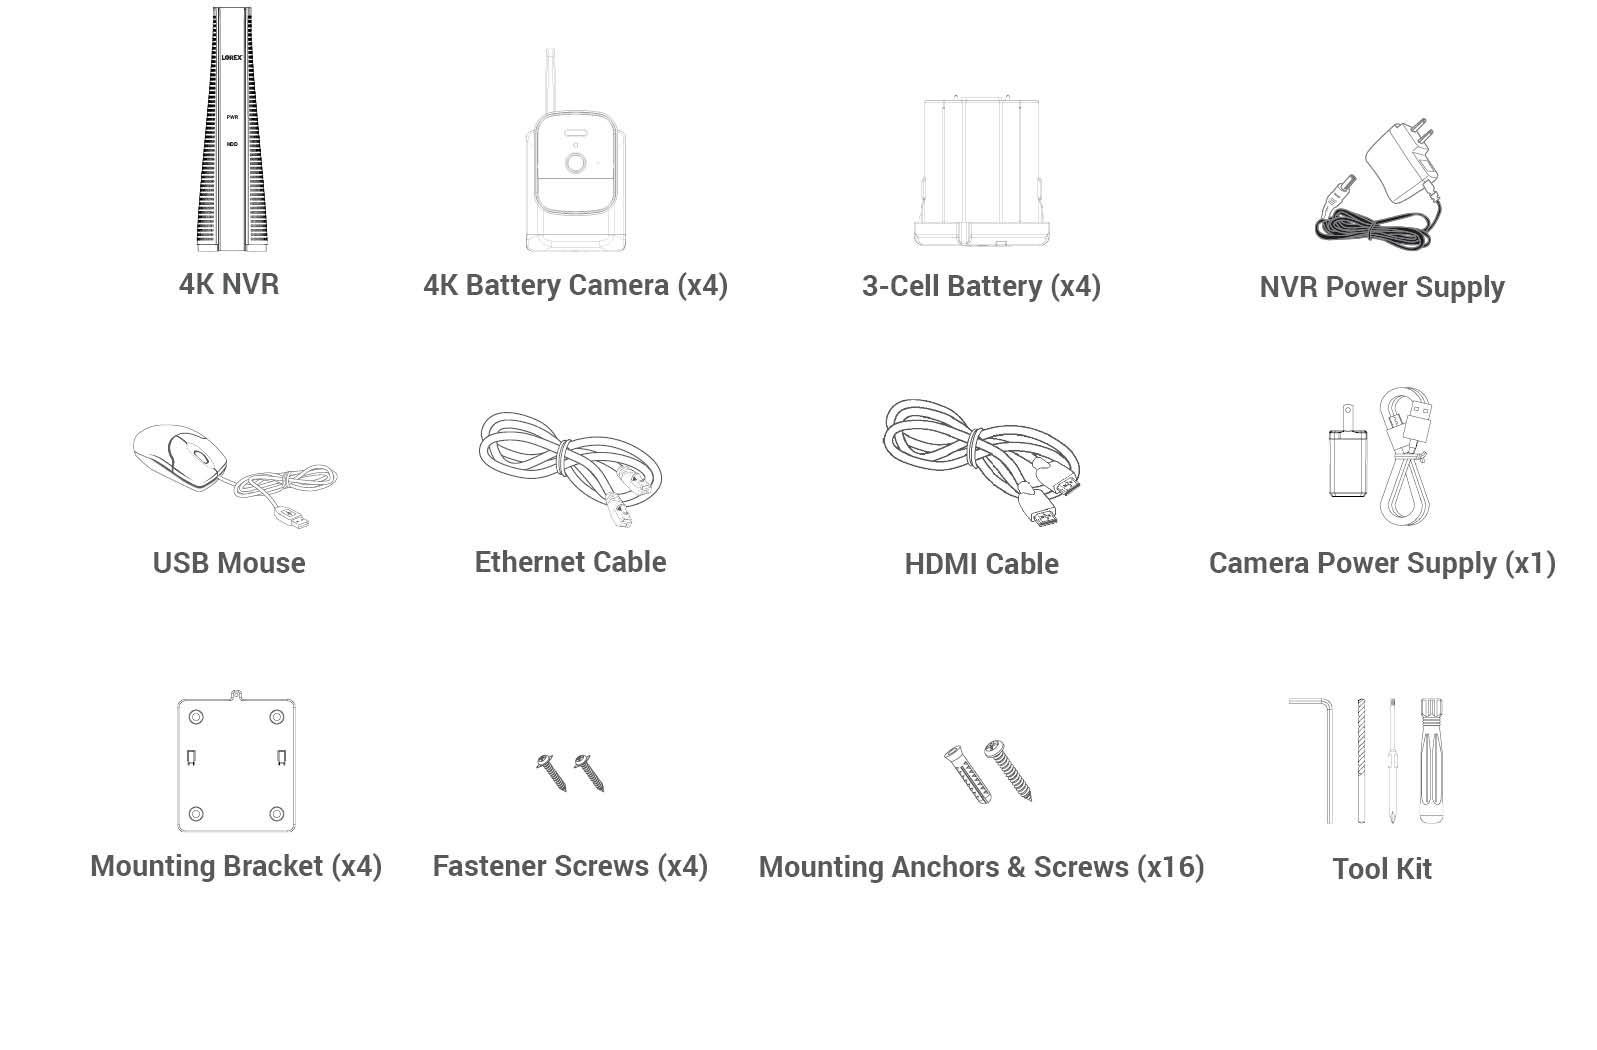
What's Included is dependent on what was purchased.
Set up
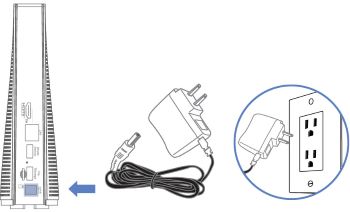
- Connect the NVR Power Supply: Connect the included NVR power supply to your recorder and a power outlet.
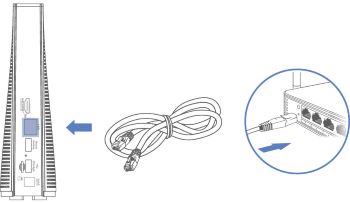
- Connect to your network: Connect your recorder to your Wi-Fi router using the included Ethernet cable.
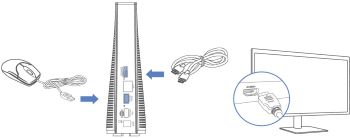
- (Optional) Connect your mouse and display:
- Connect the included USB mouse to the USB port on your recorder.
- Connect your recorder to your display using the included HDMI cable. The HDMI supports up to 4K resolution.
Download the Lorex Cirrus App
To enable remote viewing, you will need to:
- Have high-speed Internet
- Have an upload and download speed of 10Mbps (min.)
- Find your recorder's Device ID
Connect to the Lorex Cirrus app:
- Download the Lorex Cirrus app by scanning the QR code on your mobile device.
You can also visit Google Play or Apple Store to download the Lorex Cirrus app.

-
Open the Lorex Cirrus app.
-
Tap
 .
. -
Select your device from the Network list.
-
Follow the in-app instructions to complete the setup. Note:
- Make sure you are on the same network as the NVR
- If you cannot find your device on the network, scan the QR code or enter the Device ID manually, and then input the following:
- Default password: 00000000
- Media Port: 3500
- Add the cameras to the recorder through the Lorex Cirrus app or the Recorder interface:
Set up the 4K Battery-Operated Camera
- Remove the sticker from the battery cell contacts.
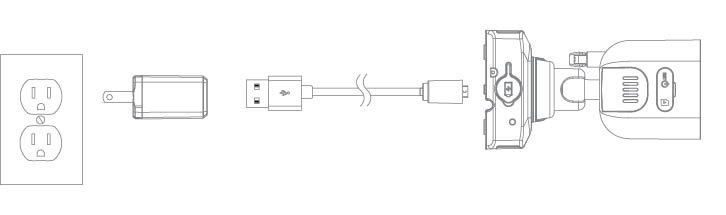
- Lift the Power Port cover, connect your camera to the included micro-USB cord and adapter, and then connect to an outlet.
- Insert the fully charged battery pack into the bottom of the camera.
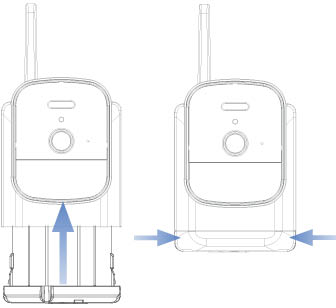
Note: You will hear a ‘beep’ when the power pack is properly inserted. If you do not hear this alert, remove the power pack by pushing in on the battery release tabs, then re-insert.
Camera Charging
![]() The camera battery comes partially charged (due to safety regulations). Please, fully charge the battery before use and setup to take full advantage of the Wire-Free camera. You can charge the battery pack inside or outside of the camera.
The camera battery comes partially charged (due to safety regulations). Please, fully charge the battery before use and setup to take full advantage of the Wire-Free camera. You can charge the battery pack inside or outside of the camera.
- Remove the sticker from the battery cell contacts.
- Lift the Power Port cover, connect your camera to a micro-USB cord and adapter, and then connect to an outlet.
- You can also remove the battery from the camera by squeezing the release tabs and charge it outside of the camera housing.
- Insert the fully charged battery into the bottom of the camera.
Note: You will hear a ‘click’ when the battery is properly inserted. If you do not here a click, remove the battery, and then re-insert.
Camera Battery Charging Indicator

Battery Duration
- 3-cell : up to 600 events
Camera Pairing
- If you do not see your cameras on the NVR display or are adding additional cameras, press and hold the pairing button until the red LED lights stop flashing, then release the pairing button.
- From the NVR display or the Lorex Cirrus app, tap any free channel marked with a
 (display) or
  (app).
 - Tap Pair.
Note:
- In the app, the message ‘Pairing success!’ will appear. If you do not see this message, repeat steps 1-3.
- On the NVR, you will have 30 seconds to pair the camera after you press and hold the pairing button on the back of the camera.
Camera Mounting

- Set the mounting bracket in the desired mounting position.
- Mark holes through the Mounting Bracket.
- Using the included drill bit, drill holes where marked.
- Using the included screwdriver, secure the Bracket with the provided Mounting Screws. Optional: If you are mounting the camera into drywall, use the provided drywall anchors.
- Align the camera’s Mounting Plate Slots to the tabs in the Mounting Bracket. Push in and slide down to secure in place.
- Insert the Fastener Screw through the Fastener on the top of the camera and Mounting Bracket, then tighten with the screwdriver.
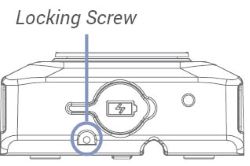
- Tighten the pre-installed Locking Screw using the screwdriver.
Note: To remove the camera battery in the future, loosen the locking screw.
- Turn the adjustment ring counter-clockwise to loosen and reposition the camera. Turn the adjustment ring clockwise to secure the desired position.