LNC Cameras: Setting up NAS recording
LNC Series cameras support the use of a network-attached storage (NAS) device (not included) to increase storage capacity.
Prerequisites:
- Download and install the L-View Client software. Click here for more information on locating software downloads.
- Connect the NAS device to the same network as the camera and power the NAS device.
- Have your NAS device username, password, and IP address ready. Refer to your NAS user manual for username, password, and IP address information.
- Create an available public folder in the main or root folder of your NAS device for recorded videos to be stored.
REMINDER: Refer to your LNC camera user manual for details on how to access NAS settings through the L-View Client software. Click here for downloads and documentation for your product.
If you have verified the above prerequisites, you are ready to set up your NAS as a storage device for your LNC camera recordings.
To set up NAS recordings:
-
Launch the L-View Client software.
-
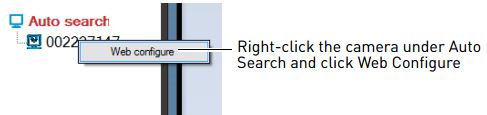
Right-click on the camera ID under Auto search and click Web Configure.
-
Enter the camera administrator login information. Refer to your user manual for your default username and password. Click Log in to open the Web Configure window in your web browser.
-
Click Schedule > NAS Settings and configure your NAS recording settings:
- Always Recording: Camera will continuously record to the NAS device.
- Schedule Recording: Camera will record to the NAS device at scheduled times.
- Disable Recording: Camera will not record to the NAS device.
- Keep Recorded Video for __ Days: The NAS device will overwrite video after a selected number of days. Oldest recorded videos will be deleted automatically.
- If free disk less than __ GB: Recorded videos will be saved until a certain storage limit is reached. Select Overwrite to allow the NAS device to overwrite the oldest recorded videos when available space is full or Stop recording to stop recording once available space is full.
-
Configure your NAS access settings:
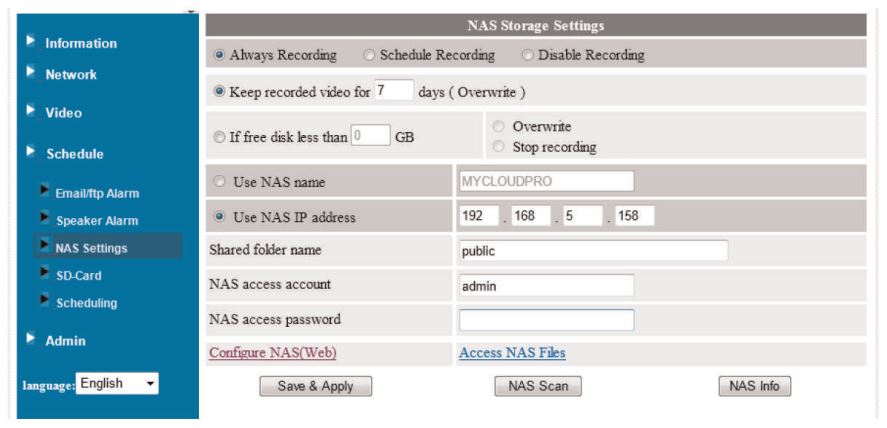
- NAS IP Address: Enter the IP address of the NAS device.
- Shared Folder Name: Enter the name of the folder in the main, or root, which was previously created (in lower case letters and without slashes).
- NAS Access Account: Enter the administrator username of the NAS device.
- NAS Access Password: Enter the administrator password of the NAS device.
-
Click Save & Apply.
You can also use L-View Client software to play back recorded videos from your NAS device.
To play back recorded videos from your NAS device:
-
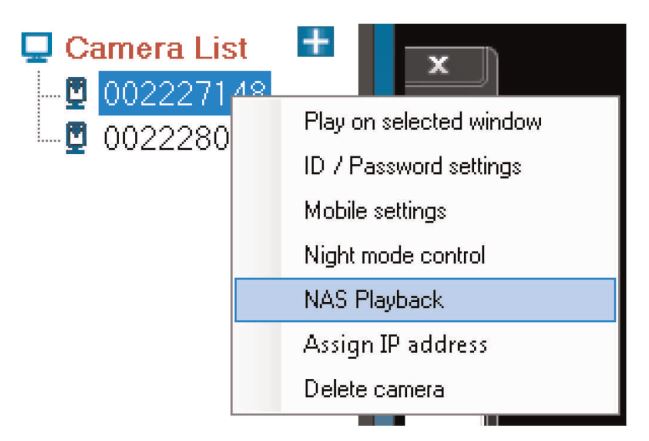
In the Camera List, right-click a camera ID and select NAS Playback.
-
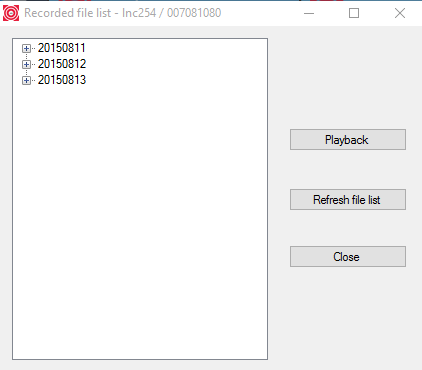
Locate the date to view playback from and click the + button. Select a video file from the list.
-
Click Playback to view the selected video, it will play in the camera display area.
REMINDER: Wait for the recording to finish, right-click and select Play to return to Live View. If playback is still playing, right-click and select Stop, then right-click and select Play.