PTZ Cameras: Video feed not displaying
If the video feed of a channel using a Pan-Tilt-Zoom (PTZ) camera is not visible, there may be an issue with the camera or its connection. Ensure that the Ethernet cable length does not exceed the guideline set in your product specifications sheet. Image quality will degrade if the maximum recommended cable length is exceeded. Click here for downloads and documentation for your product.
IMPORTANT: For best picture quality, ensure the camera dome cover is clean. Clean with a soft, slightly damp cloth. Do not use anything other than water to clean the dome cover, chemicals such as acetone can permanently damage the plastic.
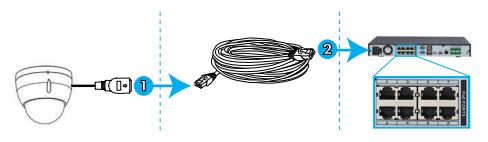
If your camera is connected directly to an NVR using an Ethernet cable:
The camera may take up to 2 minutes to display after initially connected.
- If after 2 minutes the video feed does not display, disconnect the camera from the NVR, wait for 30 seconds, and reconnect.
- If the video feed is still not visible, there may be an issue with the Ethernet cable. Try connecting using a different, functional Ethernet cable. If available, use an Ethernet cable that is connected to a functioning camera.
If the video feed is still not visible, restore the camera to default settings.
To restore the camera to default settings:
-
Ensure that the camera is connected to the NVR via an Ethernet cable and is receiving power.
-
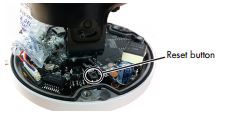
Use the Allen key included with the camera mounting kit to loosen the dome camera cover screws. Remove the dome camera cover.
-
Press and hold the reset button below the camera module for at least 10 seconds.
-
While still holding the reset button, disconnect and reconnect the Ethernet cable. Hold the button for 15 seconds before releasing.
LIMITATION: Not all PTZ cameras have a manual reset option. View your PTZ camera user manual for further information if this is available on your model. Click here for downloads and documentation for your product.
If your camera is connected to the NVR using a router or PoE switch:
The following instructions require you to access your system using your NVR and a monitor.
-
Right-click on the Live View to access the Quick Menu.
-
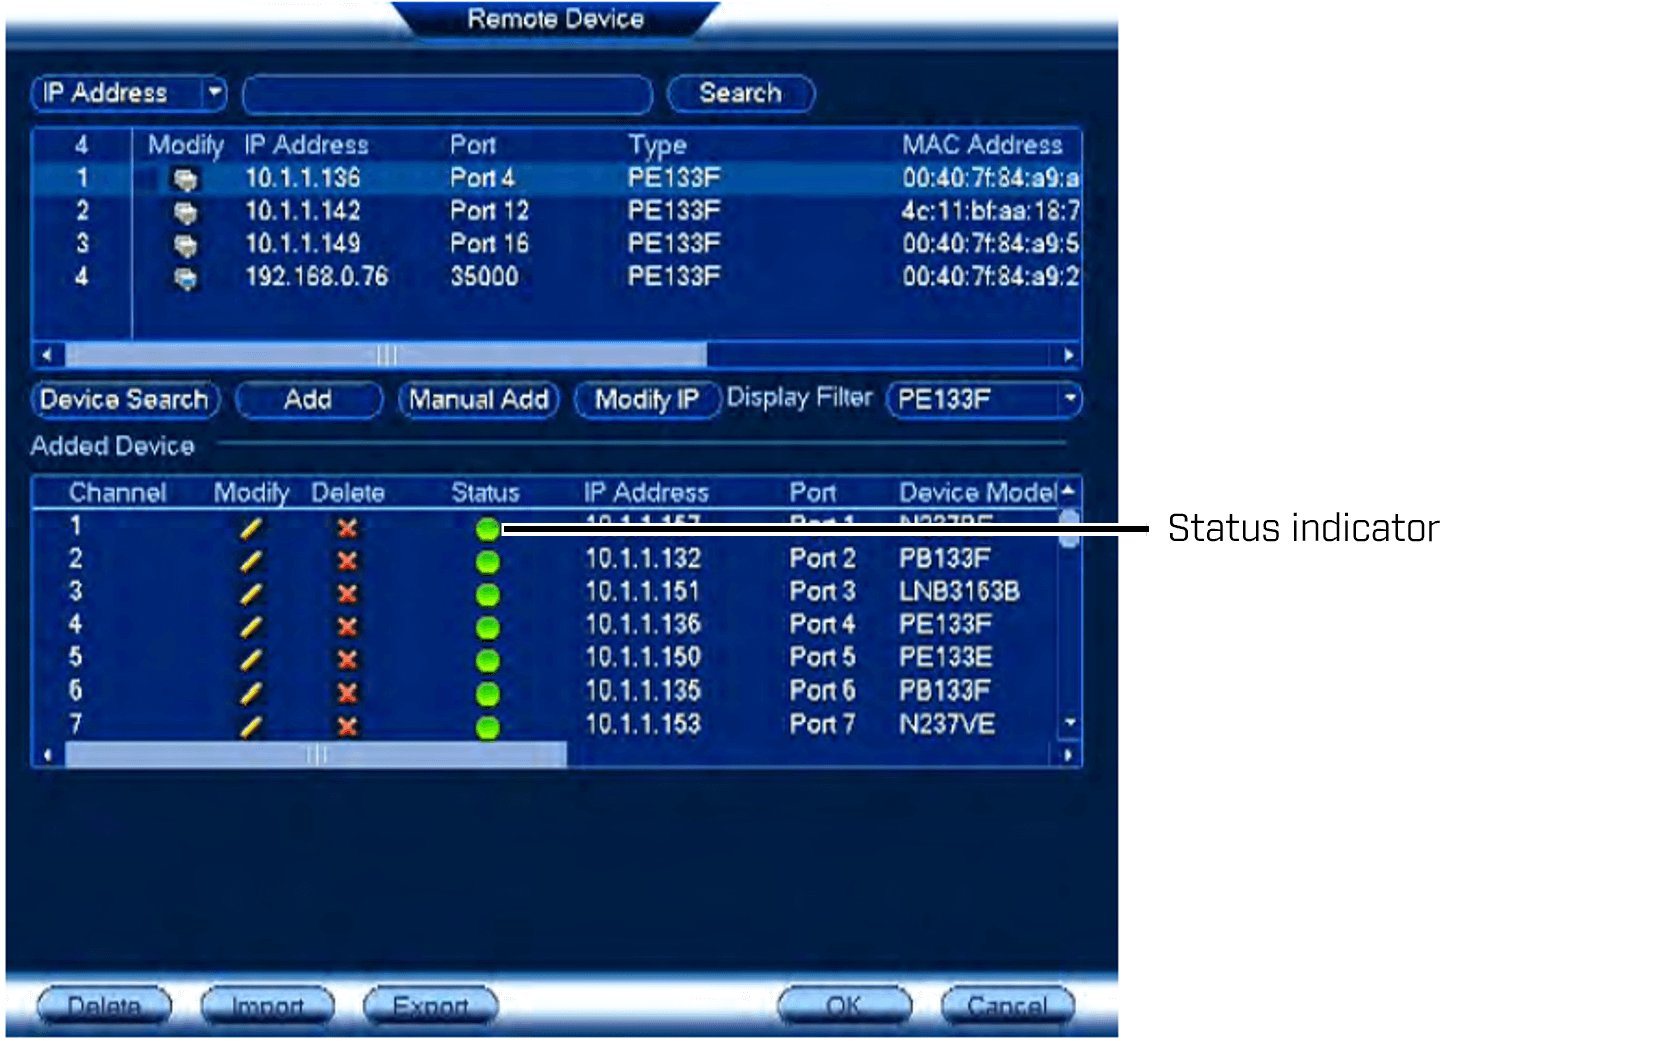
Click Device Search.
-
Log in using your administrator login information. Refer to your user manual for your default Username and Password.
-
Click Device Search. The system will search the network for compatible cameras. This may take several seconds depending on the network strength.
-
Select the camera you would like to add. If the camera does not show up in the search results, disconnect the camera. Wait 30 seconds, reconnect and search again.
REMINDER: The camera may take up to 2 minutes to display after initially connected.
-
Click Add, the status indicator will turn green if the camera is successfully connected.
-
Click OK to save changes.
After approximately 2 minutes the camera video feed will display.
If the camera connects but the status indicator does not turn green, restore the camera to default settings.
To restore the camera to default settings:
-
Ensure that the camera is connected to the NVR via an Ethernet cable.
-
Make sure the camera is receiving power.
-
Use the Allen key included with the camera mounting kit to loosen the dome camera cover screws. Remove the dome camera cover.
-
Press and hold the reset button below the camera module for at least 10 seconds.
-
While still holding the reset button, disconnect and reconnect the Ethernet cable. Hold the button for 15 seconds before releasing.
LIMITATION: Not all PTZ cameras have a manual reset option. View your PTZ camera user manual for further information if this is available on your model. Click here for downloads and documentation for your product.