LNK Series: Setting up your NVR
You can set up your LNK Series NVR to be used with a monitor (not included) and wired mouse (included).
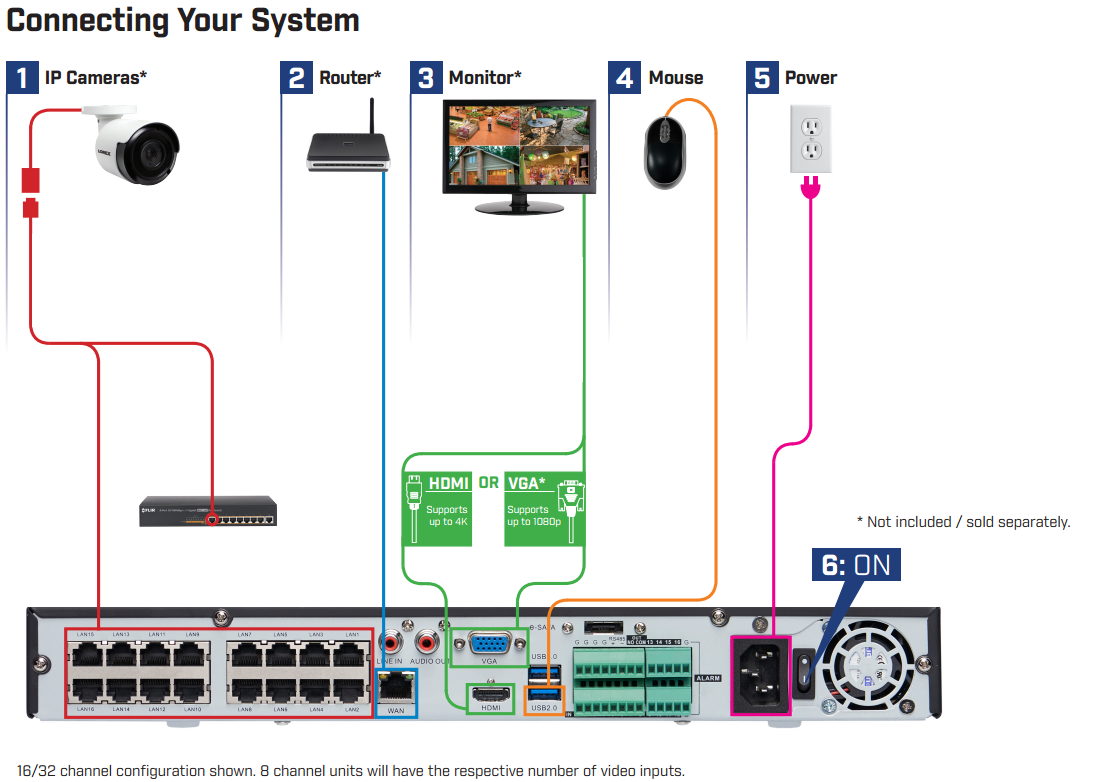
To set up your LNK Series NVR:
-
Connect your IP Cameras (not included) using an Ethernet cable to either directly to the NVR (recommended) or Power over Ethernet (PoE) switch.
REMINDER: It may take up to 1 minute for cameras to start transmitting video to your NVR.
-
Connect your Router (not included) to the Ethernet port on your NVR.
-
Connect a monitor (not included) to your NVR. You can either use an HDMI cable (included) or a VGA cable (not included).
REMINDER: Your NVR is set to 720p output by default. To optimize picture quality, set the NVRs video output to match the resolution of your monitor. Refer to your monitor user manual for details on optimal resolution.
-
Connect the wired mouse (included) to the USB 2.0 port on your NVR.
-
Connect the power cable (included) to the power port on your NVR.
-
Switch the NVR on.
IMPORTANT: This system features automatic firmware upgrades for enhanced functionality. It is required to upgrade your system to the latest firmware version. If a firmware upgrade is available, a notification will appear asking you to upgrade the firmware. Click OK to upgrade. The system will download and install the firmware upgrade. Wait for the firmware update to complete. The system may restart during the firmware upgrade process. DO NOT power off or disconnect the power cable during firmware installation.
Once you have set up your LNK Series NVR, you can also connect to and view it using the Lorex Secure / FLIR Secure app. Click here for information on how to connect to your NVR using the Lorex Secure / FLIR Secure app.