Wi-Fi Security Camera - Getting Started
This article applies to the following products: W281AA, W282CA, W261AS, W482CAD, W261AQ, and LNWDB1.
Wi-Fi Security Camera – Setup
Follow these steps to setup your Wi-Fi camera.
Note: Ensure you update to the latest app and camera firmware version.
To setup your camera
-
Attach the provided power adapter to the camera. The device is ready for setup as soon as the status indicator is flashing green and chimes.
Note: Ensure your camera is plugged in and powered ON throughout the setup.
Optional: Attach the weatherproof extension cable to the camera. -
Download the Lorex App by scanning the following QR Code. You can also visit Google Play or Apple Store to download Lorex App.
-
Open the Lorex App.
-
Create an account or login with your credentials.
Wi-Fi Security Camera – Connecting with Lorex App
Follow these steps to connect your Wi-Fi camera with the Lorex App.
To connect your camera with the Lorex App
- Launch the Lorex App.
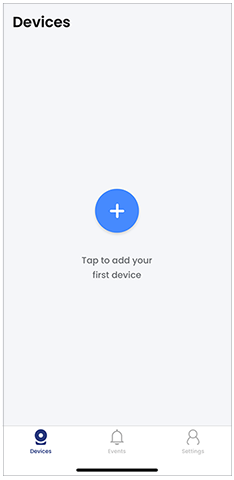 2. In the Devices Screen, tap
 ![]() icon to add a new device.
icon to add a new device.
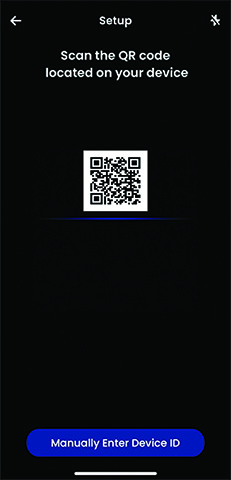
- Scan the device QR code on your Lorex Wi-Fi camera using your mobile device.
Note: If your mobile device cannot scan the QR code, tap Manually Enter Device ID. Ensure you hear the camera startup chime and the camera LED is flashing green.
 4. Allow Lorex App to establish a Wi-Fi connection directly to your camera.
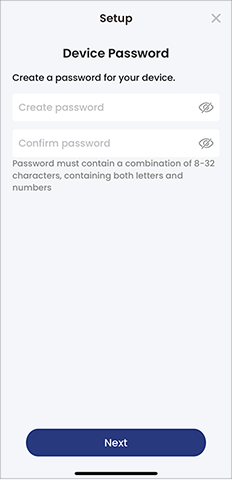
5. Create a secure password for your Lorex Wi-Fi camera.
4. Allow Lorex App to establish a Wi-Fi connection directly to your camera.
5. Create a secure password for your Lorex Wi-Fi camera.
 6. Choose your Wi-Fi network from the list of available networks and enter the Wi-Fi password.
7. Wait until the camera chimes and the LED turns solid green, then tap Next.
8. Create a name for your Lorex device by selecting from a list of pre-defined names OR enter a custom name in the text box.
6. Choose your Wi-Fi network from the list of available networks and enter the Wi-Fi password.
7. Wait until the camera chimes and the LED turns solid green, then tap Next.
8. Create a name for your Lorex device by selecting from a list of pre-defined names OR enter a custom name in the text box.
 9. Click Complete.
Your Lorex Wi-Fi camera is now successfully connected with the Lorex App application!