LNR Series: Connecting and configuring audio capable cameras
Your LNR Series NVR system supports audio recording with audio-capable cameras (not included). Audio-capable cameras have either a built-in microphone or a camera with audio input cables that can be connected to an external microphone. Depending on your camera model you can either use Listen-In audio to be alerted to sounds occurring around your camera or you can also use 2-Way Audio to speak and listen to those around your camera with an external speaker (not included).
Prerequisites:
- Ensure that your camera is audio-capable. Check your camera user manual for details. Click here for downloads and documentation for your product.
- Ensure that you have connected your cameras to your Router and the same Local Area Network (LAN) as your NVR. Click here for information on how to connect your IP Camera to your NVR.
LIMITATION: The MIC IN / OUT ports on the rear panel of the system cannot be used for audio recording. They are used for service only.
IMPORTANT: Using surveillance audio can be restricted or regulated depending on your location. Always verify with local authorities how to properly make use of your audio enabled system without breaking any privacy laws. Audio recording without consent is illegal in certain jurisdictions. Lorex by FLIR assumes no liability for use of its products that does not conform with local laws.
To set up audio recording with a camera with built-in microphone:
-
Connect the camera using an Ethernet cable to one of the Ethernet ports on the back of the NVR.
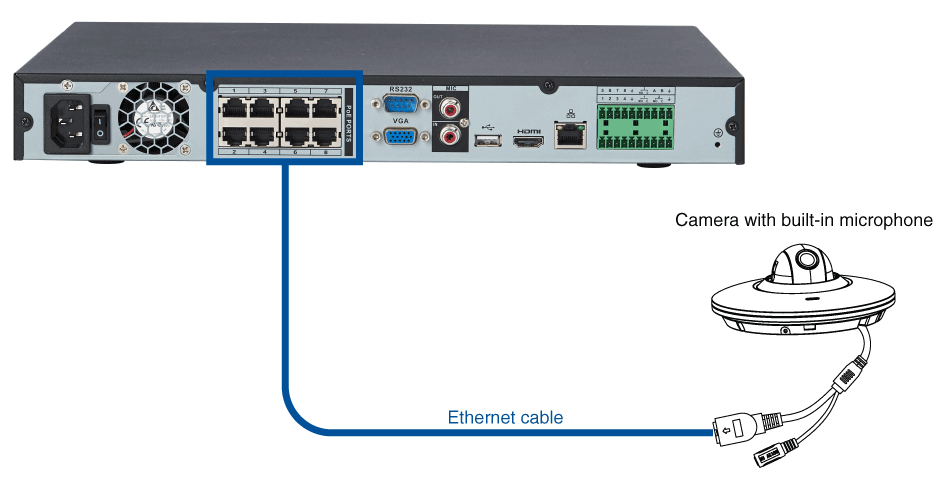
IMPORTANT: The microphone must also be connected to a powers source.
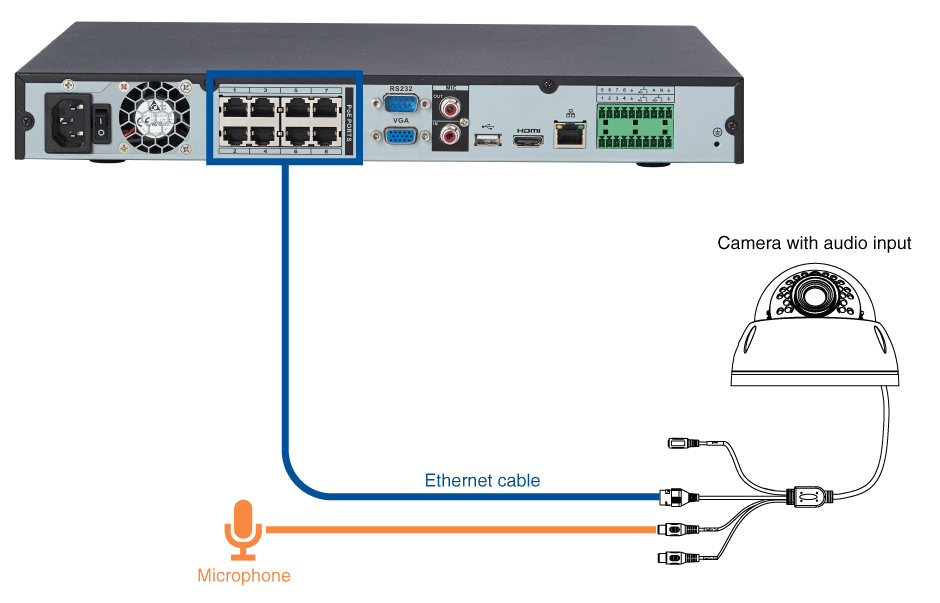
To set up audio recording with a camera with and external microphone:
-
Connect the camera using an Ethernet cable to one of the Ethernet ports on the back of the NVR.
-
Connect your camera to a self-powered external microphone.
Once you have connected your cameras, you must enable audio recording using your NVR menu.
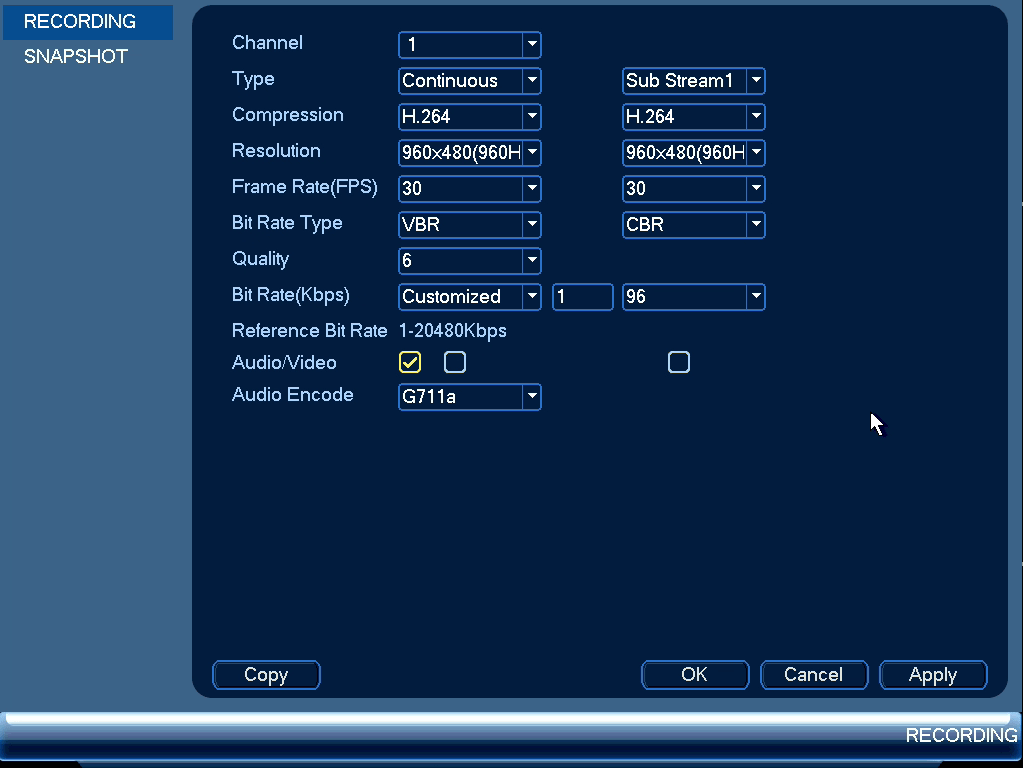
To enable audio recording on your NVR:
-
Right-click on the Live View to access the Quick Menu
-
Click Main Menu and then click the Camera icon (
 ).
). -
Click Recording > Recording.
-
Click the Channel drop-down menu to select the channel where the audio-capable camera is connected.
-
Check the Audio/Video checkbox to enable audio recording.
-
Click the Audio Encode drop-down menu to select the format that will be used to record audio.
RECOMMENDED: Set G711a as the audio format.
-
Click OK to save changes.