LNR Series: Connecting IP cameras to your NVR
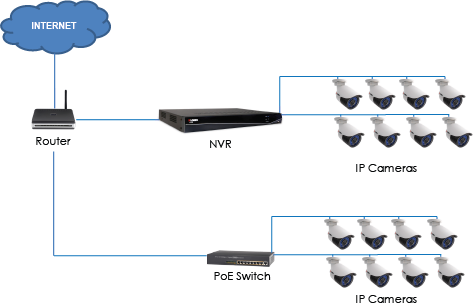
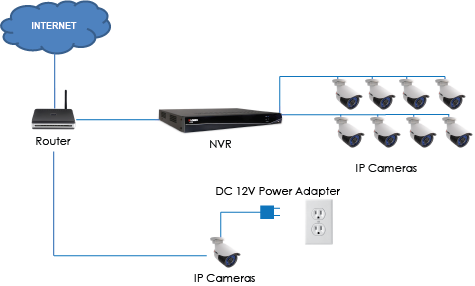
To add an IP Camera to your LNR Series NVR, you must connect the cameras to the same Router and Local Area Network (LAN) as your NVR. You must first connect to an external Power over Ethernet (PoE) switch OR connect to a 12V DC power adapter (not included) to provide power to each IP camera not connected directly to the NVR. You also must add the cameras on the NVR before they will show a picture on the monitor or be recorded by the NVR. Follow the steps below to connect the cameras to the NVR over the LAN.
To connect IP cameras to a local network using an external PoE switch:
-
Connect an Ethernet cable from the LAN port on the PoE switch to your router.
-
Connect the power cable to the PoE switch and to a power outlet or surge protector.
-
Connect IP cameras to ports 1 to 8 on the PoE switch using the included Ethernet extension cables.

REMINDER: The PoE switch will provide power and video transmission the same way your NVR does. Some terminology may vary depending on the model of your PoE switch. See the instructions for your specific PoE switch for details.
You can also connect your IP cameras to a LAN by using a 12V DC power adapter (not included).
To connect the IP cameras to your local network and power using 12V DC power adapters
-
Connect the cameras to a 12V DC power adapter (not included). Refer to your user manual for details on compatible power adapters. Click here for downloads and documentation for your product.
-
Connect the camera to your router using a CAT5e or CAT6 grade Ethernet cable. Click here for information about Ethernet cable types.

Once you have either connected your IP cameras to a PoE switch or power adapter, you can add your IP cameras to your NVR using a mouse (included) and monitor. Click here for details on how to add your IP cameras to your NVR using Device Search.