N Series NVRs: Audio recording
The system supports Lorex HD audio cameras, which transmit audio through the same network cable used for video connection.
 CAUTION: Audio recording and / or use of listen-in audio without consent is illegal in certain jurisdictions. Lorex Corporation assumes no liability for use of its products that does not conform with local laws.
To enable audio recording:
 From the Live View display, right-click to open the Quick Menu, then click Main Menu.
 Click
Click  , then click RECORDING. Click the Recording tab on the top panel.

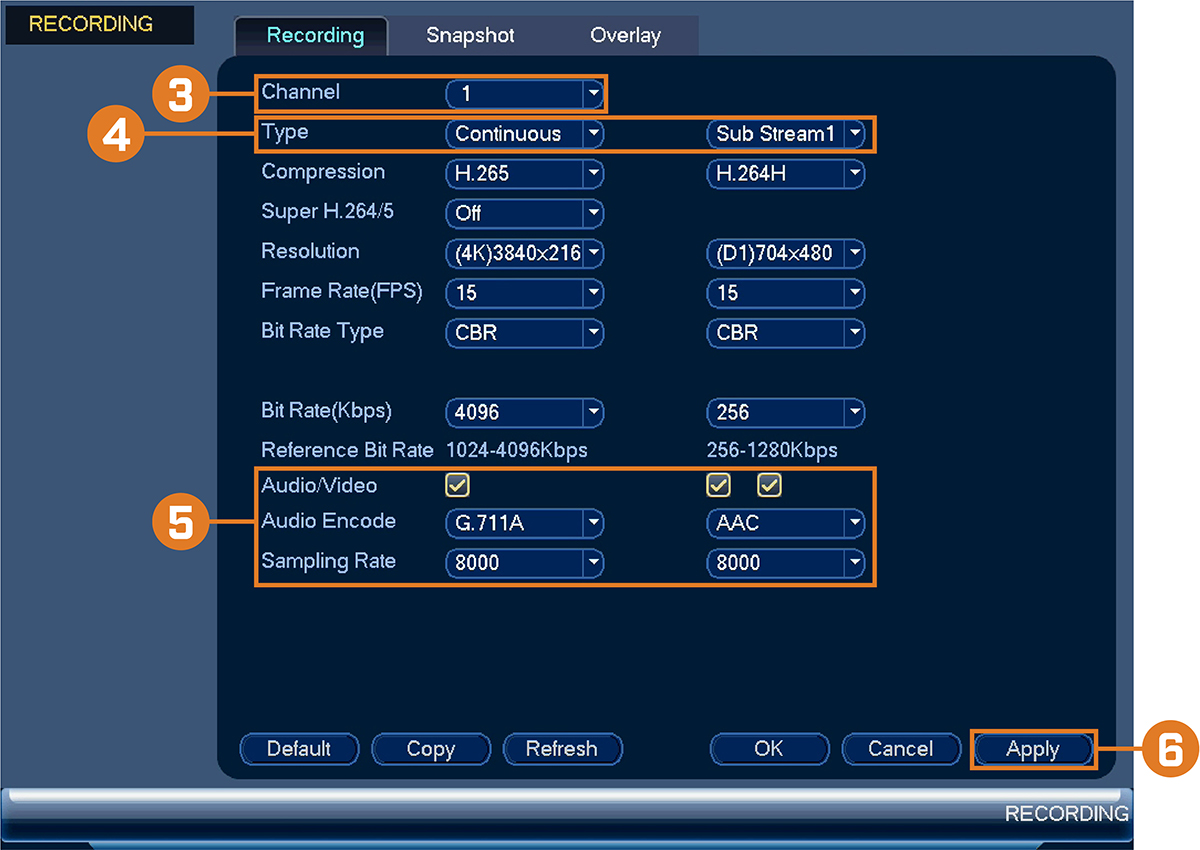
 Select the channel where the audio camera is connected.
 Select the type of recording to enable audio for. If you wish to record audio at all times, ensure you configure both Continuous and MD (Motion Detection) recording.
 Configure the following:
- Audio/Video: Ensure all boxes are checked.
- Audio Encode: Select an audio codec (G711a or AAC recommended).
CAUTION: If you are using voice commands with your security system, you must choose AAC encoding for the Sub Stream.
- Sampling Rate: Select an audio sampling rate (8000 recommended).
 Click Apply.