B451AJ Series - 2K Wired Video Doorbell: Installation Guide
This article will give you a step-by-step guide to installing the 2K Wired Video Doorbell.
Note: you should setup the 2K Wired Video Doorbell in the Lorex App before mounting it to your door.
Step one. Connect to the app.
- Install the Lorex App.

- Open the Lorex App.
- Tap + to add a device.
- Scan the device QR code found in the box or on the back of the video doorbell.
- Complete the app setup and watch the installation videos.
Step two. Preparation.
-
TURN OFF THE POWER RUNNING TO YOUR EXISTING DOORBELL AND CHIME BOX AT THE BREAKER. Test that power has been disconnected for both the doorbell and chime box power by pressing the doorbell. There should be no chime sound. Always be careful when handling electrical wiring. If you’re not comfortable doing it yourself, then you should consult with a licensed electrician.
-
Remove your existing doorbell and disconnect wiring. Make sure to bend the power cables so they do not fall through the hole in the wall.
IMPORTANT: 16-24V AC transformer is required. If your house does not have a compatible transformer, you will need to purchase a 16-24V AC doorbell transformer. Refer to the article “What transformer should I use with the 2K Video Doorbell?” for details.
Step three. Wiring the chime.
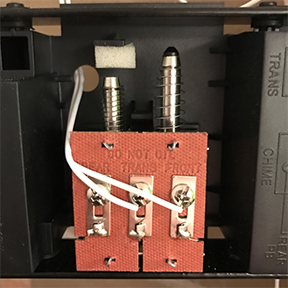
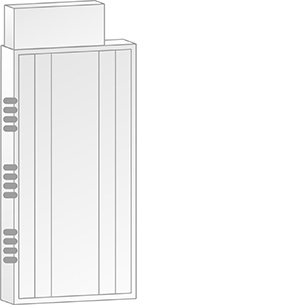
You must determine the type of doorbell chime you have in your home: electronic or mechanical.
Not sure? If your doorbell chime is a classic ding-dong sound, chances are your chime is mechanical. If your doorbell sounds more like a melody, then your chime is electronic. If you are still not sure, remove the cover panel of your chime box - if you find spring loaded levers and a physical metal chime as shown in the image below, then you have a mechanical chime.
For users with a mechanical chime, follow the extra steps below:
- Remove the cover panel of your doorbell chime box.
- Loosen the screws labeled FRONT and TRANS using a Philips head screwdriver. Do not remove the screws, and be sure to detach any connected wiring.
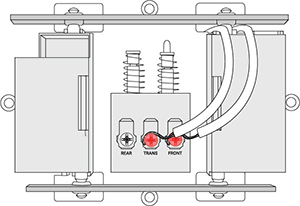
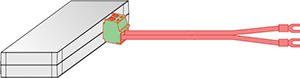
- Connect the included chime kit to the green terminal on the end of the included wire harness.
- Connect the wiring from the chime kit to the FRONT and TRANS connectors in the chime box. Ensure that the existing wiring stays connected as well.
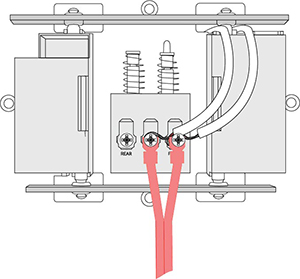
- Mount the chime kit to the inside of your chime box, or along the cover plate of the chime box, using the included double-sided tape.
Important: Use the included double-sided tape to ensure the chime kit and wires are not touching the chimes or any moving components inside the chime box, or the doorbell chime will not sound correctly.
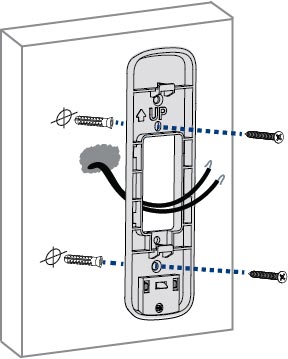
Step four. Secure the mounting bracket(s).
- Place the mounting bracket to fit your existing doorbell wiring. Then mark the screw holes according to the mounting bracket.
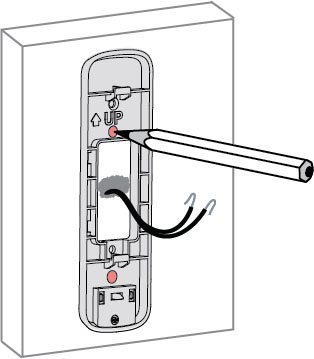
Important: Ensure that the UP^ arrow on the mounting bracket is always pointing up.
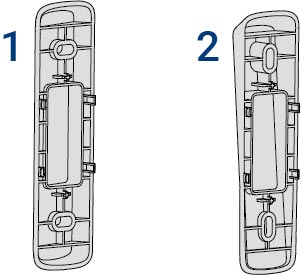
- (Optional) If you want to change the angle of the doorbell for a better view, attach one of the optional angled brackets to the mounting bracket. Select either the horizontal or vertical bracket according to the direction you want your doorbell to face.
1: Horizontal bracket 15° right/left
2: Vertical bracket 5° down/up
Notes:
- To change the direction of the angle, simply flip the horizontal or vertical bracket upside down. Whichever direction you choose, make sure the attached mounting bracket is always facing UP.
- You can only attach one angled bracket to the mounting bracket.
-
Insert the four tabs from the horizontal or vertical bracket into the mounting bracket. Make sure to insert in the desired direction.
-
Press the mounting bracket down. A click sound will indicate that the brackets are locked in.
Note: If you would like to change the direction of the angled bracket after attaching it to the mounting bracket, gently but firmly pull them apart.
-
For wood, drywall or soft surfaces: Secure the mounting bracket(s) to the mounting surface using a Phillips-head screwdriver and the supplied mounting screws.
-
For concrete, stucco or brick: Use the supplied 15/64” drill bit to drill holes where marked. Use the supplied anchors and screws to secure the mounting bracket(s) to the wall.
Notes:
- Ensure that the arrow on the mounting bracket is always pointing UP^.
- The (optional) angled bracket must be attached to the mounting bracket before installation.
- Ensure the power cables from the wall fit comfortably through the hole in the mounting bracket.
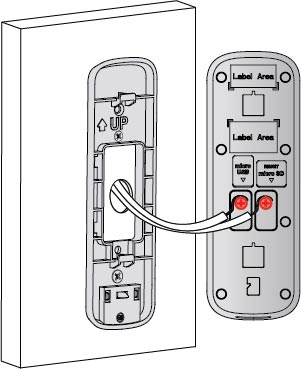
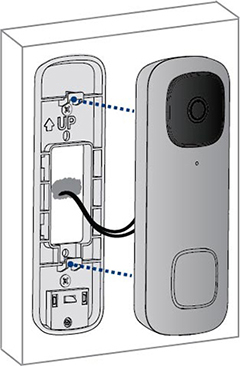
Step five. Wiring the doorbell.
- Loosen the power port screws of the doorbell with a Phillips-head screwdriver.
- Loop the power wires underneath the power port screws.

- Tighten the power port screws to secure the power wires.
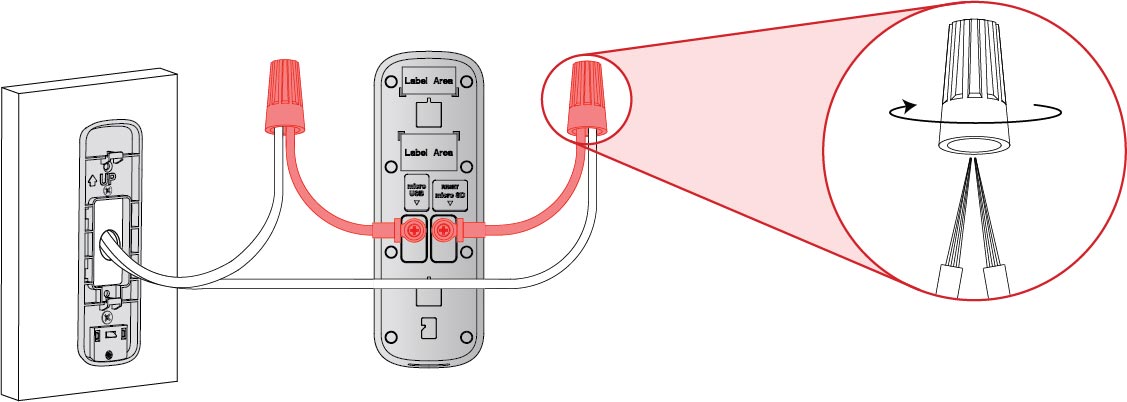
Optional - to extend short wires:
- If your existing doorbell wiring is too short, remove the power port screws completely, then thread the screws through the supplied extra wires. Use the supplied wire caps to extend your wiring.
- To attach the wire cap, align the ends of your existing wiring and extra wires, place the wire cap over the exposed wiring and twist the wire nut clockwise to tighten. Pull on the wires slightly to make sure that they are properly fastened inside the wire cap.
- Ensure there is enough space to fit the cable connectors and wire caps into the hole in your wall.
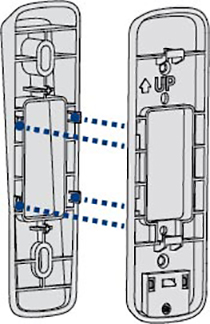
Step six. Attach the doorbell to the bracket.
- Push the wiring back into the wall.
- Insert the two tabs from the mounting bracket into the doorbell.
- Press the doorbell downwards. A click sound will indicate that it is locked in.
- You may now reconnect power to the doorbell and chime at the breaker. Wait 5 minutes for the doorbell to fully power on and press the doorbell’s button to ensure that the chime is operating correctly. Refer to the 2K Video Doorbell’s FAQ page for troubleshooting tips.
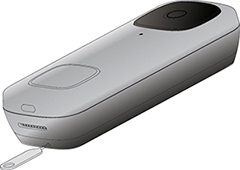
Note - If you need to remove the doorbell from the bracket:
- Insert the supplied pin into the hole at the bottom of the mounting bracket until the inner buckle is reached.
- Then slide the doorbell up and remove it.