Lorex Cirrus App - How to connect your recorder to the Lorex Cirrus app
You can connect your recorder to the Lorex Cirrus app for remote access.
Prerequisites:
-
Check that your recorder is powered ON and connected to the router using the included Ethernet cable.
-
Refer to your recorder's documentation to set up your recorder.
-
Check that your recorder has the latest firmware version.
Tip: Connect a monitor and a mouse to check the firmware from the recorder. Right-click to open the main menu, enter the device password, then go to Settings > Camera > Camera Setup.
-
Download the latest version of the Lorex Cirrus app from the App Store or Google Play Store.

-
For the latest list of supported apps and recorders, visit lorex.com/compatibility.
To connect your recorder to the Lorex Cirrus app:
-
Launch the Lorex Cirrus app.
-
Tap
 to access the main menu, then tap Device List.
 -
Tap
 at the top right.
 -
Scan the QR code on your Lorex recorder using the camera on your phone. The QR code may be located on the side or top panel of your recorder.
Note: If you're having trouble scanning the QR code or if your mobile device does not have a camera, tap Manually Enter Device ID. The Device ID is printed below the QR code.
-
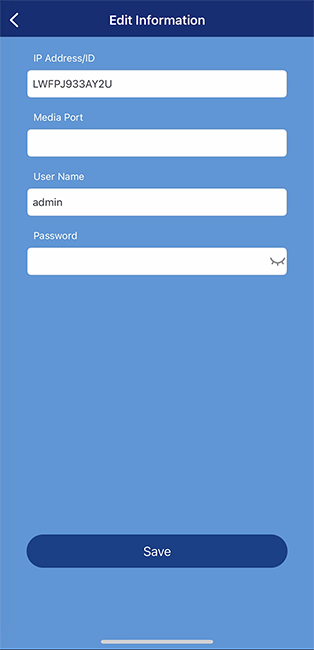
By default the device information reads as the following. Refer to the product information to make sure the information is correct.
-
IP Address/ID: Device ID
-
Username: admin

- Enter the following information:
-
Media Port: 3500
-
Password: 00000000
Note: This password is temporary. Remember to update your password in the following screen.
- Tap Save.
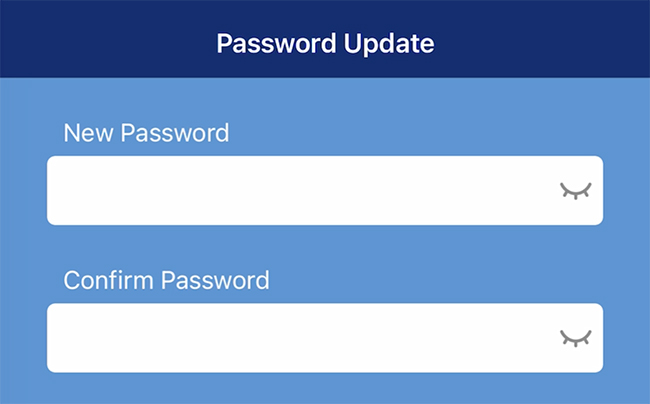
- A pop-up will display prompting you to change your password, tap OK.
- Enter a new device password in the Password Update screen. Note: The password must contain 8-15 characters.

- Re-enter your device password.
- Tap Save.
- (Optional) If you have already completed the initial setup, enter the system's password, then tap Save. The app will display the system's Live View.
- If you have not completed the initial setup for the recorder, the System Setup Wizard launches. Follow the in-app prompts to complete the recorder setup.
Note: Up to 3 authorized users can remotely access the recorder at the same time using the Lorex Cirrus app.
How do I configure the date and time?
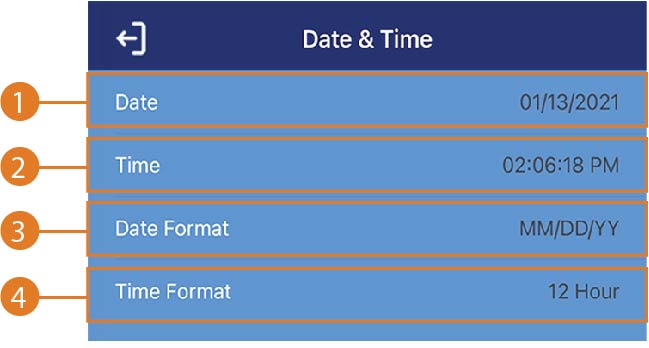
You can configure the date and time for the recorder during the initial setup, if you have not already. Tap on the specific fields to configure the Date and Time.

- Date: Tap to select the correct date from the calendar.
- Time: Tap to enter the correct time.
- Date Format: Tap to select your preferred date format from the drop-down menu. This determines how the date appears in the date stamps.
- Time Format: Tap to select your preferred time format from the drop-down menu. This determines how the time appears in the time stamps.
To configure the date and time after initial setup:
- Connect your recorder to a monitor and mouse.
- Right-click to open the main menu.
- Enter your device password.
- Click System, then General Setup.
- Update the Date, Date Format, and Time Format as needed.