Lorex Cirrus App - Configuring settings
You can configure various device and camera settings using the Lorex Cirrus app.
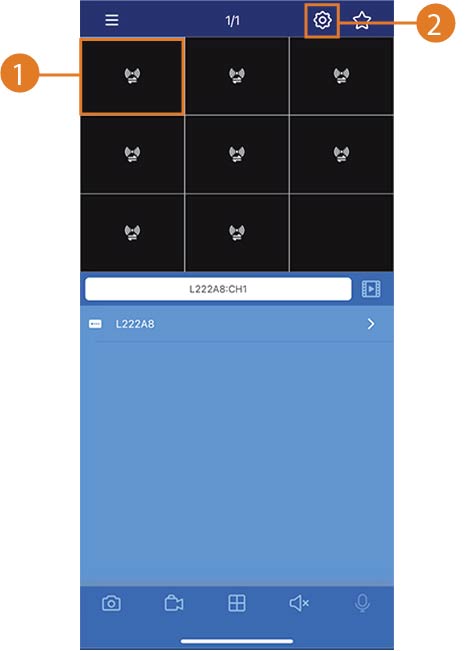
To access camera and device settings:
- From the live view, choose a channel by tapping the channel in the display view, then tap
 to view the channel settings.
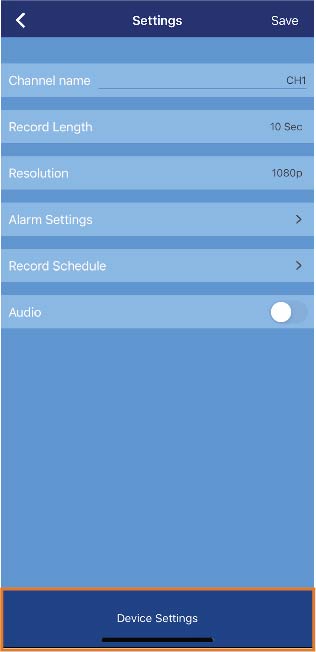
- From the channel settings screen, tap Device Settings to view the recorder settings.
To configure device settings:
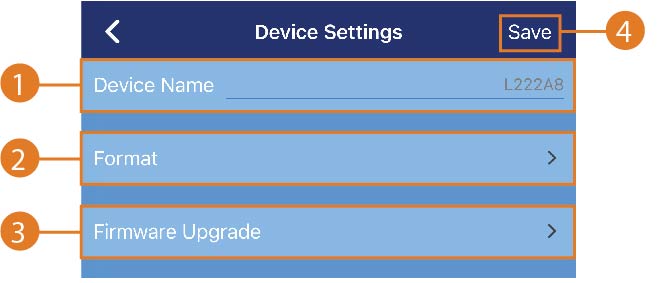
- Device Name: Tap to modify the device name.
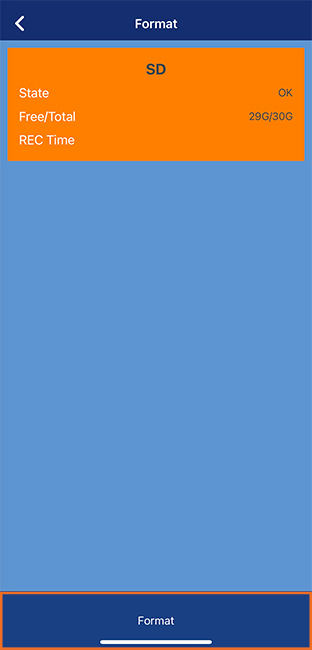
- Format: Tap to select a storage device (hard drive or microSD card) to format. In the Format screen, tap Format to confirm the selected device and begin formatting.
![]() Important: Formatting a storage device will erase all recordings and snapshots. This step cannot be undone. Only the admin user can format memory.
Important: Formatting a storage device will erase all recordings and snapshots. This step cannot be undone. Only the admin user can format memory.
-
Format Update: Tap to view the selected device's firmware information. You can upgrade the device's firmware whenever new firmware become available by tapping Upgrade.
Note: The Upgrade button will be greyed out when a firmware update is not available.
-
Tap Save to exit and save your changes.
To change your device password:
- Tap
 to access the main menu, then tap Device List.
 - From the list of devices, tap
 to view the initial device settings.
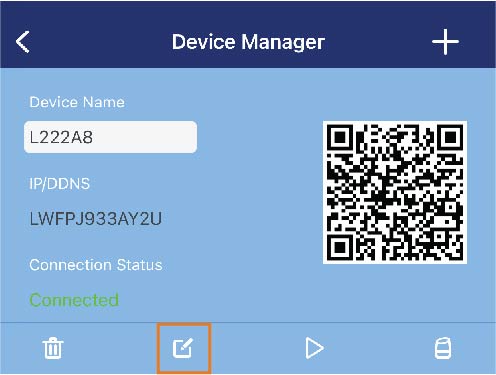
- Tap Change Password.
- Enter the Original Password.
- Enter the New Password, then reenter the new password.
- Tap Save.
Channel Settings Overview
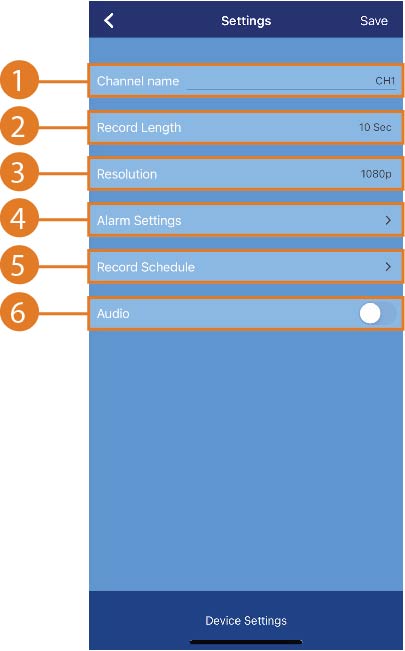
- Channel Name: Tap to modify the channel name.
- Record Length: Tap to set the amount of time (in seconds) that the device will record after motion is detected.
- Resolution: Tap to select a recording resolution.
- Alarm Settings: Tap to configure your device's motion detection settings. For more information, refer to the Alarm and Motion Detection Settings section below.
- Recording Schedule: Tap to configure your device’s video recording schedules. For more information, refer to the Recording Schedule section in this article.
- Audio: Tap to enable / disable audio recording (audio-enabled cameras or a self-powered microphone connected to the camera required)
Note: Remember to tap Save to apply any changes.
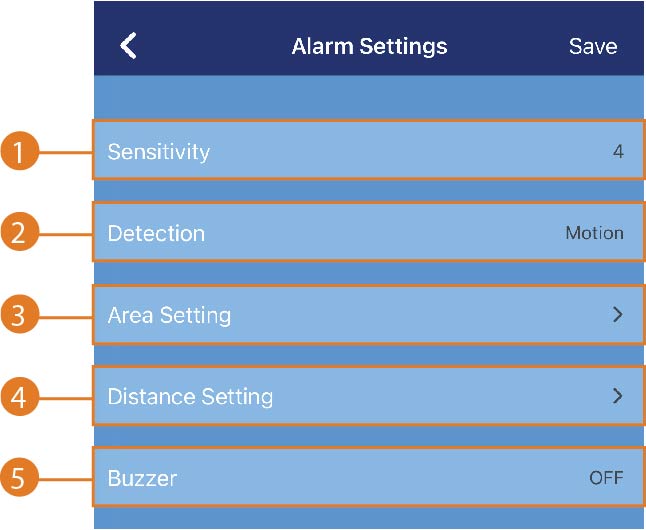
Alarm and Motion Detection Settings
You can configure motion detection settings on any connected device using the Lorex Cirrus app.
Overview
Configure the following as needed.
-
Sensitivity: Tap to select a sensitivity level for motion events. The lower the sensitivity value, the more movement is required to trigger motion detection.
-
Detection: Tap to select detection types, either motion or person detection.
-
Area Setting: Tap to configure the motion zones. Motion will only be detected in areas highlighted in red.
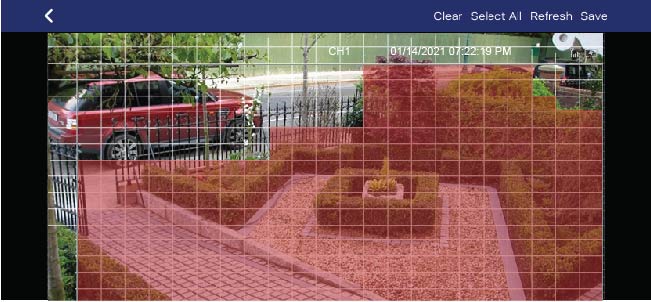
- Tap to configure which areas of the camera image will be enabled for motion detection. A red grid will appear over the camera’s live view, letting you know that motion detection is active for the entire image.
- Tap-and-drag over areas of the image to remove the red grid overlay, which removes that part of the image from the active area.
- Clear: Tap to remove the entire image from the active area.
- Select All: Tap to add the entire image as the active area for motion detection.
- Refresh: Reset to the default of using the entire image as the active area for motion detection.
- Save: Tap to save the motion detection region.
Note: Motion detection will be disabled for areas without the red overlay. Only motion which occurs in the red overlay will trigger motion detection. Disabling motion detection in certain areas of the image is an effective way to eliminate unwanted recordings and notifications, such as those caused by trees blowing in the wind or street traffic seen through a window.
- Distance Setting: Tap to configure distance setting for motion detection. Change the distance setting if motion detection is being triggered by unwanted events.
- Buzzer: Tap to select the amount of time you want the camera siren to be active up to 60 seconds or select Off to disable the siren.
Note: Remember to tap Save to apply any changes.
Recording Schedule
To navigate the recording schedule:
- Use one finger to add / remove hours from a recording schedule.
- Use two fingers to slide up and down.
To configure the recording schedule:
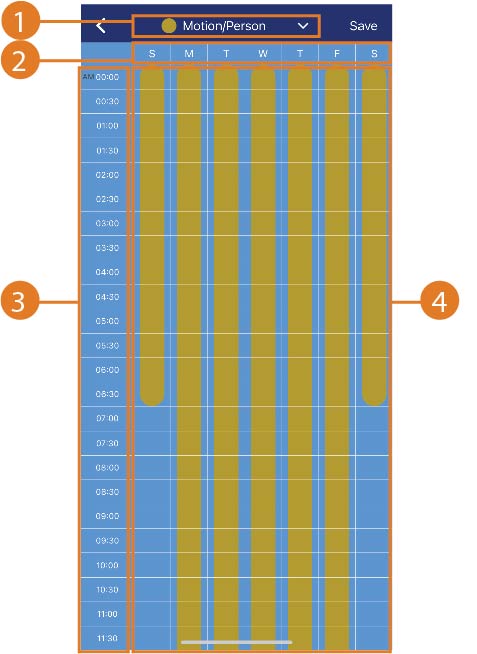
- Filter: Tap the drop-down arrow to select between the Motion / Person recording schedule or the Continuous recording schedule.
- Days: Displays the days of the week.
- Time: Displays the time of day.
- Colored bars: Displays the times of day during which motion recording is enabled. The times of day during which motion recording is enabled are represented by colored bars (yellow for motion, green for continuous). By default, the system is set to record motion at all times.
Tap or drag on bars with one finger to add / remove hours from the schedule.
Note: Remember to tap Save to apply any changes.