L4248, U424A Series - 2K NVR & Wire-Free Camera System: Installation Guide
This article provides instructions to install your 2K NVR & Wire-Free Camera system (L4248 Series).
What is included in the box?
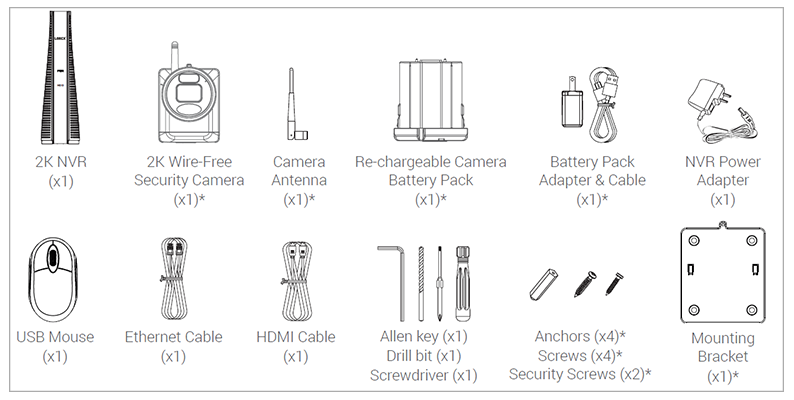
*Dependent on the number of cameras included.
Before you start
The camera battery comes partially charged (due to safety regulations). Please, fully charge the battery before use and setup. You can charge the battery pack inside or outside of the camera.
![]() The camera battery comes partially charged (due to safety regulations). Please, fully charge the battery before use and setup to take full advantage of the Wire-Free camera. You can charge the battery pack inside or outside of the camera.
The camera battery comes partially charged (due to safety regulations). Please, fully charge the battery before use and setup to take full advantage of the Wire-Free camera. You can charge the battery pack inside or outside of the camera.
To charge the camera battery pack:
- Remove the protective film on the battery contacts and camera lens.
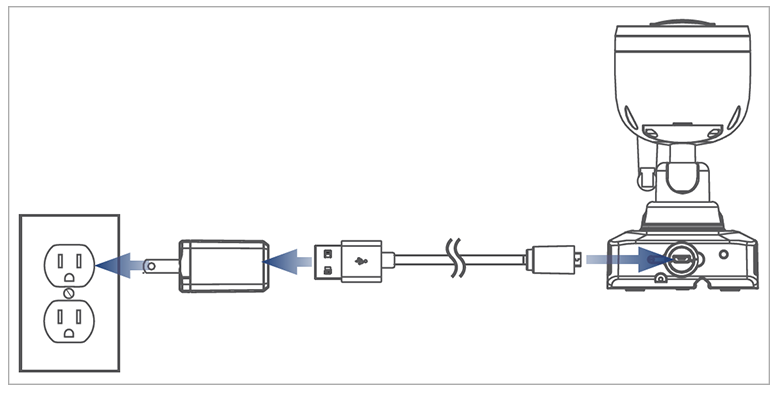
- Using the provided battery charging adapter and cable, connect the camera to a nearby outlet.
Camera Battery Charging Indicator
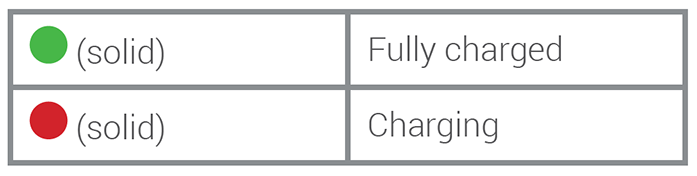
Battery Charging Time
- 2-cell : 2-4 hours
- 3-cell : 3-5 hours
Setup 2K NVR
- Connect the included NVR power adapter to the recorder.
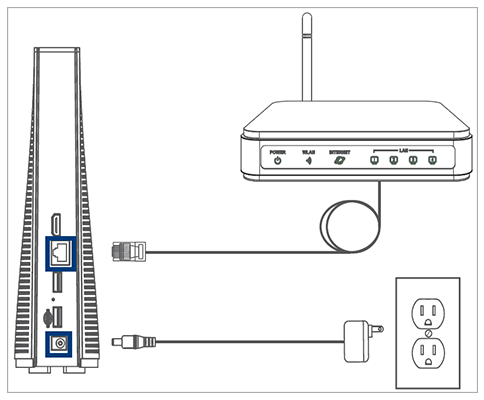
- Connect the recorder to your router using the included Ethernet cable.
Optional: Full Recorder Setup
- Connect a monitor using the included HDMI cable.
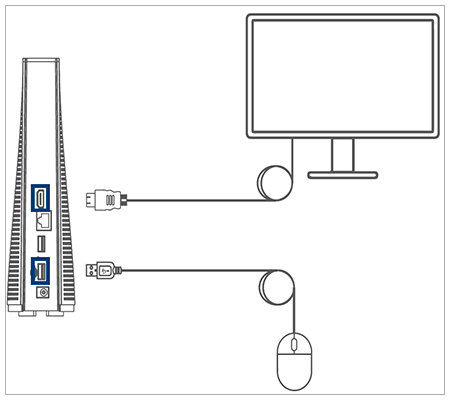
- Connect the included USB mouse to one of the USB ports.
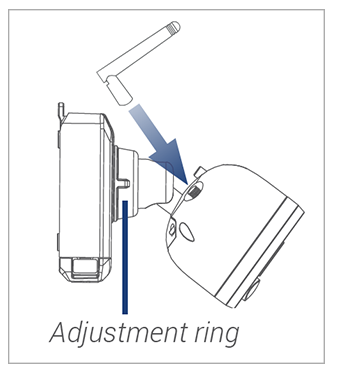
Setup 2K Wire-Free Camera
-
Turn the adjustment ring counterclockwise to loosen and angle the camera.
-
Screw in the antenna.
-
Insert the battery pack into the bottom of the camera.
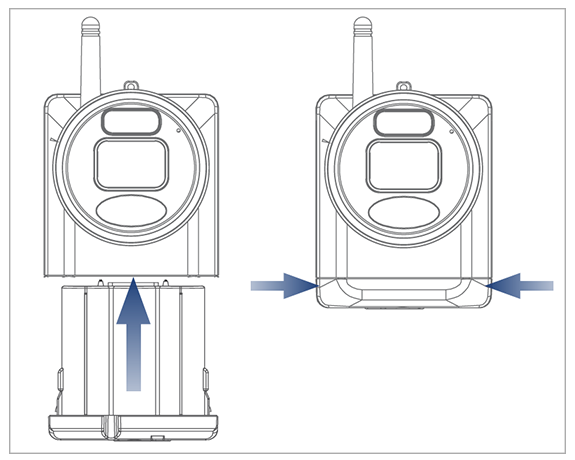
Note: You will hear a ‘beep’ when the power pack is properly inserted. If you do not hear this alert, remove the power pack by pushing in on the battery release tabs, then re-insert.
Setup recorder with Lorex Cirrus App
You can connect your recorder to the Lorex Cirrus app for remote access.
To setup NVR with Lorex Cirrus App
- Download the Lorex Cirrus app by scanning the QR code on your mobile device.
You can also visit Google Play or Apple Store to download the Lorex Cirrus app.

-
Open the Lorex Cirrus app.
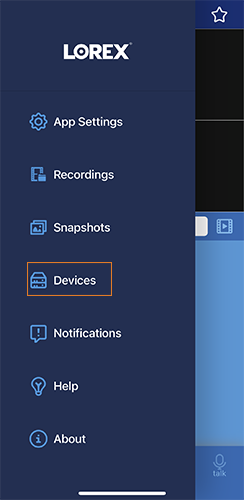
-
Tap
 to open the menu, then tap Devices.
- Tap
 icon on the Device Manager screen to add device.
 - Scan the QR code on your Lorex recorder using the camera on your phone. The QR code may be located on the side or top panel of your recorder.
Note: If you're having trouble scanning the QR code or if your mobile device does not have a camera, tap Manually Enter Device ID. The Device ID is printed below the QR code. - By default the device information reads as the following. Refer to the product information to make sure the information is correct.
-
IP Address/ID: Device ID
-
Username: admin
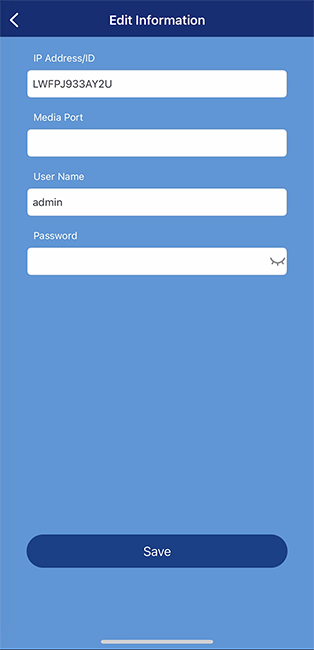
- Enter the following information:
-
Media Port: 3500
-
Password: 00000000
Note: This password is temporary. Remember to update your password in the following screen.
- Tap Save.
- A pop-up will display prompting you to change your password, tap OK.
- Enter a new device password in the Password Update screen. Note: The password must contain 8-15 characters.
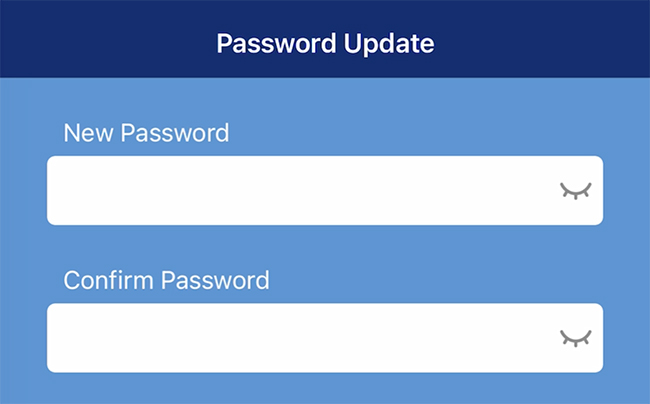
- Re-enter your device password.
- Tap Save.
- (Optional) If you have already completed the initial setup, enter the system's password, then tap Save. The app will display the system's Live View.
Note: Up to 3 authorized users can remotely access the recorder at the same time using the Lorex Cirrus app.