Smart Motion Detection Camera Placement Tips
The following article provides guidance for the optimal placement and orientation of your camera based on the smart motion detection feature that you want to use for monitoring.
The optimal installation location and position, including the height and angle of your camera, will depend on the type of smart motion detection settings enabled in your recorder. Since the optimal angle for person and vehicle detection is different from the optimal angle for face detection or animal detection, you will need to choose one installation technique.
Based on your detection preference, choose between the following:
- Person, Vehicle or Animal Detection
- Face or Mask Detection
- Package and Envelope Detection
- Safeguard™
- Virtual Fence
- People Counting
Note: Support of smart detection features differ per Lorex cameras and are compatible with certain Lorex recorders. For a full list of smart motion detection cameras and compatible recorders, please see our Product Compatibility Chart.
Installing for Person, Vehicle or Animal Detection
Person Detection
Vehicle Detection
Animal Detection
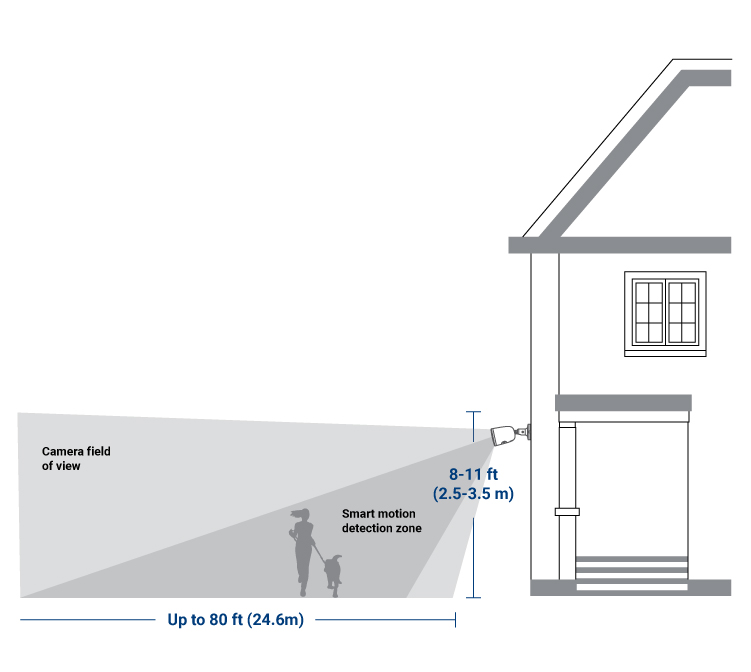
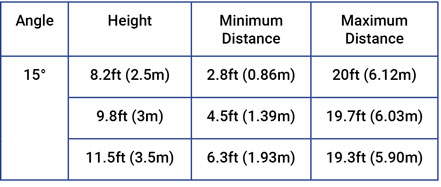
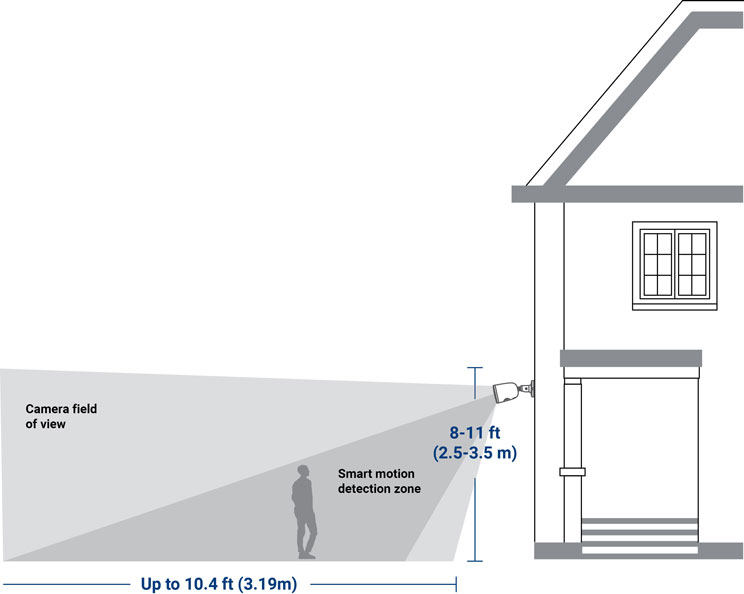
- Angle the camera so that objects of interest appear in the bottom 2/3 of the camera image.
- Choose a location where objects of interest will be no further than 20ft (6.1m) from the camera.
- Angle the camera 15° down from the level position.
- Install the camera between 8.2-11.5ft (2.5-3.5m) off of the ground.
Accuracy of person and vehicle detection will be influenced by multiple factors, such as the object’s distance from the camera, the size of the object, and the height and angle of the camera. Night vision will also impact the accuracy of detection.
Animal detection is compatible with certain Lorex recorders. For a list of compatible recorders, please see our Product Compatibility Chart.
Installing for Face and Mask Detection
Attention: Facial recording without consent is illegal in certain jurisdictions. Lorex Technology does not assume liability for any use of its product that fails to conform with local laws.
- Install in a bright area and avoid facing direct sunlight with strong backlights and dark shadows.
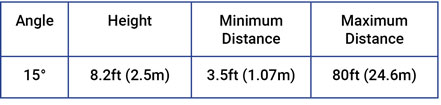
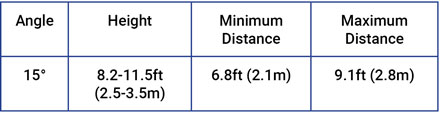
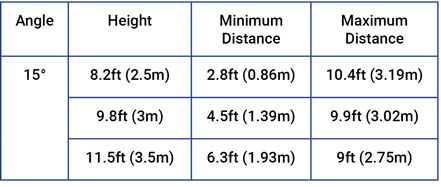
- Choose a location where objects of interest will be no further than 10.4ft (3.19m) from the camera.
- Position the camera about 9.8ft (3m) off the ground to detect the full proportion of a face.
- Angle the camera around 15° down from the level position.
- Point the camera directly where objects of interest will be facing.
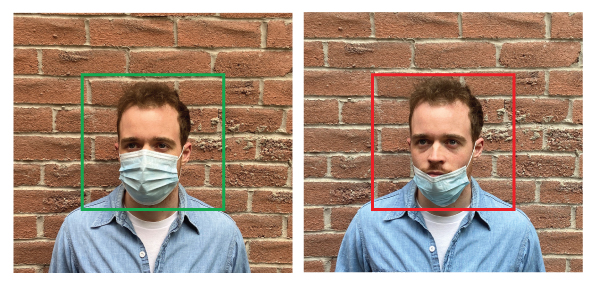
Face Detection: High accuracy vs. low accuracy

Accuracy will be influenced by lighting conditions and the distance/angle of a person’s face to the camera. To distinguish facial features, the camera must be positioned head on with a clear view of a person’s face. Obscured and partially/fully covered faces will not be accurately captured. To improve the range of face detection in low light conditions, Color Night Vision™ will switch to black & white. If you cannot meet these requirements for installation, it may be best to follow the guidelines for person and vehicle detection instead.
Mask Detection
From the Face Detection tab, set the Alarm Type to Mask Detect. Using mask detection, a person improperly wearing or not wearing a face mask will be captured in the side preview panel and a notification will be sent from the Lorex App. Check Auto Response to remind visitors to: "Please wear your face mask."
Note: You can use the face detection feature without using mask detection. Face detection is disabled by default. For more information on face detection setup and configuration, refer to your recorder’s manual. Visit our help.lorextechnology.com, search for your recorder series model number, and click on the Downloads tab.
Face detection and mask detection are compatible with certain Lorex recorders. For a list of compatible recorders, please see our Product Compatibility Chart.
Installing for Package and Envelope Detection
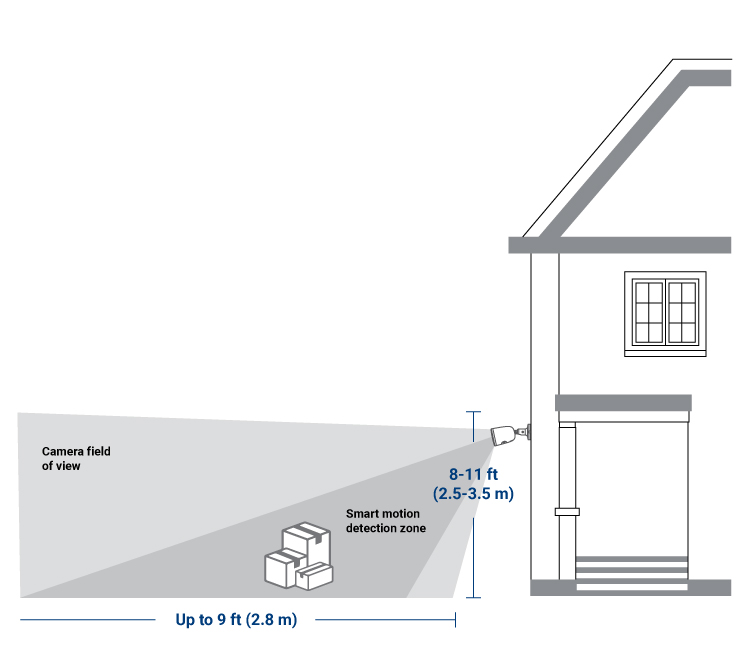
Place your camera so that it is about 10 feet high and has a clear view of the area where your packages are picked up and dropped off. When a mail carrier walks by your camera with a package, your camera will detect the package once it is placed in the designated bounding box. If an object, such as a plant or hedge, is partially blocking the package then your camera might not detect it.
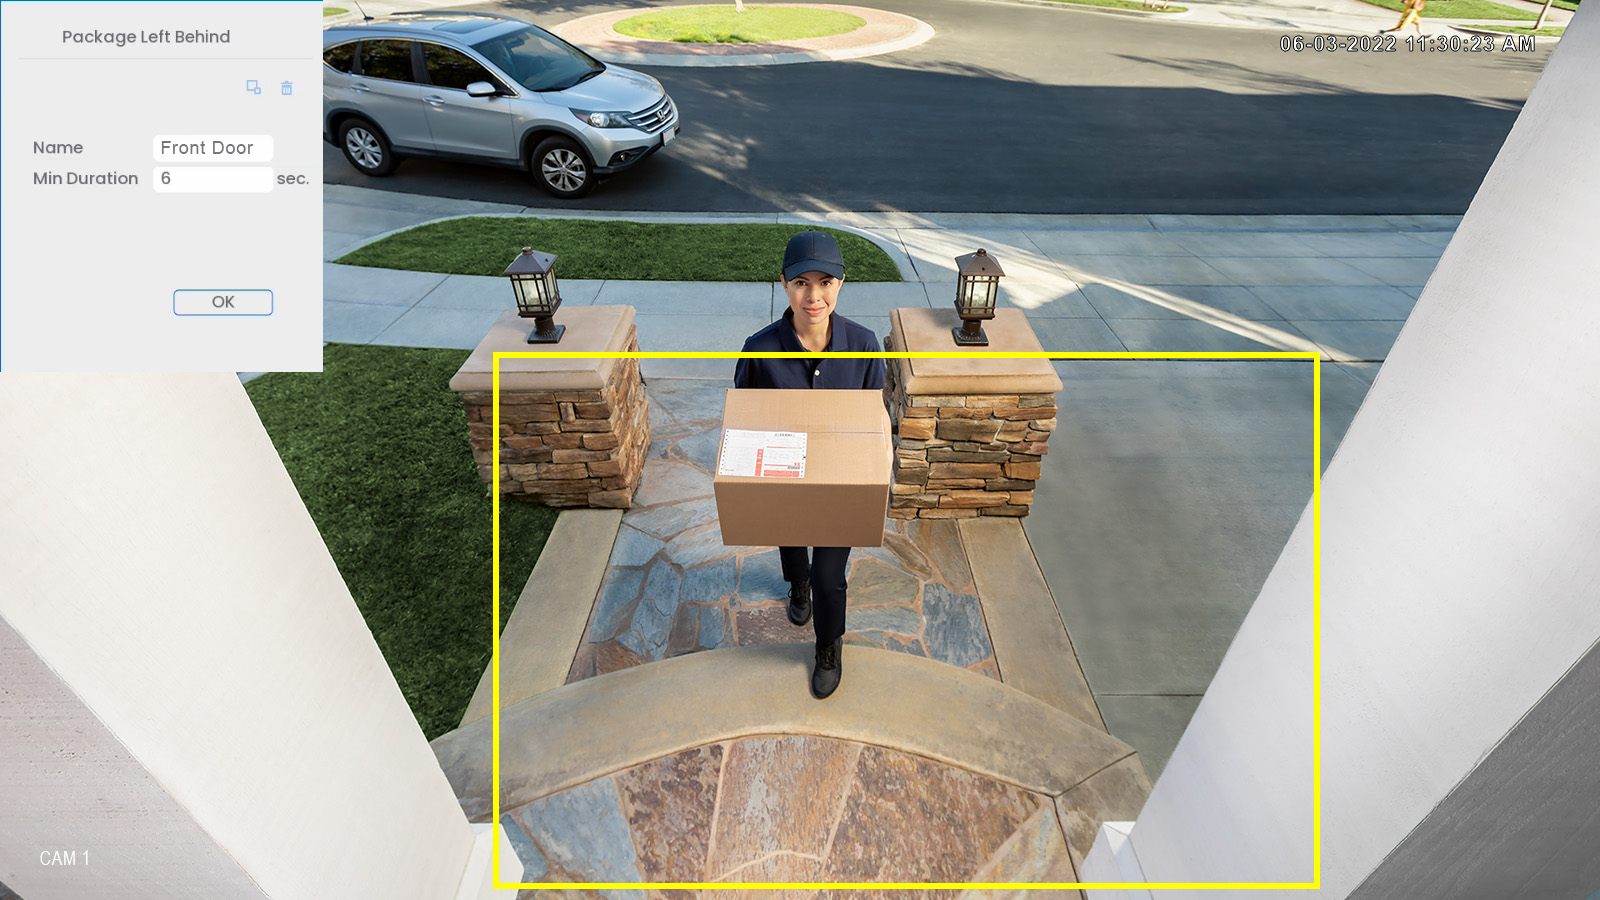
The image above is a good example of camera placement, angle, and height for your camera to detect packages/envelopes. This view captures the path leading up to the door and the door stoop, where packages/envelopes are typically dropped-off. Note that there are no obstructions between the camera and the bounding box; monitoring a simple environment with a clear view ensures accurate detection and minimizes false alerts.
Package and envelope detection are compatible with certain Lorex recorders. For a list of compatible recorders, please see our Product Compatibility Chart.
Installing for Safeguard™
For most accurate results, use Safeguard™ in areas that are simple, without frequent or obvious light change, and with low-density traffic. False alarms increase in high-density areas where there are too many people.
Safeguard™ is compatible with certain Lorex recorders. For a list of compatible recorders, please see our Product Compatibility Chart.
Installing for Virtual Fence
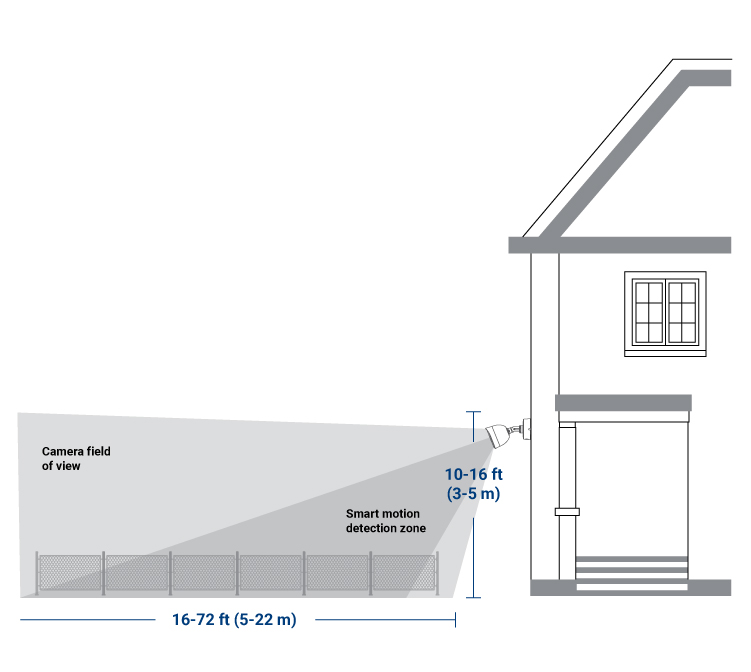
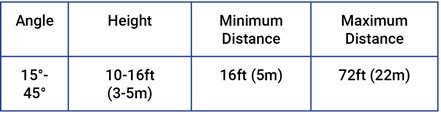
- Install the camera in a simple environment with low-density traffic
- Avoid facing the camera in areas with blockage or obstructions such as trees
- Ensure that there is sufficient lighting around the area
- Angle the camera towards indirect light; avoid locations with complex lighting, overexposure, low light, or strong background lights
- If monitoring vehicles, install the camera parallel to roadsides to avoid headlights
Virtual Fence is compatible with certain Lorex recorders. For a list of compatible recorders, please see our Product Compatibility Chart.
Installing for People Counting
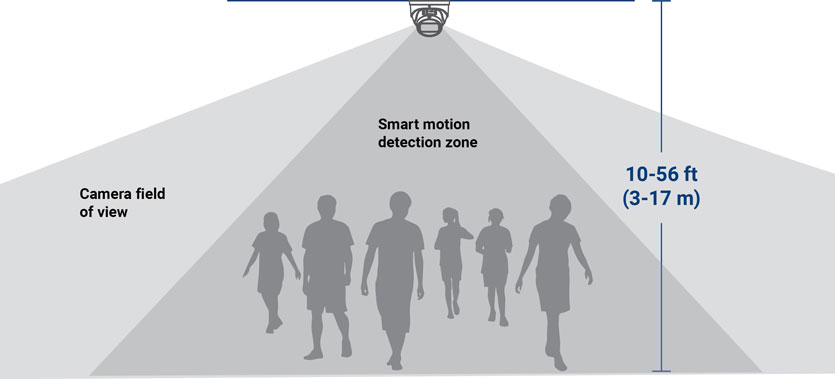
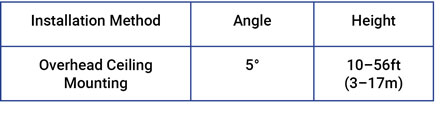
- Position the camera overhead the exit, entrance, or area that you want to monitor and aim to the floor.
- The camera should be high enough (at least 3m off the ground) to ensure the head and shoulder contour of people detection in the area is clear.
- The camera should be installed facing against the mainstream flow of traffic.
- Ensure there is a clear view of the monitored area. There should be no obstructions between the camera and the area.
- Avoid monitoring areas with frequent light changes, backlight, or direct sunlight exposure.
- Choose an area with a simple background (floor/walls).
People Counting is compatible with certain Lorex recorders. For a list of compatible recorders, please see our Product Compatibility Chart.
Additional installation tips
- Point the camera where there is the least amount of obstructions (e.g., tree branches).
- Install the camera where vandals cannot easily reach.
- Secure cabling so that it is not exposed or easily cut.
- Installation in a sheltered location is recommended.
To learn more about different types of motion detection, please see our Motion Detection page.