N845, N846, N847, N864 Series: Changing Your Recorder’s Output Resolution
The following article provides instructions for changing your recorder's output resolution.
To ensure the best possible picture quality, set the recorder’s output resolution to match the highest resolution supported by your monitor.
Important: If you need to switch the monitor, make sure you set the recorder to an output resolution supported by the new monitor before switching.
Change your recorder’s output resolution
- From live view, right-click and then click Main Menu. If prompted, log in using the system user name (default: admin) and your new, secure password.
- Click Information, then Display. Click the Display tab from the side panel.
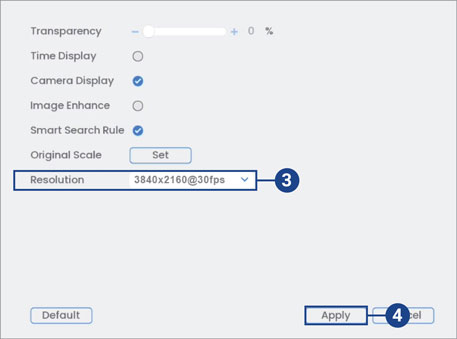
- Set Resolution to match the highest resolution supported by your monitor. For example, select 3840×2160 for 4K monitors, or 1920×1080 for 1080p.
- Click Apply to save changes. Click OK again to restart the system using the new resolution.
The recorder will restart before changes take effect.
If you have attempted to change the display output of your recorder to a higher resolution (e.g., 4K Ultra HD) but your monitor does not support 4K Ultra HD, there is a great likelihood that your monitor will (1) lose video signal, (2) turn black and (3) lose the live view. To restore your display settings, refer to the article How to Restore Your Recorder’s Display Resolution to Factory Default (New Local UI).