N845, N846, N847, N864 Series: Using the Warning Light
The following article provides Lorex App and recorder instructions for using the warning light on your wired IP deterrence cameras.
Table of Contents:
- Set the Warning Light Settings (Lorex App)
- Manually Activate the Warning Light (Lorex App)
- Set the Warning Light Settings (New Local UI)
- Manually Activate the Warning Light (New Local UI)
Lorex wired deterrence IP cameras can help ward off or deter intruders through a motion-activated bright light.
The warning light is compatible with certain Lorex IP cameras. For a complete list of compatible cameras, navigate to your recorder series at lorex.com/compatibility.
Set the Warning Light Settings (Lorex App)
Set the warning light settings for when smart detection events occur (active deterrence).
Prerequisite: To use the warning light remotely, download the Lorex App and connect your system. Refer to the article DVR / NVR - Download the Lorex App for full instructions.
- Open your Lorex App and login.

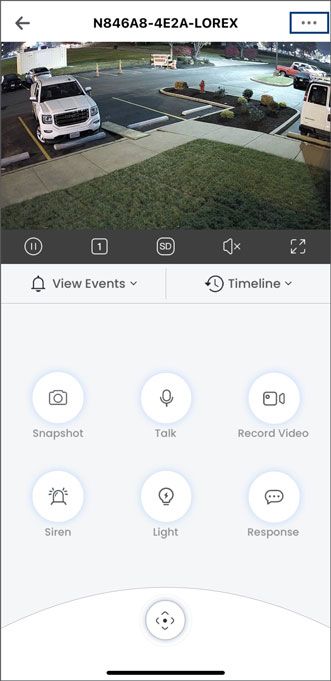
- Under your recorder, swipe left and tap on your deterrence camera.

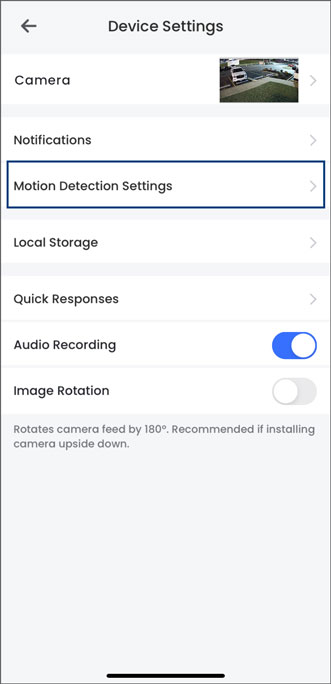
- Tap the camera's device settings icon.
- Tap on Motion Detection Settings.
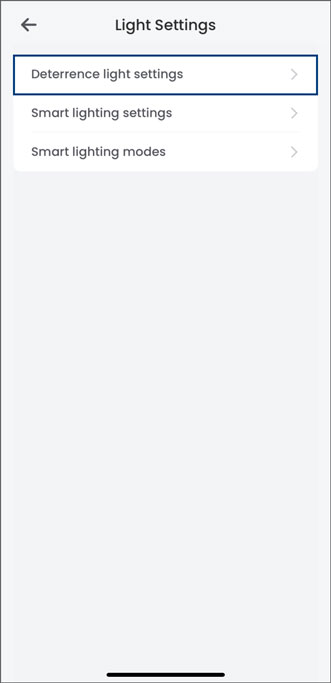
- Swipe to the bottom and tap on Light Settings.

- Tap on Deterrence Light Settings.
- Tap to enable the smart detection feature, and configure the following:
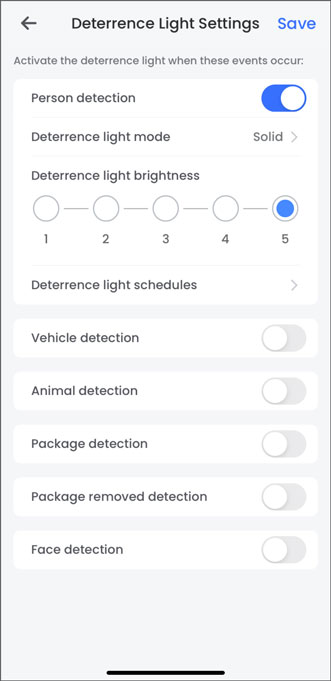
- Deterrence Light Mode: Select Solid for a solid light or Flashing for a flashing light. Tap Save.
- Deterrence Light Brightness: Adjust the warning light brightness level, with 1 being the lowest and 5 being the highest.
- Deterrence Light Schedules: Tap on a weekday to adjust the warning light time schedule preferences. Set the start time and end time, then select other weekdays to repeat the schedule. Tap Save.
- Tap Save to apply all changes.
Manually Activate the Warning Light (Lorex App)
- Open your Lorex App and login.
- Under your recorder, swipe left and tap on your deterrence camera.
- In the Live View display, tap the Light icon.
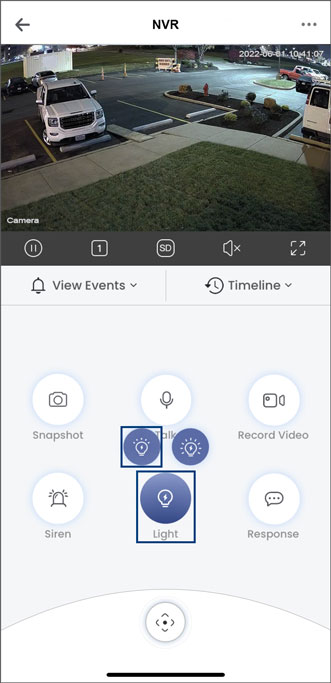
- Tap the warning light icon on the top left. Tap it again to manually turn it off.
Note: The warning light automatically turns off after 10 seconds.
To learn about using other deterrence light features, refer to the article Using Color Night Vision Booster.
Set the Warning Light Settings (New Local UI)
The system allows you to activate bright, white warning lights to deter intruders. Select channels that you want to enable the warning light on and adjust preferences.
- From the Live View display, right-click to open the Quick Menu, then click Main Menu.
- Click Events, then Event Settings. Click the Smart Motion tab from the side panel.

- Select a channel of a connected deterrence camera.
- Check to enable the smart motion detection rule that you want to use.
- Set a name for the rule by double-clicking the mouse over the Name of the rule.
- Select between Person, Vehicle, or Animal detection types.
- Click the drawing icon and customize the area for active deterrence:
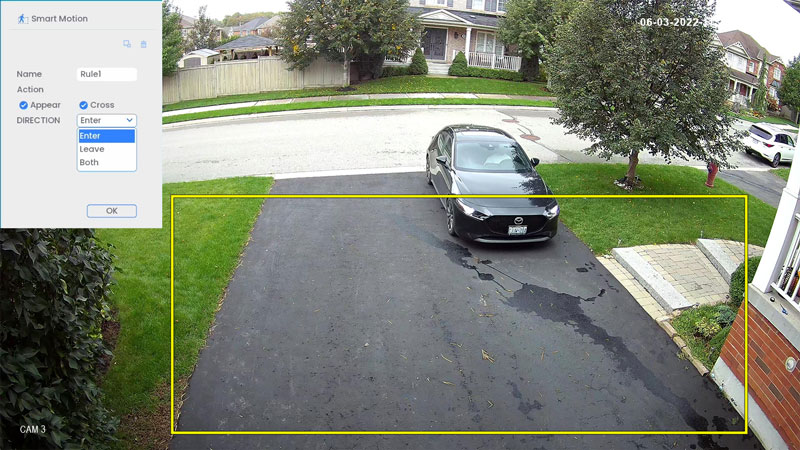
- Action: Check Appear to detect if an object of interest appears in the defined area. Check Cross to detect if an object of interest enters or exits the defined area. Check both to enable each type of action.
- Direction: Determine which direction an object needs to travel in order to trigger automatic deterrence. You can select Enter for movement entering the defined area, or Leave for movement exiting the defined area, or Both for both types of directions.
- To draw, click-and-drag the corners of the yellow box to resize the area. For most accurate results, set an area where objects of interest will move within the bounding box as well as into/out of.
- Click OK when finished.
- Click the trigger modifying icon to adjust automatic deterrence features.

- Click Set next to Schedule to choose which days and times or the week to enable automatic deterrence:
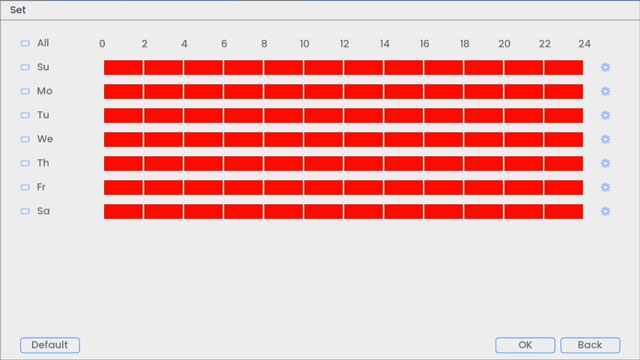
- Click or click-and-drag along each of the red timelines to quickly add or remove time from each day’s schedule in 30–minute segments.
- Click
 beside 2 or more days to link schedules (
 ). This allows you to quickly change multiple schedules at once.
 - To make fine adjustments to a schedule, click
 . This will allow you to set exact start and end times for a schedule.
- To enable the warning light, check Camera Light and click Set.
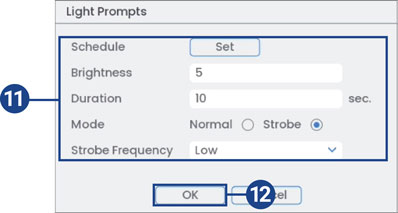
- Adjust warning light preferences:
- Schedule: Click Set to customize a schedule specifically for the warning light.
- Brightness: Set the warning light brightness level.
- Duration: Choose how long the warning light will stay on following a smart motion detection event.
- Mode: Select Normal for a solid white light or Strobe for a flashing light. If you select Strobe, set how quickly the light will flash under Strobe Frequency.
- Click OK, click OK again.
- Click Apply to save changes.
- Click Add to create additional active areas for active deterrence on the selected channel.
Manually Activate the Warning Light (New Local UI)
From the recorder, hover the mouse pointer near the top of the camera image in Live View to reveal the Camera Toolbar. Click to activate the warning light.

To activate warning light and siren on all connected cameras:
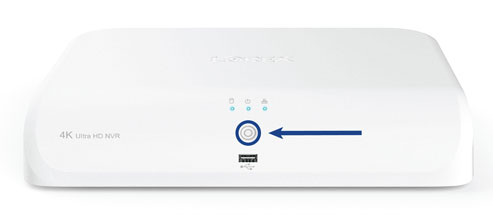
- Push and hold the front panel panic button on the recorder for 3 seconds.
- From the Live View display, click the panic button
 on the navigation bar.
For detailed instructions on configuring your system, refer to your recorder's Series Manual on the product support page. Visit help.lorextechnology.com and search your recorder's model number.