Back to list
N883, N884 Series: Enable Audio Recording
The following article provides instructions for enabling audio recording on your NVR.
Caution: Audio recording and / or use of listen-in audio without consent is illegal in certain jurisdictions. Lorex Corporation assumes no liability for use of its products that does not conform with local laws.
Enable Audio Recording
Prerequisite: To configure audio recording settings, you must first connect an audio capable camera or external audio devices such as a self-powered microphone and self-powered speaker. For more information, see the article N883 Series: Connect Audio Devices.
- From the Live View display, right-click to open the Quick Menu, then click Main Menu.
- Click CAMERA. Click the Recording tab from the side panel, then the Recording tab from the top panel.
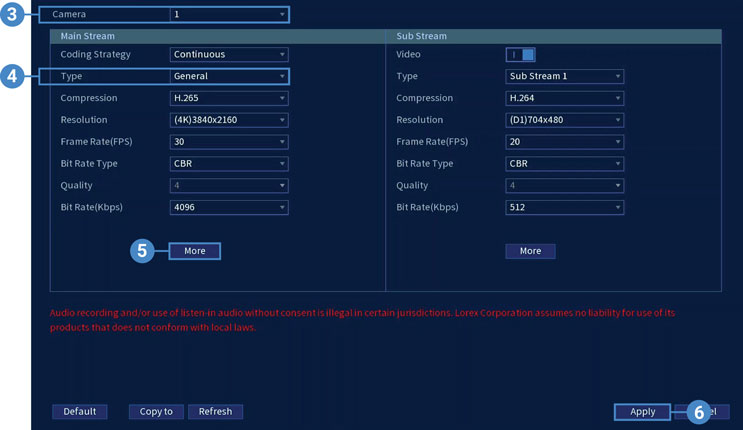
- Select the channel where the audio camera is connected.
- Select the type of recording to enable audio for. If you wish to record audio at all times, ensure you configure both General (continuous) and Motion (motion detection) recording.
- Under Main Stream, click More and configure the following:
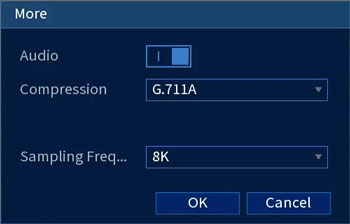
- Audio: Click to enable.
- Compression: Select an audio codec (G711a recommended).
- Sampling Frequency: Select an audio sampling rate (8000 recommended).
- Click Apply to save changes.