N910, E910 Series: Using Your Camera's Smart Security Lighting
This article provides instructions for how to use the Smart Security Lighting feature on your IP wired deterrence cameras through both the Lorex App and your recorder.
Certain Lorex IP wired deterrence cameras have a built-in, vibrant Smart Security Lighting positioned on the front of the camera. This feature allows users to customize different colored lighting modes or synchronize it with smart motion detection settings.
Smart Security Lighting is available on certain Lorex IP wired deterrence cameras. To view a list of cameras with Smart Security Lighting, please refer to the Product Compatibility Chart.
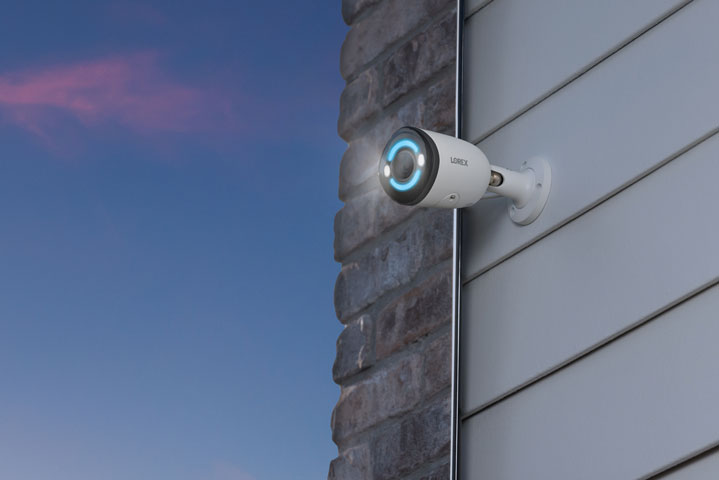
Table of Contents:
- Customize Smart Security Lighting Through the Lorex App
- Set Your Camera's Smart Security Lighting Mode
- Activate Smart Security Lighting on Smart Motion
- Customize Smart Security Lighting via Your Recorder
- Set Your Camera's Smart Security Lighting Mode
- Activate Smart Security Lighting on Smart Motion
- Turn Smart Security Lighting Off
Customize Smart Security Lighting Through the Lorex App
Set Your Camera's Smart Security Lighting Mode
Before you begin: Ensure you have downloaded the Lorex app and successfully connected your system. For detailed instructions, please consult the article "DVR / NVR - Download the Lorex App".
-
Launch the Lorex app and log in to your account.
-
Swipe left under your recorder and select the desired camera.
-
Tap the Device Settings icon (•••) located in the top right corner of the app.
-
Tap Light Settings > Smart Security Lighting Modes.
-
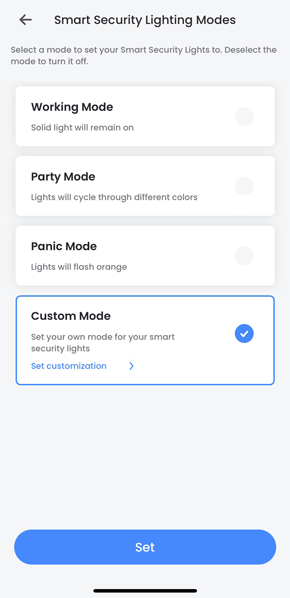
Select a mode to set your Smart Security Lighting to. Personalize Smart Security Lighting by selecting your own colors in Custom Mode.
To turn Smart Security Lighting Off: Deselect the mode and tap Save.
Activate Smart Security Lighting on Smart Motion
Before you begin: Ensure you have downloaded the Lorex app and successfully connected your system. For detailed instructions, please consult the article "DVR / NVR - Download the Lorex App".
-
Launch the Lorex app and log in to your account.
-
Swipe left under your recorder and select the desired camera.
-
Tap the Device Settings icon (•••) located in the top right corner of the app.
-
Tap Light Settings > Activate Light on Smart Motion.
-
Tap the desired Smart Motion detection type, tap
 to enable the Smart Security Lighting, and then customize the light settings:
- Light color: Tap the red circle, set a custom color, then click Save.
- Deterrence light mode: Opt for Solid for a consistent light or Flashing for a light that flashes.
- Deterrence light settings: Adjust the brightness level of the light (from 1 being the lowest to 5 being the highest).
- Light schedule: Tap to edit the light schedule. Tap the day of the week and select the custom time.
To turn Smart Security Lighting Off: Disable Smart Security Lighting and tap Save.
Customize Smart Security Lighting via Your Recorder
Set Your Camera's Smart Security Lighting Mode
- Right-click on the Live View display to access the Quick Menu, then proceed to click on Main Menu.
- Navigate to Events > Event Settings and click on the Smart Security Lighting tab located in the side panel.
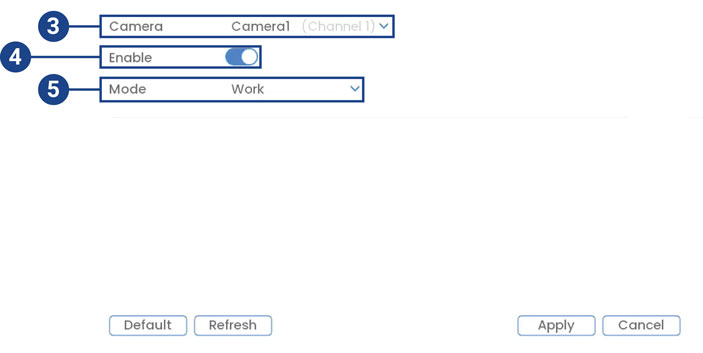
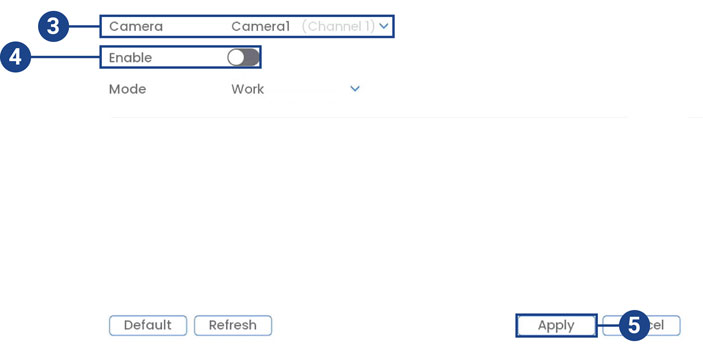
- Choose the camera you want to configure.
- Check to Enable.
- Under Mode, choose from various lighting modes or customize colors in Custom.
- (Optional) Adjust Custom mode preferences:
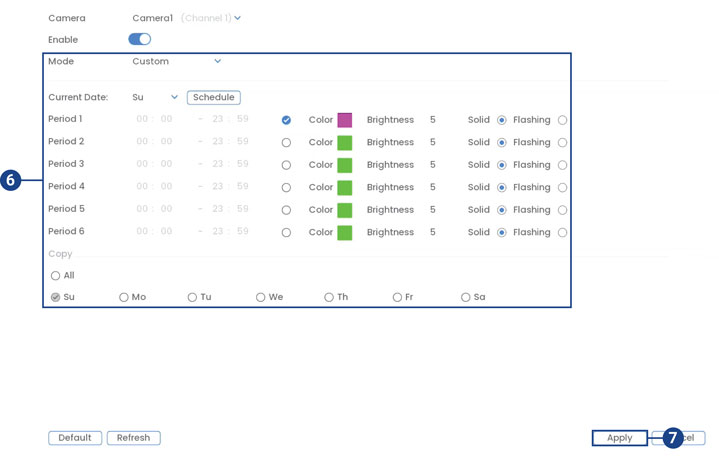
- Current Date: Select the weekday from the drop-down menu and then click Schedule to choose the times of the week to enable Smart Security Lighting.
- Period (1–6): Choose the time that Smart Security Lighting will be active.
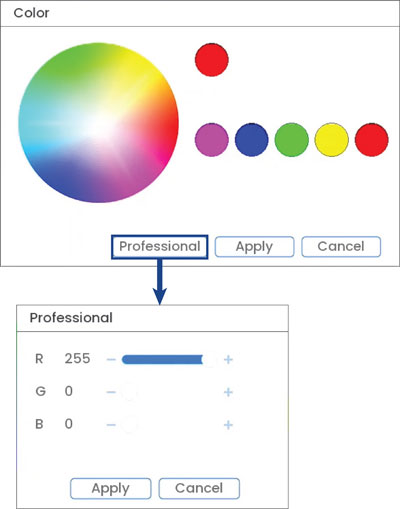
- Color: Click on the green color box to open the color settings. Set a custom color by clicking through the rainbow color palette, then click OK to select the color.
- Brightness: Set the brightness level.
- Select Normal for a solid light or Flashing for a flashing light.
- Copy: Copy your preferences onto other weekdays or All.
- Click Apply to save changes.
- Current Date: Pick the weekday, then click Schedule to set times for Smart Security Lighting.
- Period (1–6): Choose the time that Smart Security Lighting will be active.
- Color: Click the green box, set a custom color by clicking through the rainbow color palette, then click OK.
- Brightness: Adjust brightness.
- Select Normal for a solid light or Flashing for a blinking light.
- Copy: Duplicate preferences for other days or All.
Activate Smart Security Lighting on Smart Motion
- Right-click on the Live View display to access the Quick Menu, then proceed to click on Main Menu.
- Navigate to Events > Event Settings and click on the Person & Vehicle tab located in the side panel.
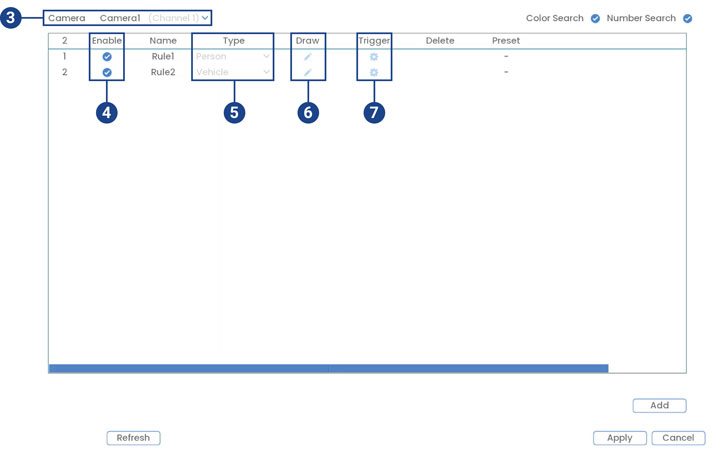
- Choose the camera you want to configure.
- Enable the desired detection rule by checking the corresponding box.
- Select between Person or Vehicle detection types.
Note: The initial two smart motion detection rules are automatically included. The detection type for these default rules cannot be changed, and the areas can only be enabled or disabled. Subsequent rules added allow for modification or deletion of all details.
- Click the Draw icon
 and customize the active area for automatic Smart Security Lighting:
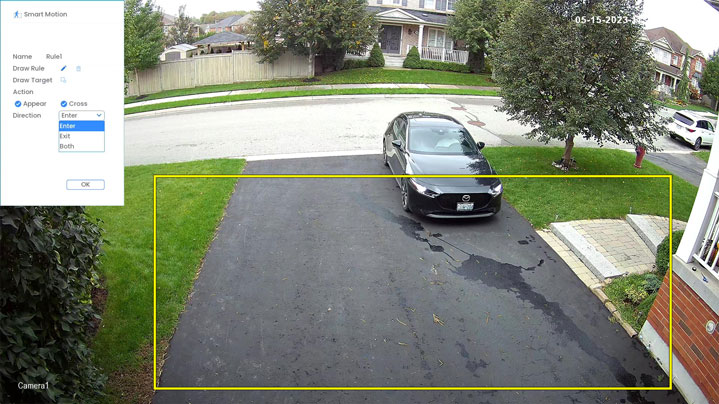
- Name: Click to enter a custom name for the detection area.
- Draw Rule: Resize or create a new bounding box by clicking and dragging. Use the delete icon
 to remove the current box. Draw a line around the monitoring area on the live view image and then right-click to close the area.
 - Action: Check Appear for detecting objects appearing in the area, and Cross for objects entering or crossing through. Enable both for each action.
- Direction: Specify the direction an object must travel to trigger automatic deterrence. Choose Enter for movement entering the defined area, Exit for movement exiting the area, or Both for both directions.
- Click OK to save.
- Click the Trigger icon
 .
.
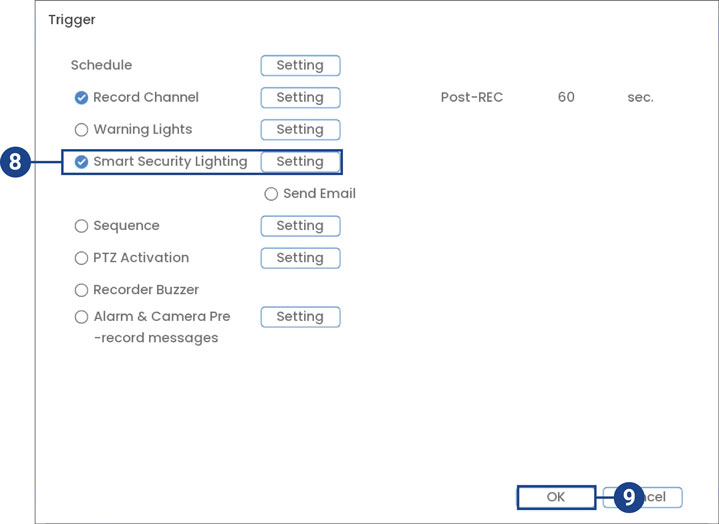
- Check Smart Security Lighting, and then click Setting.
- Adjust Smart Security Lighting preferences:
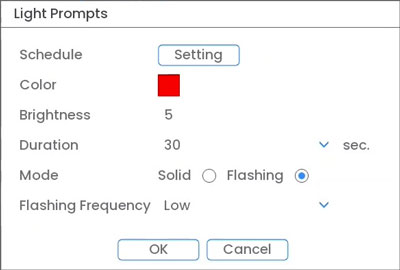
- Schedule: Click Setting choose which days and times or the week to enable automatic warning lights. Click or click-and-drag along each of the red timelines to quickly add or remove time from each day’s schedule in 30–minute segments.
- Color: Click on the red color box to open the color settings. Set a custom color by clicking through the rainbow color palette or click Professional to enter an RGB code. Click Apply to save the color.
- Brightness: Set the Smart Security Lighting brightness level.
- Duration: Choose how long the Smart Security Lighting will stay on following a smart motion detection event.
- Mode: Select Solid for a solid light or Flashing for a flashing light. If you select Flashing, set how quickly the light will flash under Flashing Frequency
- Click OK.
- Click Add to create additional active areas for automatic Smart Security Lighting on the selected channel
- Click Apply to save changes.
Turn Smart Security Lighting Off
- From the Live View display, right-click to open the Quick Menu, then click Main Menu.
- Click Events > Event Settings, and then click the Smart Security Lighting tab from the side panel.
- Select a camera to configure.
- Uncheck Enable.
- Click Apply to save changes.