< Back to list
E871AB, Halo Series, H20 - 4K Dual-Lens IP Wired Security Camera: Installation
This article provides instructions for installing your 4K Dual-Lens IP Wired Security Camera E871AB.
Table of Contents:
What's Included
- 4K Dual-Lens IP Wired Camera
- Mounting Template
- Anchors & Screws (x4)
- Ethernet Extension Cable
Camera Placement Tips
- Install the camera in a location that is difficult for thieves and vandals to reach.
- Secure cabling so that it is not exposed or easily cut.
- Point the camera where there is the least amount of obstructions (i.e. tree branches).
- Take into consideration what you want to monitor and where is the best coverage area.
- Place your camera close to the area of interest.
- The best position is 10 ft (3 m) above ground, angled 15° down.
Installation
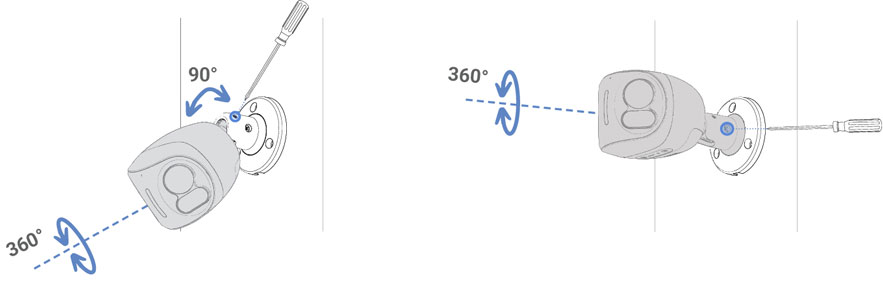
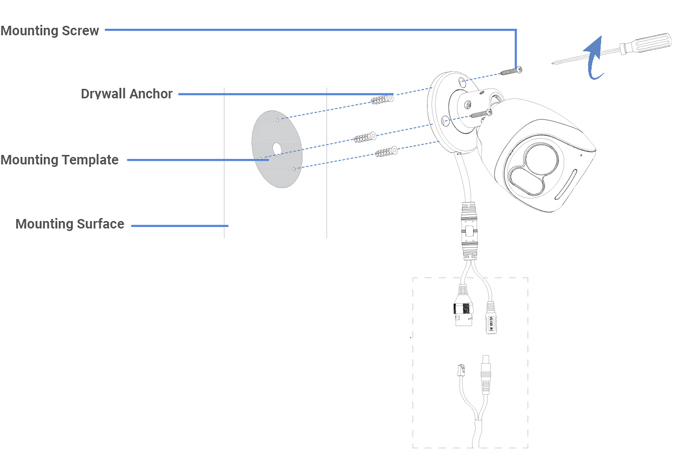
Camera Mounting
- Use the mounting template to drill holes for screws, then insert the drywall anchors. Drill a hole for the camera’s cable if you plan to run it through the mounting surface.
- Use the screws to mount the camera base to the surface. If you are running cables along a wall/ceiling, make sure to pass the cable through the cable notch.
- Feed the camera’s cable through the camera base, then connect the cables.
- Loosen the adjustment screws and position your camera as needed, then tighten to secure it in place.
- Remove the vinyl film from the camera lens once your installation is complete.
Camera Connection

Connect your camera directly to your recorder using the camera’s Ethernet extension cable.
Weather-Resistant Cap

Twist the Ethernet extension cable’s pre-attached weather-resistant cap securely onto your camera’s Ethernet connector. If exposed to regular precipitation, seal the cap with silicone and electrical tape.