LNC Cameras: Connecting the camera to WiFi using L-View
You can connect to and view your LNC Series camera on your PC / Mac through a WiFi network using the L-View Client software.
To connect the camera to WiFi using L-View for PC / Mac:
-
Connect the camera directly to a router using an Ethernet cable.
-
Download and install the L-View Client software on your PC / Mac. Click here for more information on locating software downloads.
-
Launch the L-View Client software.
-
Right-click on the camera ID under Auto search and click Web Configure. Click here for more information on locating the camera ID on your LNC camera.

-
Enter the camera administrator login information. Refer to your user manual for your default username and password. Click Log in to open the Web Configure window in your web browser.
-
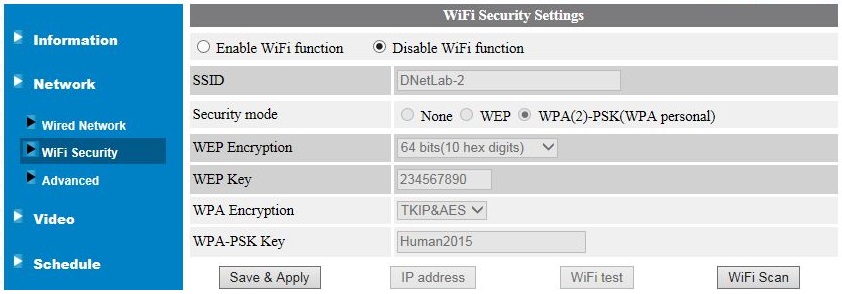
Click Network > WiFi Security.

-
Click WiFi Scan and select your WiFi network out of the list that is displayed.

-
Enter the necessary security information for the router being used. Refer to your router user manual for details.

-
Click Save & Apply.
-
Click WiFi Security again and click WiFi Test.
REMINDER: The WiFi test can take up to 1 minute to complete. If WiFi settings have been successfully configured, the WiFi Test status will read Test Success. If the test was unsuccessful, check the wireless password and ensure that the camera is within range of router.
-
Remove the Ethernet cable from the camera, wait one minute.
-
Reconnect the camera in the L-View Client software by double-clicking the camera ID.