FLIR Cloud Client Software: Downloading recorded video on PC / Mac
FLIR Cloud Client software allows you to download recorded video onto your PC / Mac.
Prerequisite:
- Download and install FLIR Cloud Client software on your PC / Mac. Click here for more information on locating software downloads.
- The following instructions require you to access your system using the FLIR Cloud Client software and a PC / Mac.
To download recorded video:
-
Launch the FLIR Cloud Client software on your computer.
-
On the Home window, click the PLAYBACK icon. (
 ) to open the PLAYBACK tab.
 -
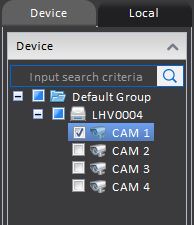
On the right-side under the Device tab, select the Device Name and cameras that you would like to play back from.

-
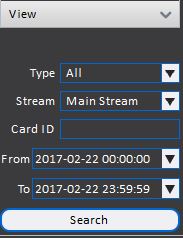
On the bottom-right under View, in the From drop-down and To drop-down, select a date range.

-
Click Search to view recorded video for the selected date range.
-
Click the Play icon (
 ) to start viewing your recorded video.
 -
Click a specific time on your timeline to select a starting time, then click the Time Clip icon (
 ). A timeline market indicates a start time for your playback download.
-
Click a specific time on your timeline to select an end time and click the Time Clip icon (
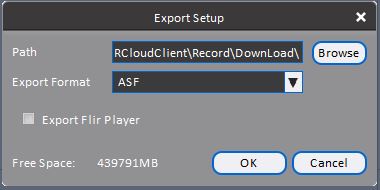
 ) to open the Export Setup window.
 -
Click Browse to select the where you want to save your recorded video.

-
Select the Export Format for your recorded video. The available options for exporting video are:
-
.asf
-
.avi
-
.mp4
-
.dav
LIMITATION: Mac operating systems only support downloading recorded videos to .dav format.
-
-
Click OK to open an Information window, then click OK again.
-
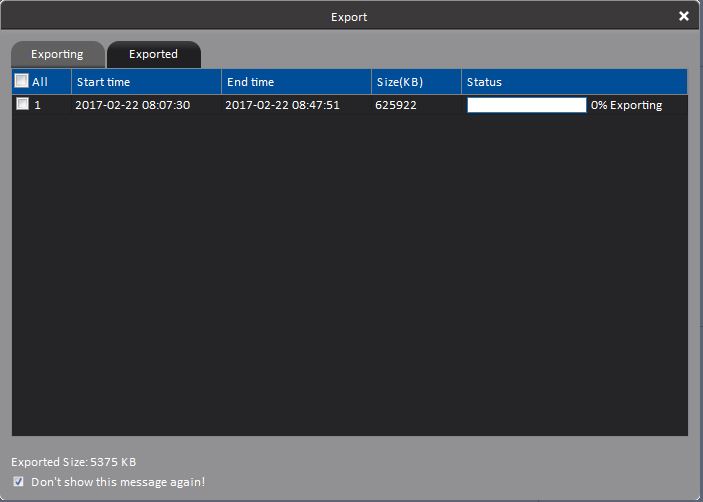
Click the Export icon (
 ) on the bottom-right to open the Export window and view your status. Once the video is completed, you can find the video file in your selected folder.