Back to list
Lorex Client 11 Software: Logging in on PC / Mac
Once you have completed the installation of your Lorex Client 11 software, log in and complete the system setup before remotely monitoring the system.
The following instructions require you to access your system using the Lorex Client 11 software and a PC / Mac.
Prerequisites:
- Download and install the Lorex Client 11 software.
- To install and log in to your Lorex Client 11 software, you must have a Dynamic Domain Name System (DDNS) address or local IP address to configure your system. For example, if the URL created is tomsmith, then the DDNS address is tomsmith.lorexddns.net. Prior to User login, obtain your DDNS address, local IP address, and Client Port value.
To locate your DDNS address, local IP address, and Client Port value on your DVR / NVR system:
- Right-click on the Live View to access the Quick Menu.
- Click the Main Menu icon (
 ).
). - Click System > Info.
RECOMMENDED: You can also access system information by pressing the Enter button ( ) on the front panel of your DVR / NVR system or remote control.
To log in and set up your Lorex Client 11 software:
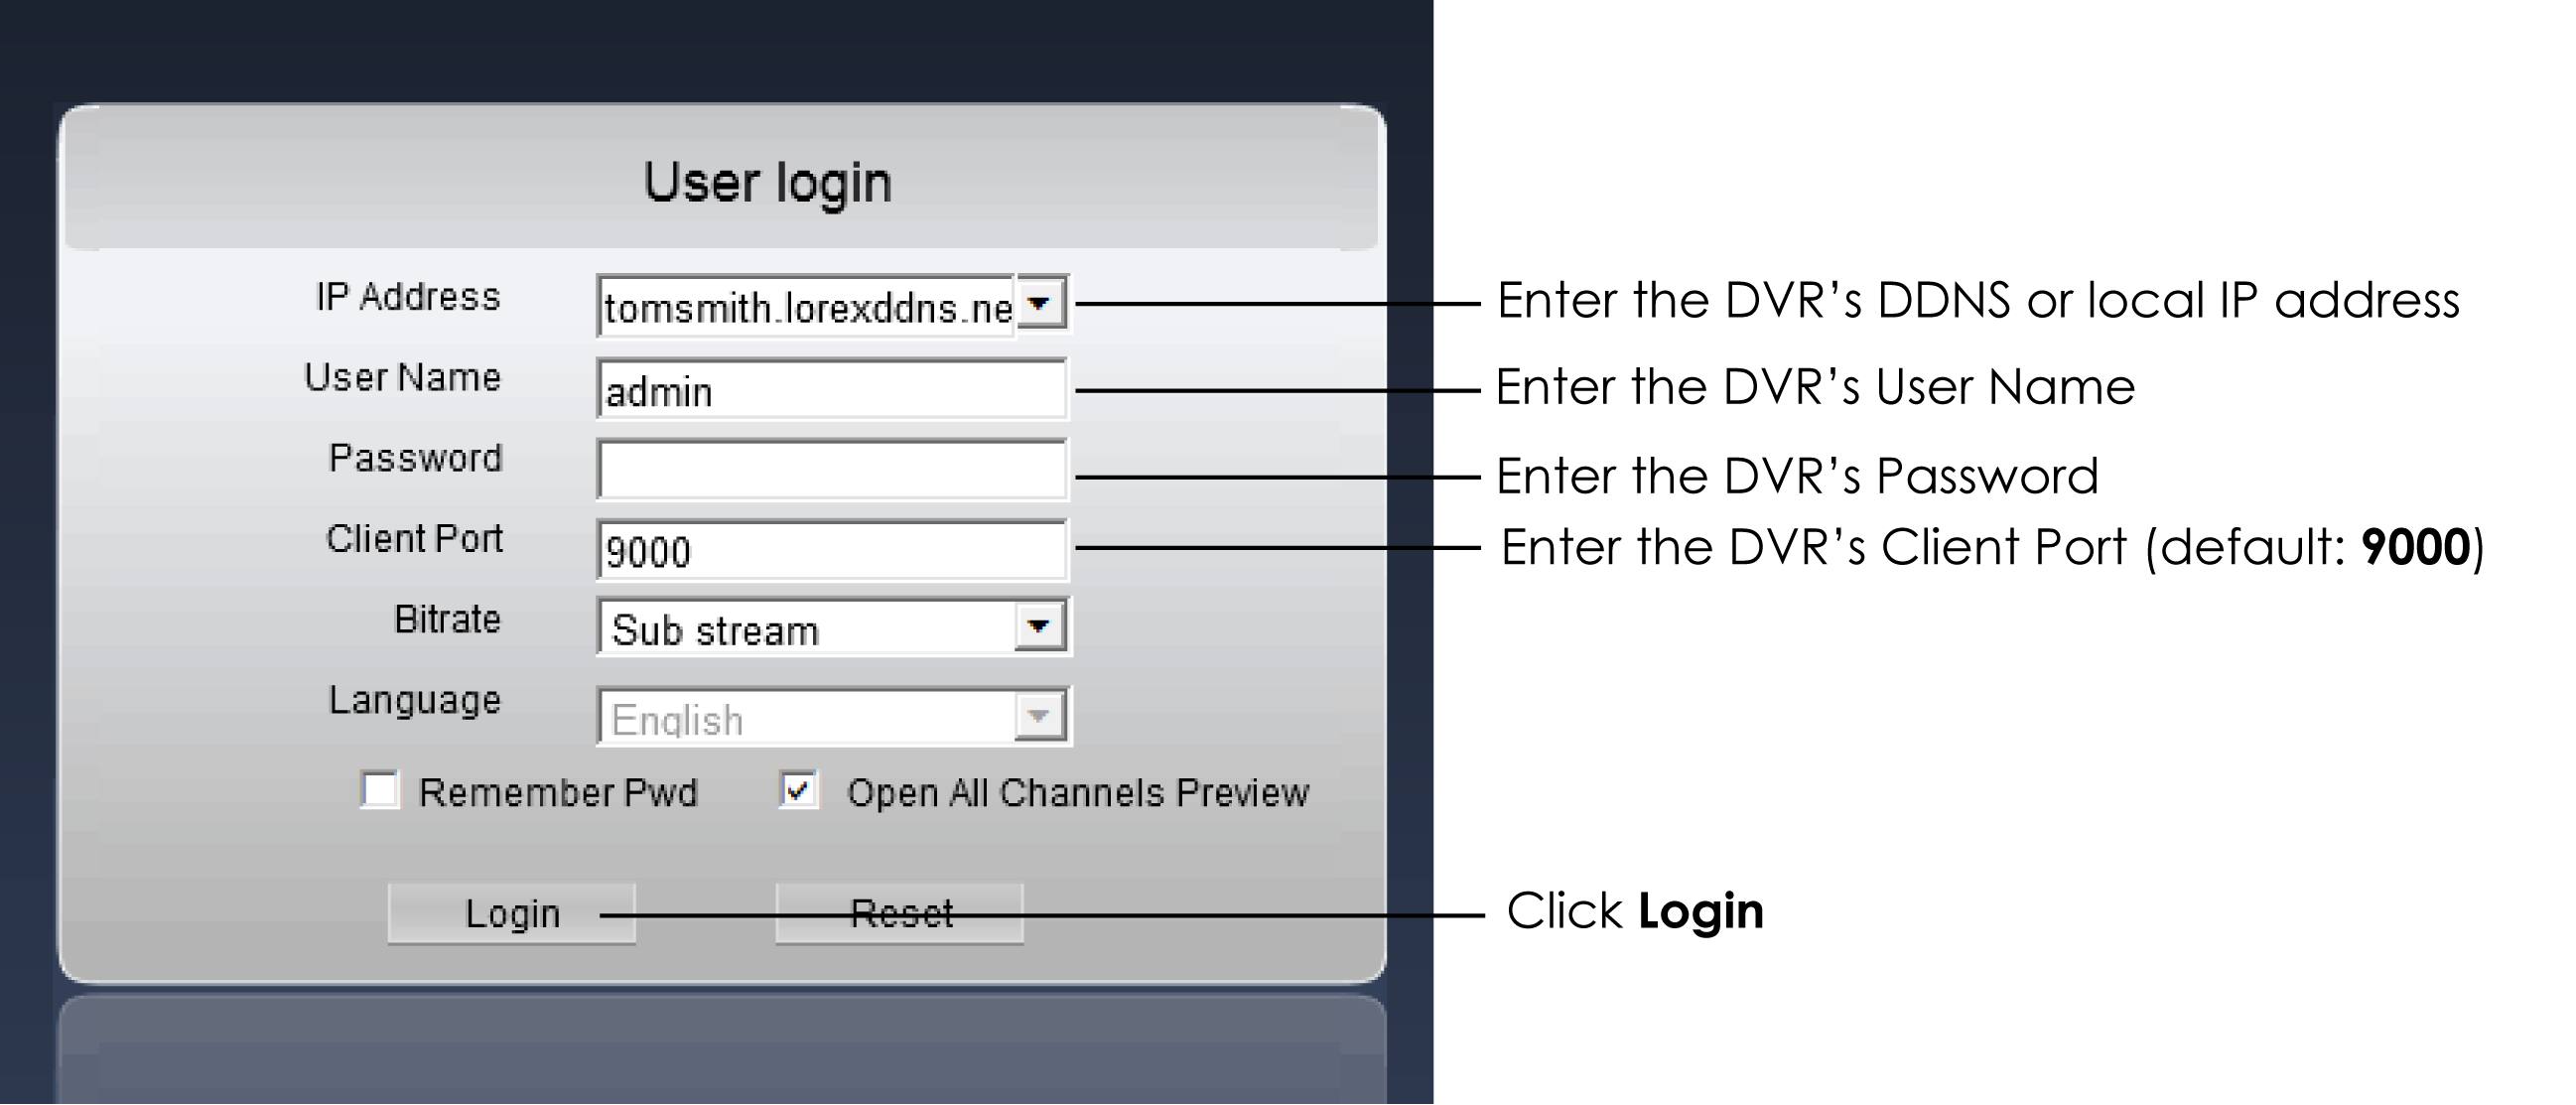
- Launch the Lorex Client 11 software on your computer.
- In the IP Address field, enter the DDNS or local IP address of your DVR.
- Enter your User Name.
- Enter the Password.
- Enter the Client Port value (default: 9000).
- Click Login.