ECO Series: Changing the IP address
An ECO Series DVR requires an IP address to connect to a router. You can configure your network settings so that the DVR IP address is either automatically assigned by the network router using Dynamic Host Configuration Protocol (DHCP), or set to a static IP address.
To configure network settings:
-
Right-click on the Live View to access the Quick Menu.
-
Click the Main Menu icon (
 ).
). -
Click Network.
-
Click the Network tab.
-
In the Type drop-down, select DCHP to allow the system to automatically obtain an IP address from the router, or select Static to assign the IP address to the system.
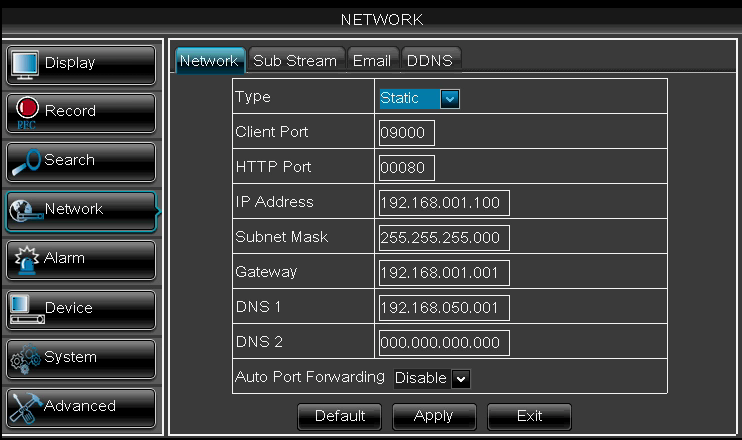
If selecting Static, enter the following:
- IP Address: Enter an IP address of your choice. The same IP address must also be assigned on the router for it to be static.
- subnet mask: Enter the Subnet Mask for the network.
- Gateway: Enter the gateway address for the network.
- DNS 1 & DNS 2: Enter the DNS 1 and DNS 2 address for the network.
-
Click Apply to save your settings.
-
Click Exit to return to the previous menu, and exit the menu to return to Live View.
The DVR will prompt for a restart. Restart the DVR for changes to take effect.
To restart the DVR:
- Right-click on the Live View to access the Quick Menu.
- Click the Main Menu icon ().
- Click Advanced.
- Click the Maintain tab.
- Click Reboot.
- Follow the on-screen prompts to restart the DVR.