F461AQ Series - 2K Pan-Tilt Outdoor Wi-Fi Security Camera: Mounting Installation
This article provides instructions to install your 2K Pan-Tilt Outdoor Wi-Fi security camera F461AQ.
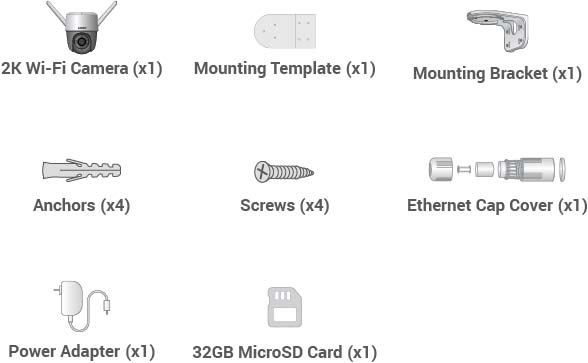
What's included in the box?
Connecting with the Lorex App
Note: Make sure to connect the camera to the Lorex App prior to selecting a permanent mounting location.
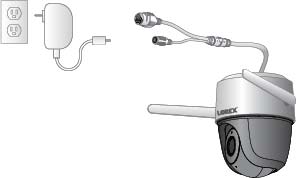
- Connect the power adapter to the device, and then plug it in.
-
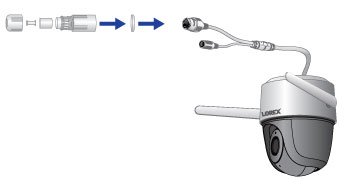
(Optional): Install the Ethernet Cap Cover to make the power adapter weatherproof. Slide the components in the order below, starting with the Ethernet Cap Ring, and then plug in the device.
-
Download the Lorex App by scanning the QR code. You can also visit Google Play or Apple Store to download Lorex App.
-
Open the Lorex App app and create an account or login with your credentials.
-
Tap
 icon to add a new device, then follow the in-app instructions to complete the device setup.
Mounting Your 2K Pan-Tilt Outdoor Wi-Fi security camera
There are 3 ways to mount your 2K Pan-Tilt Outdoor Wi-Fi security camera.
![]() Before you Start:
Before you Start:
-
Install in an area that can support at least three times the total weight of the camera and accessories.
-
Make sure to setup the camera on the Lorex App first before installation.
Mounting the Camera to a Ceiling or Wall:
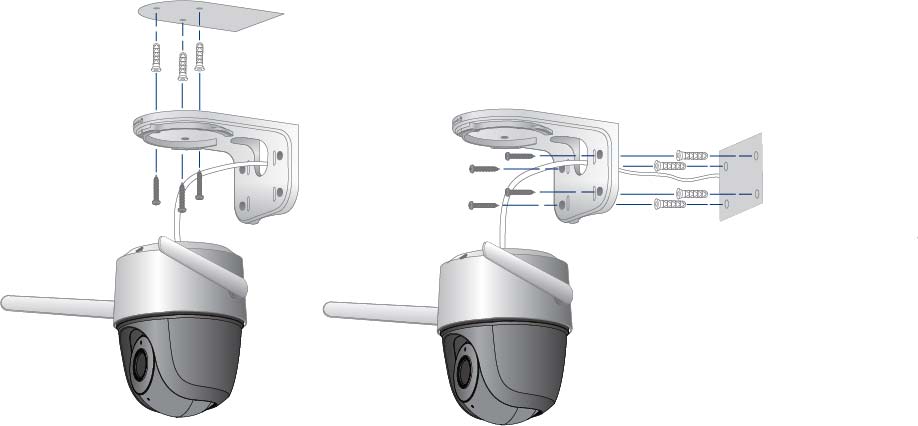
- Place the mounting template on the desired location.
- Drill 7/32" (5/5mm) holes for the anchors.
- Ceiling install only: Using a drill, carefully drill through the plastic covering the ceiling mount holes.
- Using a drill and the provided screws, secure the mounting bracket to the surface.
- Feed the cable through the cable channel and the mounting bracket, and then power on the camera. If needed, feed the cable through the mounting surface.
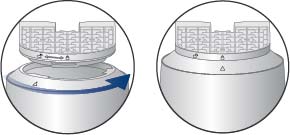
- Carefully, align the arrow on the top of the camera to the unlock symbol on the bracket. Turn the camera counter-clockwise until the arrow aligns with the lock symbol.
- Remove the vinyl film from your camera lens when your installation is complete.
- Open the camera’s settings on the app and enable Image Rotation to flip the camera image.
To configure camera settings, see Device Settings.
Mounting the Camera to a Pole:
Note: Metal straps not included. Make sure to purchase metal straps that can support three times the total weight of the camera and accessories.
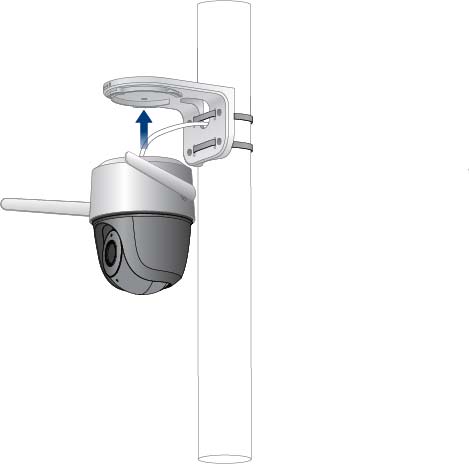
- Thread the straps through the slots on the mounting bracket, and then attach the bracket to the pole.
- Feed the cable through the cable channel and the mounting bracket, and then power on the camera.
- Carefully, align the arrow on the top of the camera to the unlock symbol on the bracket. Turn the camera counter-clockwise until the arrow aligns with the lock symbol.
4. Remove the vinyl film from your camera lens when your installation is complete.
5. Open the camera’s settings on the app and enable Image Rotation to flip the camera image.
To configure camera settings, see Device Settings.