Back to list
C884DA Series: Lorex App - Live View Settings
The following article provides Lorex App instructions for using your (C884DA Series) 4K Deterrence Bullet CVI Wired Camera's Live View Settings.
Live View Settings Overview
Live Viewing allows you to see your wired camera's recording in real time.
To access your wired camera remotely, you must first download the Lorex App and connect your system. Refer to the article DVR / NVR - Download the Lorex App for full instructions.
To access your wired camera's live view:
- Open your Lorex App and login.

- Under your recorder, swipe left and tap on your wired camera.
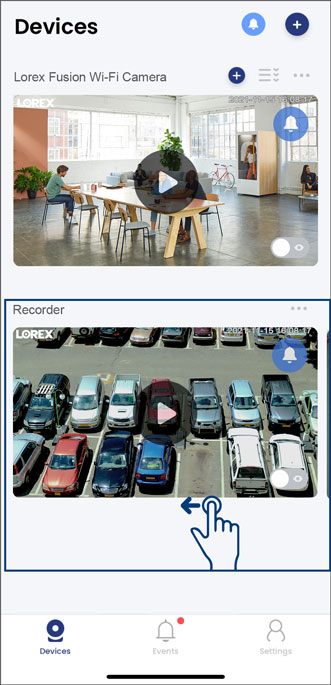
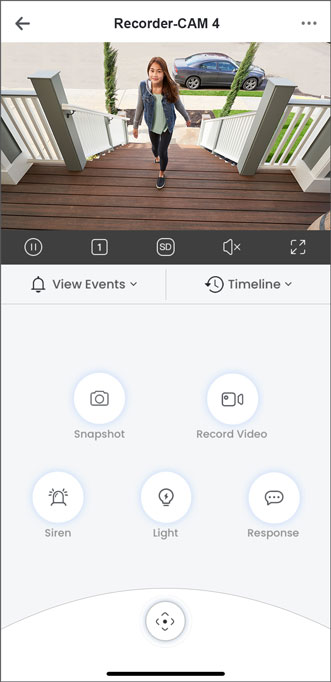
- Your wired camera's Live View settings should match the image below. See the next section to learn how to use Live View settings.
To adjust Live View settings:
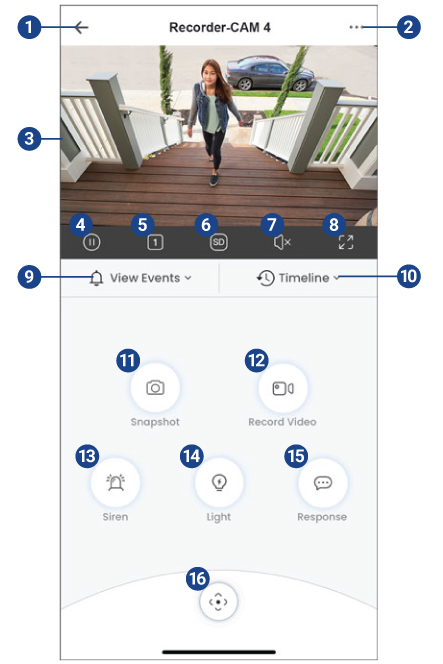
- Return to Devices (Main Menu)
- Device Settings: Configure device settings for the selected camera. Refer to the article C884DA Series: Lorex App - Device Settings for detailed instructions.
- Live Video
- Pause/Restart Video
- Viewing Mode: Switch between single and multichannel views.
- Video Quality: Tap to switch between SD/HD. Tap to switch to SD to optimize streaming. Note: HD resolution will be limited to the maximum screen resolution of your mobile device. This will not impact the recording resolution of the recorder.
- Audio: Tap to mute/unmute the camera's audio.
- Full screen: Tap to view in landscape mode.
- View Events: Tap to view recorded events.
- Timeline: Tap to search for and play back recorded videos.
- Snapshot: Tap to save a still image of the current live view.
- Record Video: Tap to begin manual recording of the current live view. Tap again to stop recording and save the video clip to your Lorex App.
- Siren: (Deterrance cameras only) Tap to enable the camera's siren.
- Light: (Deterrance cameras only) Tap the Light icon, then tap on either the Warning Light (
 ) or the Dual Warning Light (
 ). Refer to the article Using Warning Light & Dual Warning Light to learn more.
 - Response: Tap to select a pre-recorded quick response.
- PTZ (Pan-Tilt-Zoom) Control: Tap to adjust the camera's field of view to pan left or right, tilt up or down, or pinch the live video screen to zoom in. Note: This feature is supported by PTZ cameras only.
To learn about using other Lorex App features, refer to the articles below:
- C884DA Series: Lorex App - Device Settings
- C884DA Series: Lorex App - Motion Detection Settings
- Using Warning Light & Dual Warning Light