C884DA & D881 Series: Using Warning Light & Dual Warning Lights
The following article provides Lorex App and recorder instructions for using the warning light and dual warning lights deterrence features on your wired deterrence cameras.
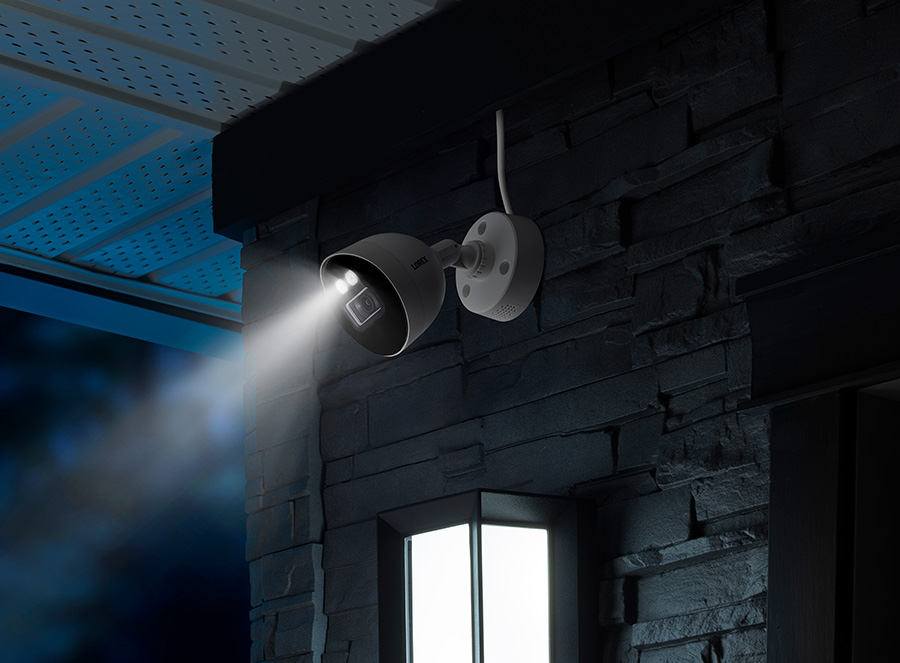
Set the warning light and dual warning lights settings to help increase visibility around your surveillance area and alert everyone of your camera’s presence, while also enhancing the camera’s image at night.
Table of Contents:
- Activate Warning Light and Dual Warning Lights (Lorex App)
- Set the Warning Light and Dual Warning Lights Settings (New Local UI)
- Manually Activate Deterrence Features (New Local UI)
- Link Automatic Warning Light and Dual Warning Lights with Smart Detection (New Local UI)
Certain Lorex deterrence wired cameras have a built-in warning light and dual warning lights. These deterrence features can be activated from the Lorex App or from your recorder where they can also be paired with smart motion detection settings.
Warning light and dual warning lights settings are compatible with certain Lorex wired cameras. For a complete list of compatible cameras, navigate to your recorder series at lorex.com/compatibility.
Activate Warning Light and Dual Warning Lights (Lorex App)
Activate deterrence light features using the Lorex App.
Pre-requisite: Download the Lorex App and connect your system. Refer to the article DVR / NVR - Download the Lorex App for full instructions.
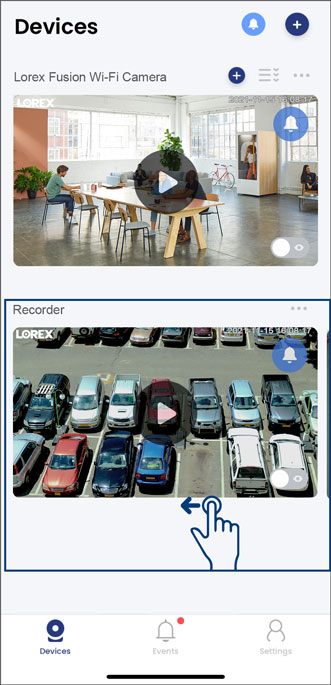
- Open your Lorex App and login.

- Under your recorder, swipe left and tap on a compatible deterrence camera.
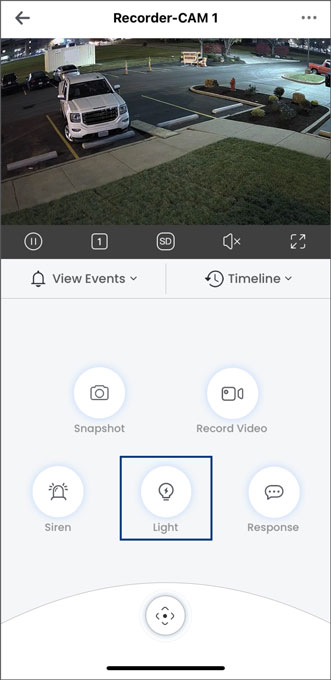
- From the camera's live view, tap the Light icon.
- To activate the Warning Light, tap the icon on the left. Tap again to manually turn it off.
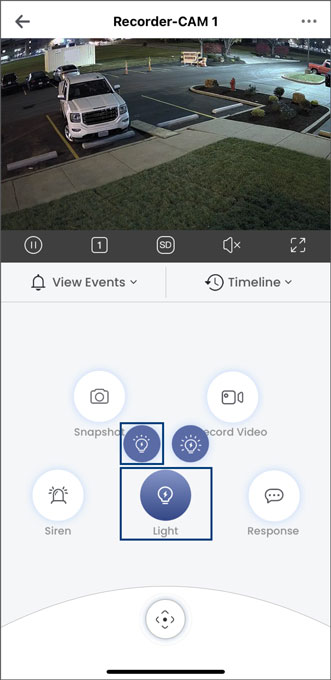
- To activate the Dual Warning Lights, tap on the icon on the right. Tap again to manually turn it off.
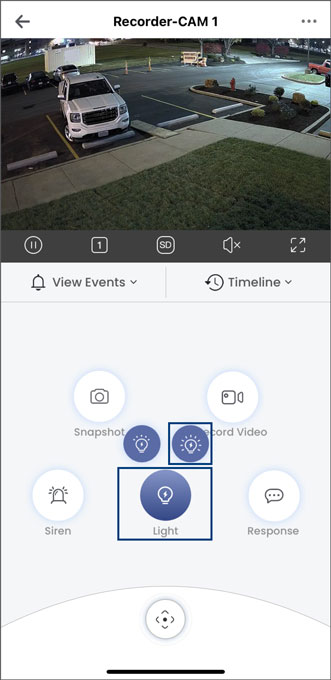
Note: Warning Light and Dual Warning Lights automatically turn off after 10 seconds.
Set the Warning Light and Dual Warning Lights Settings (New Local UI)
Select channels that you want to enable the Warning Light and Dual Warning Lights on and adjust preferences.
To set the warning light settings:
- From the Live View display, right-click to open the Quick Menu, then click Main Menu.
- Click Events, then Event Settings. Click the Light tab from the side panel, then the Warning Light tab from the top panel.
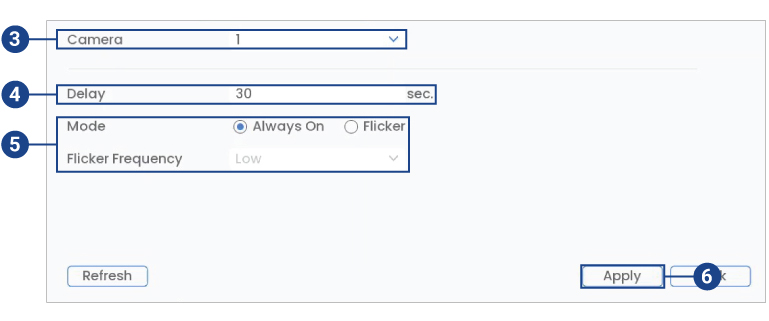
- Select a camera to configure warning light.
- Enter how long the warning light will stay on after a motion detection event.
- Select Always On for a solid white light, or Flicker for a flashing light. If you select Flicker, set how quickly the light will flash under Flicker Frequency.
- Click Apply to save changes.
To set the dual warning lights settings:
- From the Live View display, right-click to open the Quick Menu, then click Main Menu.
- Click Events, then Event Settings. Click the Light tab from the side panel, then the White/Blue Light tab from the top panel.

- Select a camera to configure dual warning lights.
- Enter how long the dual warning lights will stay on after a motion detection event.
- Select White Always On or Blue Always On for a solid white light or for a flashing light select between White Blue Flicker, White Flicker, or Blue Flicker. If you select a flicker light, set how quickly the light will flash under Flicker Frequency.
- Click Apply to save changes,
Manually Activate Deterrence Features (New Local UI)
The recorder has multiple options for manually activating deterrence features.
To activate warning light & dual warning lights on a single camera:
Hover the mouse pointer near the top of the camera image in Live View to reveal the Camera Toolbar. Click the left icon to activate the warning light or click on the far right icon to activate the dual warning lights.

To activate warning light & siren on all connected cameras:
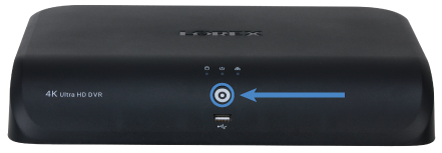
- Push and hold the front panel panic button on the recorder for 3 seconds.
- From the Live View, click the panic button on the Navigation Bar.

Link Automatic Warning Light and Dual Warning Lights with Smart Detection (New Local UI)
Set preferences for automatic warning lights and dual warning lights triggering on compatible Lorex deterrence cameras.
To set automatic deterrence light settings:
- From the Live View display, right-click to open the Quick Menu, then click the Main Menu.
- Click Events, then Event Settings. Click the Event Settings tab from the side panel, then the Motion Detection tab from the top panel.
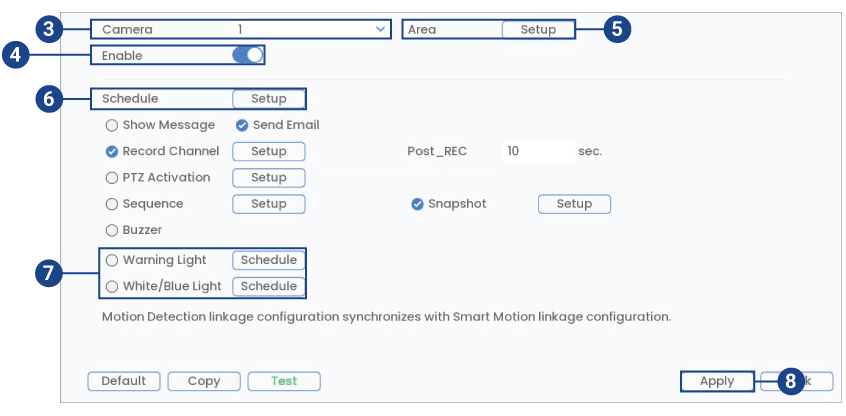
- Select the channel of a connected deterrence camera.
- Check Enable.
- Click Setup next to Area to set an active area for automatic deterrence.
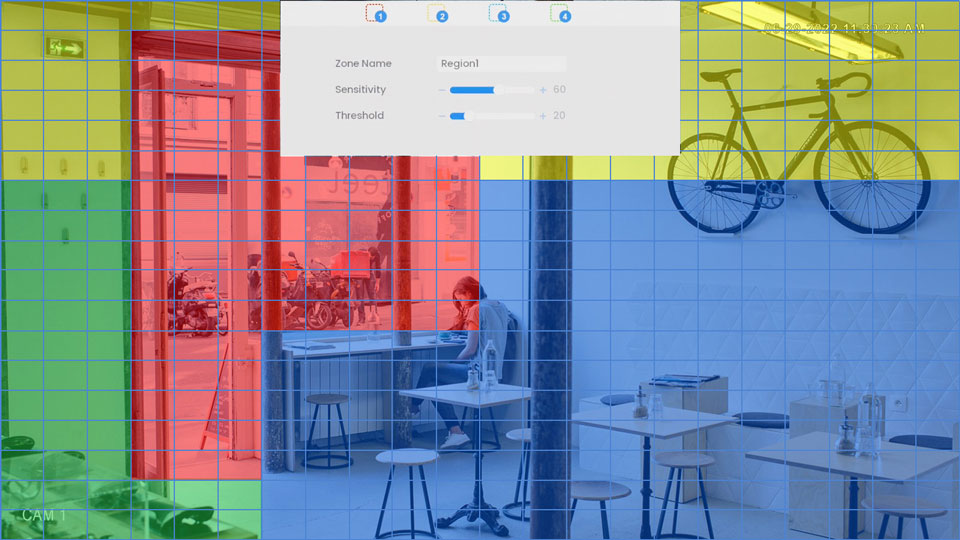
- The camera image appears with a red grid overlay. This means the entire image is enabled for motion detection.
- Click or click-and-drag to add / remove boxes from the active area. Cells that have been removed from the active area appear transparent.
- Hover near the top of the image to reveal zone selection. You can set up to 4 different zones with different sensitivity and threshold values.
- Right-click when finished.
- Click Setup next to Schedule to set the weekly schedule for automatic deterrence.
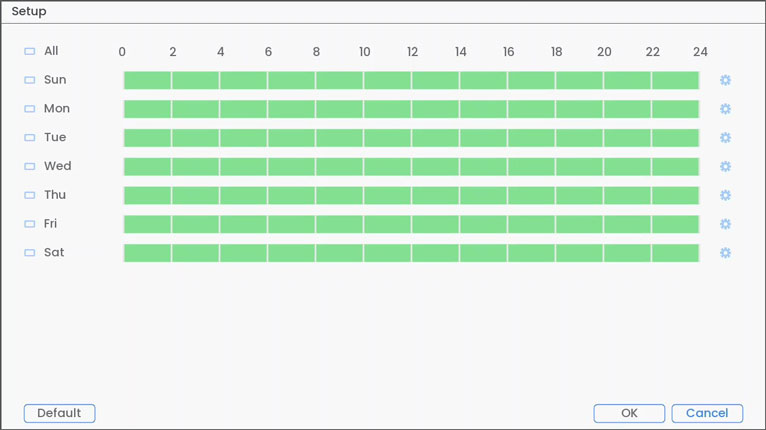
- Click or click-and-drag along each of the green timelines to quickly add or remove time from each day’s schedule in 30–minute segments.
- Click
 beside 2 or more days to link schedules (
 ). This allows you to quickly change multiple schedules at once.
 - To make fine adjustments to a schedule, click
 . This will allow you to set exact start and end times for a schedule.
- Check to activate one of the automatic deterrence lights after a motion detection event.
- Warning Light: Check to enable the warning light when motion is detected. Click Schedule to set the warning light schedule. To adjust the warning light settings, refer to the section above "Set the Warning Light and Dual Warning Lights Settings (New Local UI)".
- White/Blue Light (Dual Warning Lights): Check to enable the dual warning lights when motion is detected. Click Schedule to set the dual warning lights schedule. To adjust the dual warning lights settings, refer to the section above "Set the Warning Light and Dual Warning Lights Settings (New Local UI)".
- Click Apply to save changes.
- (Optional) Click Copy to apply the settings for the current channel to one or more channels.
Note: The instructions above are for Motion Detection, however, they apply to any compatible smart detection feature (Smart Motion, Face Detection, and Virtual Fence).
For instructions on disabling this feature, see the article How to Turn Off Warning Light and Dual Warning Lights.