C884DA Series: Lorex App - Motion Detection Settings
The following article provides Lorex App instructions for configuring your (C884DA Series) 4K Deterrence Bullet CVI Wired Camera's Motion Detection Settings.
Lorex wired cameras use motion detection technology that activates when movement is detected within a certain distance of your camera. Once motion is detected, you will receive a notification in the Lorex App, and your camera will begin recording.
Table of Contents:
- Enable Motion Detection
- Enable Smart Motion Detection
- Person Detection
- Vehicle Detection
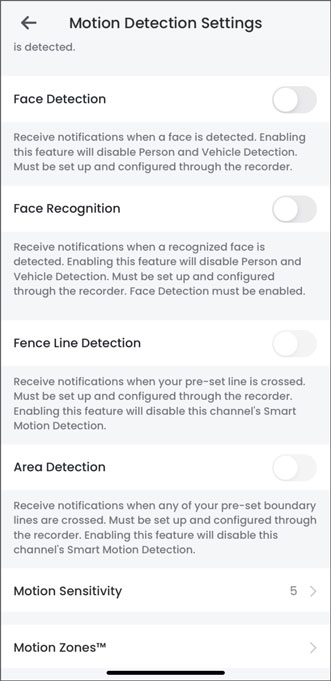
- Face Detection
- Face Recognition
- Fence Line Detection
- Area Detection
- Adjusting Motion Sensitivity
- Creating Motion Zones™
To access your wired camera remotely, you must first download the Lorex App and connect your system. Refer to the article DVR / NVR - Download the Lorex App for full instructions.
Enable Motion Detection
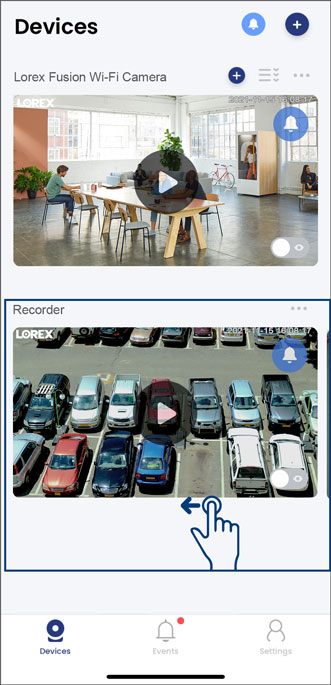
- Open your Lorex App and login.

- Under your recorder, swipe left and tap on your wired camera.
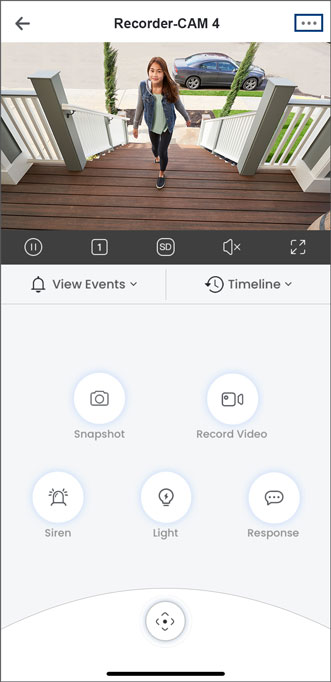
- From your wired camera's Live View screen, tap the Device Settings icon
 .
.
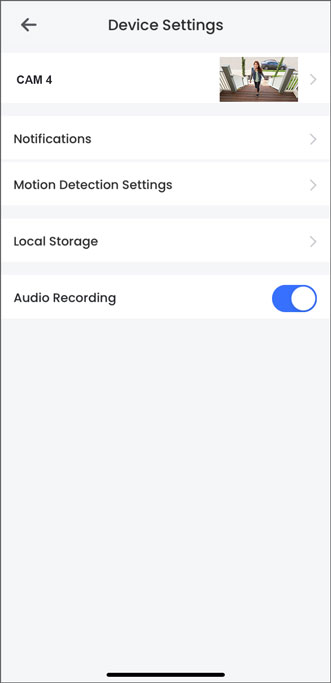
- Tap on Motion Detection Settings.
- Tap to enable Motion Detection.
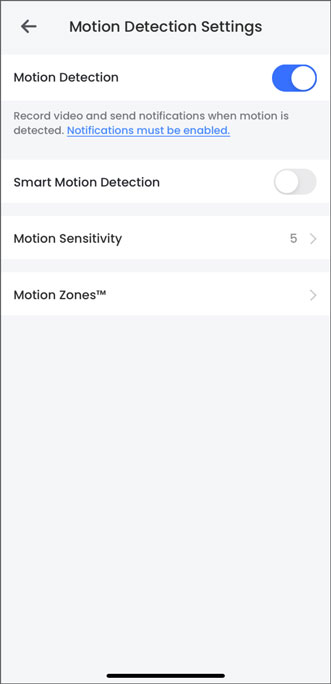
Note: To get notifications you must enable them in the app. Refer to the article C884DA Series: Lorex App - Device Settings to learn more.
Enable Smart Motion Detection
Once smart motion detection is enabled, you will be able to enable other specific types of smart motion detection, such as Person Detection, Vehicle Detection, Face Detection, Face Recognition, Fence Line Detection, and Area Detection.
- Open your Lorex App and login.
- Under your recorder, swipe left and tap on your wired camera.
- From your wired camera's Live View screen, tap the Device Settings icon .
- Tap on Motion Detection Settings.
- Tap to enable Motion Detection.
- Tap to enable Smart Motion Detection. You will then be able to enable other specific types of smart motion detection.
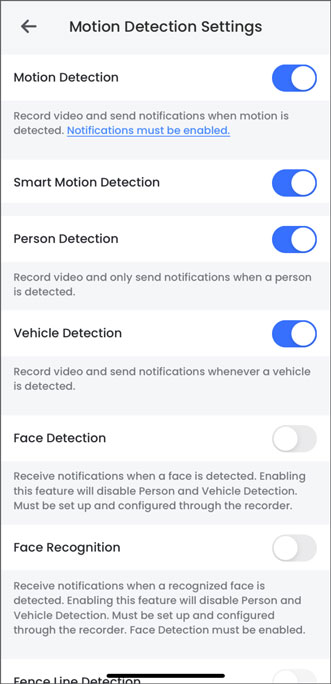
Note: Face Detection, Face Recognition, Fence Line Detection, and Area Detection must be set up and configured through the recorder.
Note: To get notifications you must enable them in the app. Refer to the article C884DA Series: Lorex App - Device Settings to learn more.
Adjust Motion Sensitivity
You can adjust the level of Motion Sensitivity for your Lorex wired camera according to your preference. The higher the sensitivity level, the less motion is required to trigger an event. If you get too many or too few motion detection notifications, try these steps to test or adjust the motion detection sensitivity of your Lorex wired camera.
- Open your Lorex App and login.
- Under your recorder, swipe left and tap on your wired camera.
- From your wired camera's Live View screen, tap the Device Settings icon .
- Tap on Motion Detection Settings.
- Tap to enable Motion Detection.
- Tap Motion Sensitivity, then select the sensitivity level.
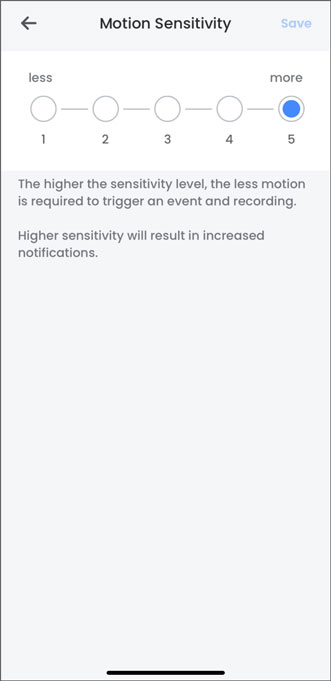
- For decreased motion sensitivity, go for a lower level between 1-3. We recommend starting at a low setting.
- For increased sensivitity, go for a higher level between 4-5. Higher sensitivity will result in increased notifications.
- Tap Save.
Creating Motion Zones™
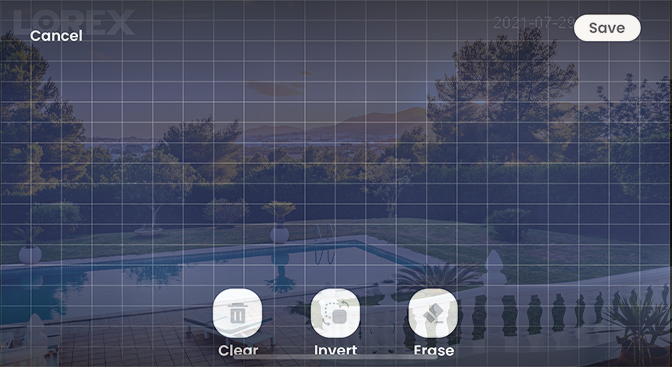
Motion Zones™ allows you to customize your device’s motion detection region. Areas of the camera image that trigger unwanted motion events can be ignored, such as a busy sidewalk or trees blowing in the wind.
- Open your Lorex App and login.
- Under your recorder, swipe left and tap on your wired camera.
- From your wired camera's Live View screen, tap the Device Settings icon .
- Tap on Motion Detection Settings.
- Tap to enable Motion Detection.
- Tap on Motion Zones™.
By default, the entire area has an active blue overlay, meaning that a motion event happening anywhere on the screen will trigger an event.
-
Tap the Clear icon
 to remove the active blue overlay from the entire image.
 -
Tap and drag over the area where you want motion detection enabled.
Note: The de-selected area will be greyed-out and the selected area will be highlighted in blue.
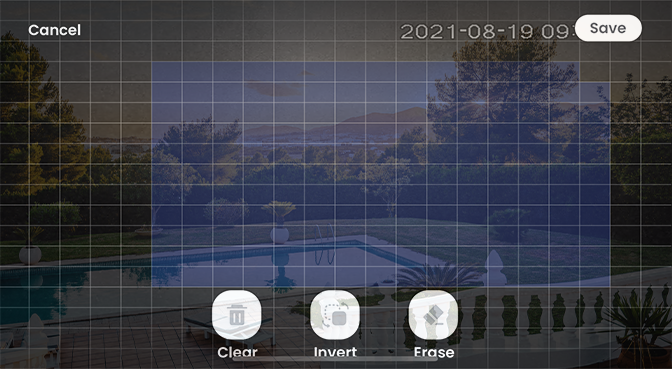
-
(Optional) Tap the Erase icon
 to exclude any area from the Motion Zones™.
 -
(Optional) Tap the Invert icon
 to invert the Motion Zones™ to the de-selected area.
 -
Tap Save.
To learn about using other Lorex App features, refer to the articles below:
- C884DA Series: Lorex App - Device Settings
- C884DA Series: Lorex App - Live View Settings
- Using Warning Light & Dual Warning Light