N883, N884 Series: Using Auto Tracking
The following article provides instructions on configuring and using Auto Tracking on your Pan-Tilt-Zoom Camera.
Table of Contents:
- Enable Smart Motion Plus (for Auto Tracking) in Smart Plan
- Create a Preset for Auto Tracking
- Configure Auto Tracking
- Disable Auto Tracking
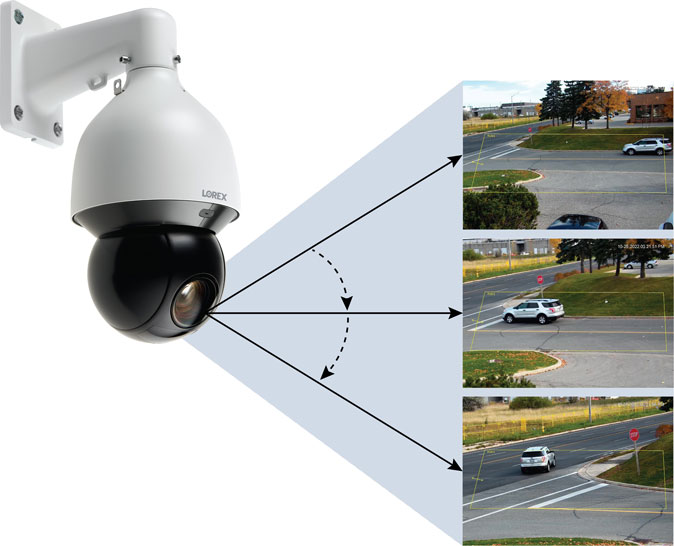
Auto Tracking is an advanced function on the PTZ camera that allows it to cover a large area and to automatically detect, follow, and record moving objects, such as a person or vehicle. The auto tracking technology is composed of both AI detection and tracking. When an object triggers the smart motion plus rule, the PTZ camera will automatically use its pan/tilt rotation and zoom feature to lock in the moving object in the center of the screen and continue to track it without missing any details.
Enable Smart Motion Plus (for Auto Tracking) in Smart Plan
The smart motion plus feature cannot be used simultaneously with the face detection feature. If the smart motion plus feature is not enabled on your IP PTZ camera’s smart plan, then the auto tracking feature will not work. Please make sure the smart motion plus feature is enabled in smart plan before continuing.
To enable smart motion plus in smart plan settings:
- From the Live View display, right-click to open the Quick Menu, then click Main Menu.
- Click EVENTS. Click the Event Settings tab from the side panel, then the Smart Plan tab from the drop-down.
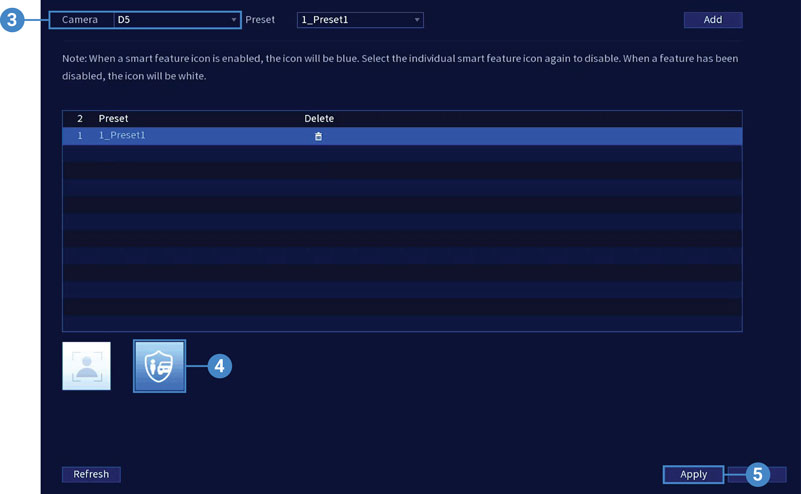
- Under Camera, select your connected IP PTZ camera.
- Select the Smart Motion Plus feature.
- Note: When a smart feature icon is enabled, the icon appears blue. Click the blue smart feature icon again to disable it. When a feature is disabled, the icon appears white.
- Click Apply to save changes.
Create a Preset for Auto Tracking
To use the auto tracking function on your PTZ camera, you must create one or more presets. Presets will save a camera position for quick retrieval. See the article Setting Presets on Your Pan-Tilt-Zoom Camera for full instructions.
Configure Auto Tracking
The system allows you to create defined detection areas for auto tracking on moving objects. Adjust preferences for auto tracking on your IP PTZ camera.
To configure auto tracking:
- From the Live View display, right-click to open the Quick Menu, then click Main Menu.
- Click EVENTS. Click the Event Settings tab from the side panel, then the Smart Motion tab from the drop-down.
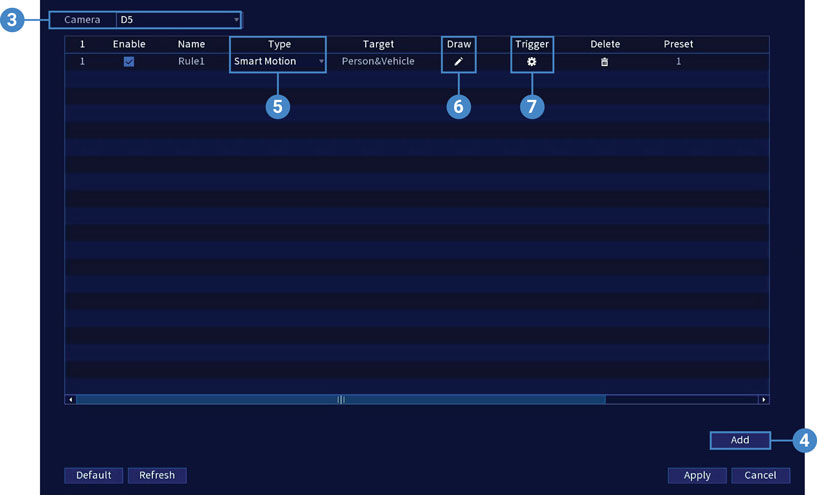
- Under Camera, select your connected PTZ camera.
- Click Add to create a detection rule. Auto Tracking is enabled by default.
- Under Type, select Smart Motion.
- Click the Draw icon and customize the active area for auto tracking:
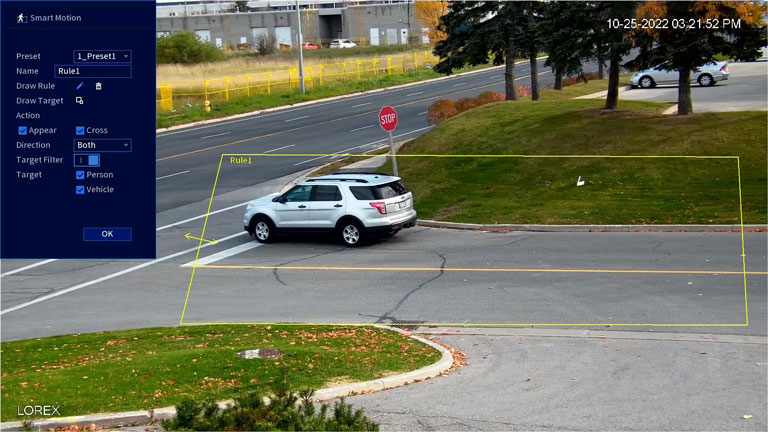
- Preset: Select the preset that you have created for your PTZ camera. If you have not yet created one, see 5.2.1 Presets, page 16 for full instructions, otherwise auto tracking will not work.
- Name: Set a custom name for the rule.
- Draw Rule: To draw, click around the area, then right-click to close the defined area. For most accurate results, set an area where objects of interest will move within the defined area as well as into/out of.
- Action: Check Appear to detect if an object of interest appears in the defined area. Check Cross to detect if an object of interest enters or exits the defined area. Check both to enable each type of action.
- Direction: Determine which direction an object needs to travel in order to trigger auto tracking. You can select Enter for movement entering the defined area, or Leave for movement exiting the defined area, or Both types of directions.
- Target: Enable the Target Filter. Then check the detection targets Person and/or Vehicle.
- Click OK when finished.
- Click the Trigger icon to set the auto-tracking schedule and to adjust the tracking duration.
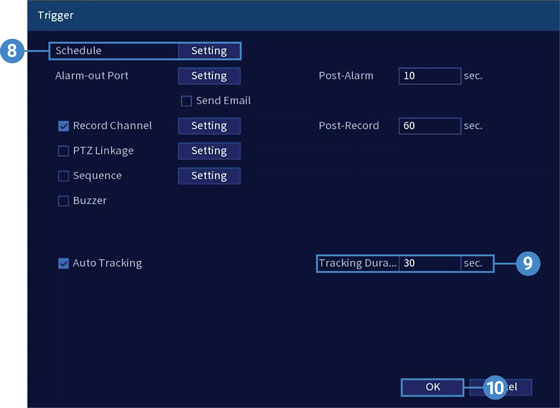
- Click Setting next to Schedule to choose which days and times of the week to enable auto tracking.

- Click or click-and-drag along each of the blue timelines to quickly add or remove time from each day’s schedule in 30–minute segments.
- Click
 beside 2 or more days to link schedules (
 ). This allows you to quickly change multiple schedules at once.
 - To make fine adjustments to a schedule, click
 . This will allow you to set exact start and end times for a schedule.
- To adjust how long the camera will automatically track a moving object, enter the Tracking Duration number (next to Auto Tracking).
- Click OK when finished.
- Click Apply to save changes.
Disable Auto Tracking
Stop auto tracking on your PTZ camera by simply disabling the function.
To disable auto tracking:
- From the Live View display, right-click to open the Quick Menu, then click Main Menu.
- Click EVENTS. Click the Event Settings tab from the side panel, then the Smart Motion tab from the drop-down.

- Under Camera, select your connected PTZ camera.
- Click the Trigger icon.
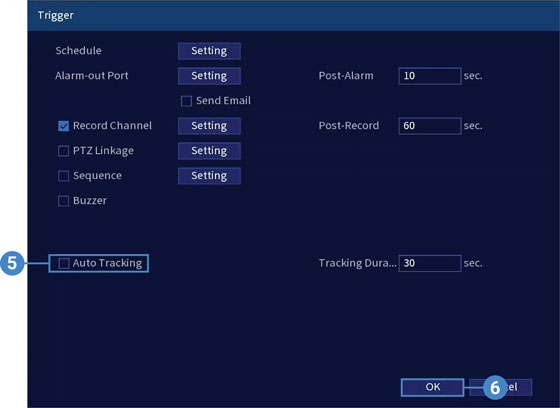
- Uncheck Auto Tracking.
- Click OK, then Apply to save changes.