B463AJ - 2K Battery Video Doorbell: Installation
This article will give you a step-by-step guide to installing the 2K Battery Video Doorbell.
Note: Setup the 2K Wired Video Doorbell in the Lorex App before mounting the doorbell.
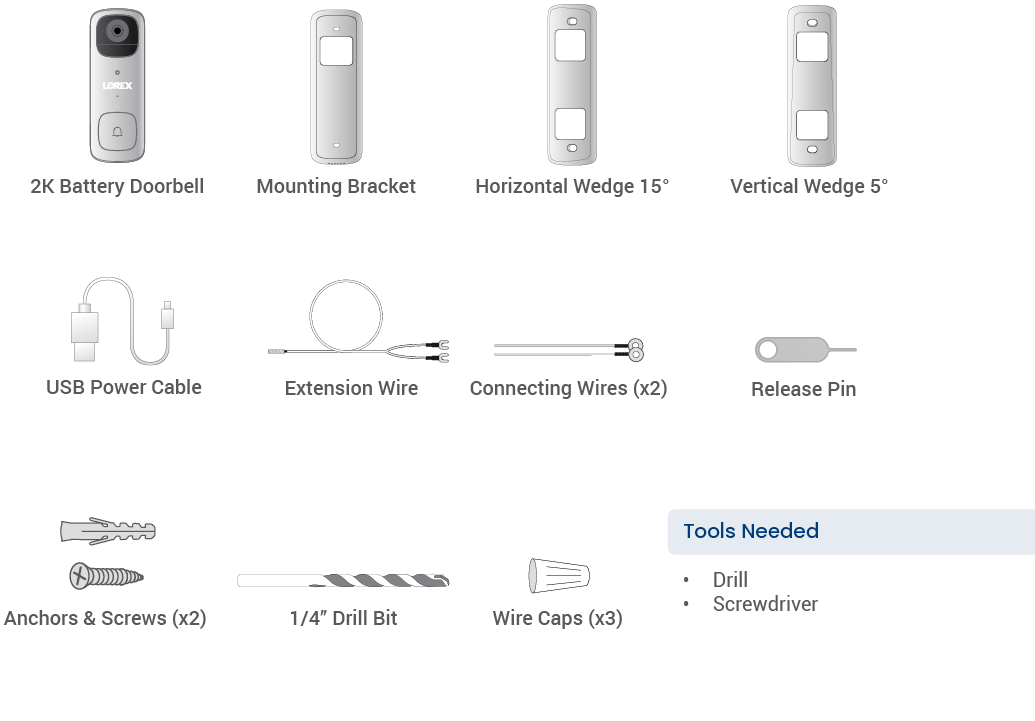
What's Included?
Step 1 - Connect to the app
- Download the Lorex App app.
 2. Pull back the RESET/microSD card slot cover located on the side of the video doorbell.
3. Short press the Reset Button.
4. Tap
2. Pull back the RESET/microSD card slot cover located on the side of the video doorbell.
3. Short press the Reset Button.
4. Tap ![]()
![]()
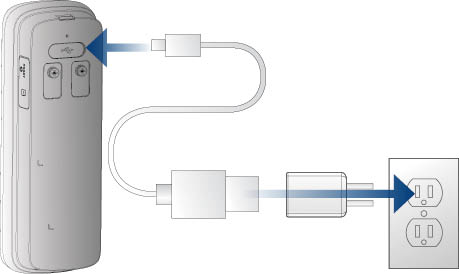
- If the status indicator does not start flashing blue, use the included USB power cable to power on your device, and then short press the reset button.
- Do not remove the USB power cable while connecting to the app.
Step 2 - Battery Setup
- Fully charge your Battery Doorbell before mounting. This could take up to 3 hours. 5V/2A power adapter is recommended (not included). Once fully charged, the status indicator will turn solid blue.
Recommendation: Charge your doorbell at the optimal environmental temperature of 32°F to 113°F (0°C to 45°C). The optimal operating temperature is -4°F to 122°F (-20°C to 50°C).
- Go to and complete Step 5 - Mounting Setup.
- Press the doorbell into the Mounting Bracket. You will hear a 'click' when it secures into place.
Step 3 - Wired Preparation
![]() WARNING: TURN OFF THE POWER RUNNING TO YOUR EXISTING CIRCUIT AT THE BREAKER
WARNING: TURN OFF THE POWER RUNNING TO YOUR EXISTING CIRCUIT AT THE BREAKER
- Test that power has been disconnected by pressing the button on your existing doorbell. There should be no sound.
- 8-24 VAC is required. If you do not have this voltage, you will need a 8-24 VAC doorbell transformer.
- Always be careful when handling electrical wiring. If you are not comfortable doing it yourself, consult a licensed electrician.
IMPORTANT: 8-24V AC transformer is required. If your house does not have a compatible transformer, you will need to purchase a 8-24V AC doorbell transformer. Refer to the article “What transformer should I use with the 2K Video Doorbell?” for details.
Step 4 - Wiring the Doorbell
![]() If your existing doorbel wiring is too short, replace the Connecting Wire with the provided Extension Wire.
If your existing doorbel wiring is too short, replace the Connecting Wire with the provided Extension Wire.
- Remove your existing doorbell and disconnect the wiring. Tip: Bend the power cables so they do not fall through the wall.
- Go to and complete Step 5 - Mounting Setup.
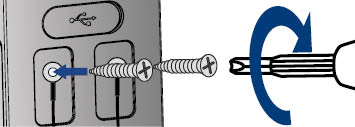
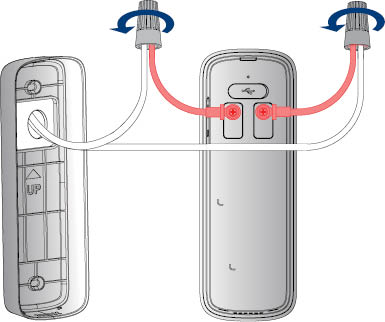
- Completely remove the Power Port Terminal screws completely with a Philips-head screwdriver.
- Thread the screws through the metal loops of the Connecting Wires, and then tighten the screws clockwise.
- Align the ends of your existing wiring and Connecting Wires, place the wire caps over the exposed wiring, and then twist the wire cap clockwise to tighten.
Step 5 - Mounting Setup
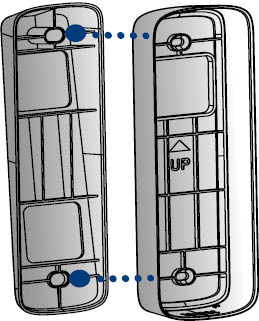
- Place the Mounting Bracket on the desired location with the
 arrow pointing up.
 - Mark the holes for screws.
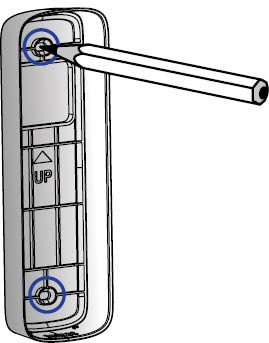
- Using a Phillips-head screwdriver and the provided screws, secure the Mounting Bracket to the surface.
Optional: Drill 1/4” (6mm) holes for the anchors. 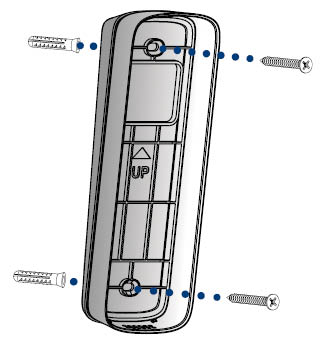
Wedge Installation (Optional)
- Align and place either one of the horizontal or vertical wedges to the Mounting Bracket according to the direction you want the doorbell to face.
- To change the direction of the angle, flip the horizontal or vertical wedge upside down.