LNC Cameras: Connecting remotely using L-View on PC / Mac
LNC Series cameras can be viewed remotely using the L-View Client software for PC / Mac.
Prerequisites:
- Ensure that your PC / Mac is connected to a WiFi network.
- Download and install the L-View Client software. Click here for downloads and documentation for your product.
- Ensure that your camera has been configured and connected to the same WiFi network as your PC / Mac. Click here for details on how to configure your LNC camera to connect to WiFi.
After following the prerequisite steps, verify that your camera indicator lights show the camera is powered (solid red) and connected to WiFi (flashing blue). If there is no flashing blue light the camera is not connected to WiFi. Unplug the power from the camera for 30 second and plug back in.
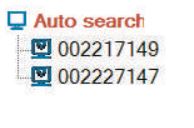
Now that your LNC camera is connected to the same WiFi network as your PC / Mac, you are ready to connect to your camera remotely. Using the L-View Client software on a PC / Mac, you can confirm that the camera is connected by checking for the camera ID under the Auto search menu. To open the Live View for a selected camera, double-click the camera ID under the Auto search menu.
REMINDER: If using a Mac, the L-View Client software will not display in the Auto Search menu and the camera ID will need to be manually entered. Enter the 9-digit camera ID number for the camera, located on the camera, and the password. Refer to you user manual for your default password. If this is the first time entering the password, a prompt to enter a new password will appear. Do not enter a password longer than 6 digits or one that has special characters.