LHV / LNR Series: Enabling and configuring snapshots
Your LHV / LNR Series DVR / NVR system can be set to record snapshot images. Snapshots are still image files saved to your DVR / NVR Hard Disk Drive (HDD). They are useful in capturing specific moments in recorded video such as a license plate or subject's face. The first step to setting up snapshots is to enable them in your DVR / NVR menu.
To enable Snapshots:
-
Right-click on the live view to access the Quick Menu.
-
Click Main Menu, and then click the Setting icon (
 ).
). -
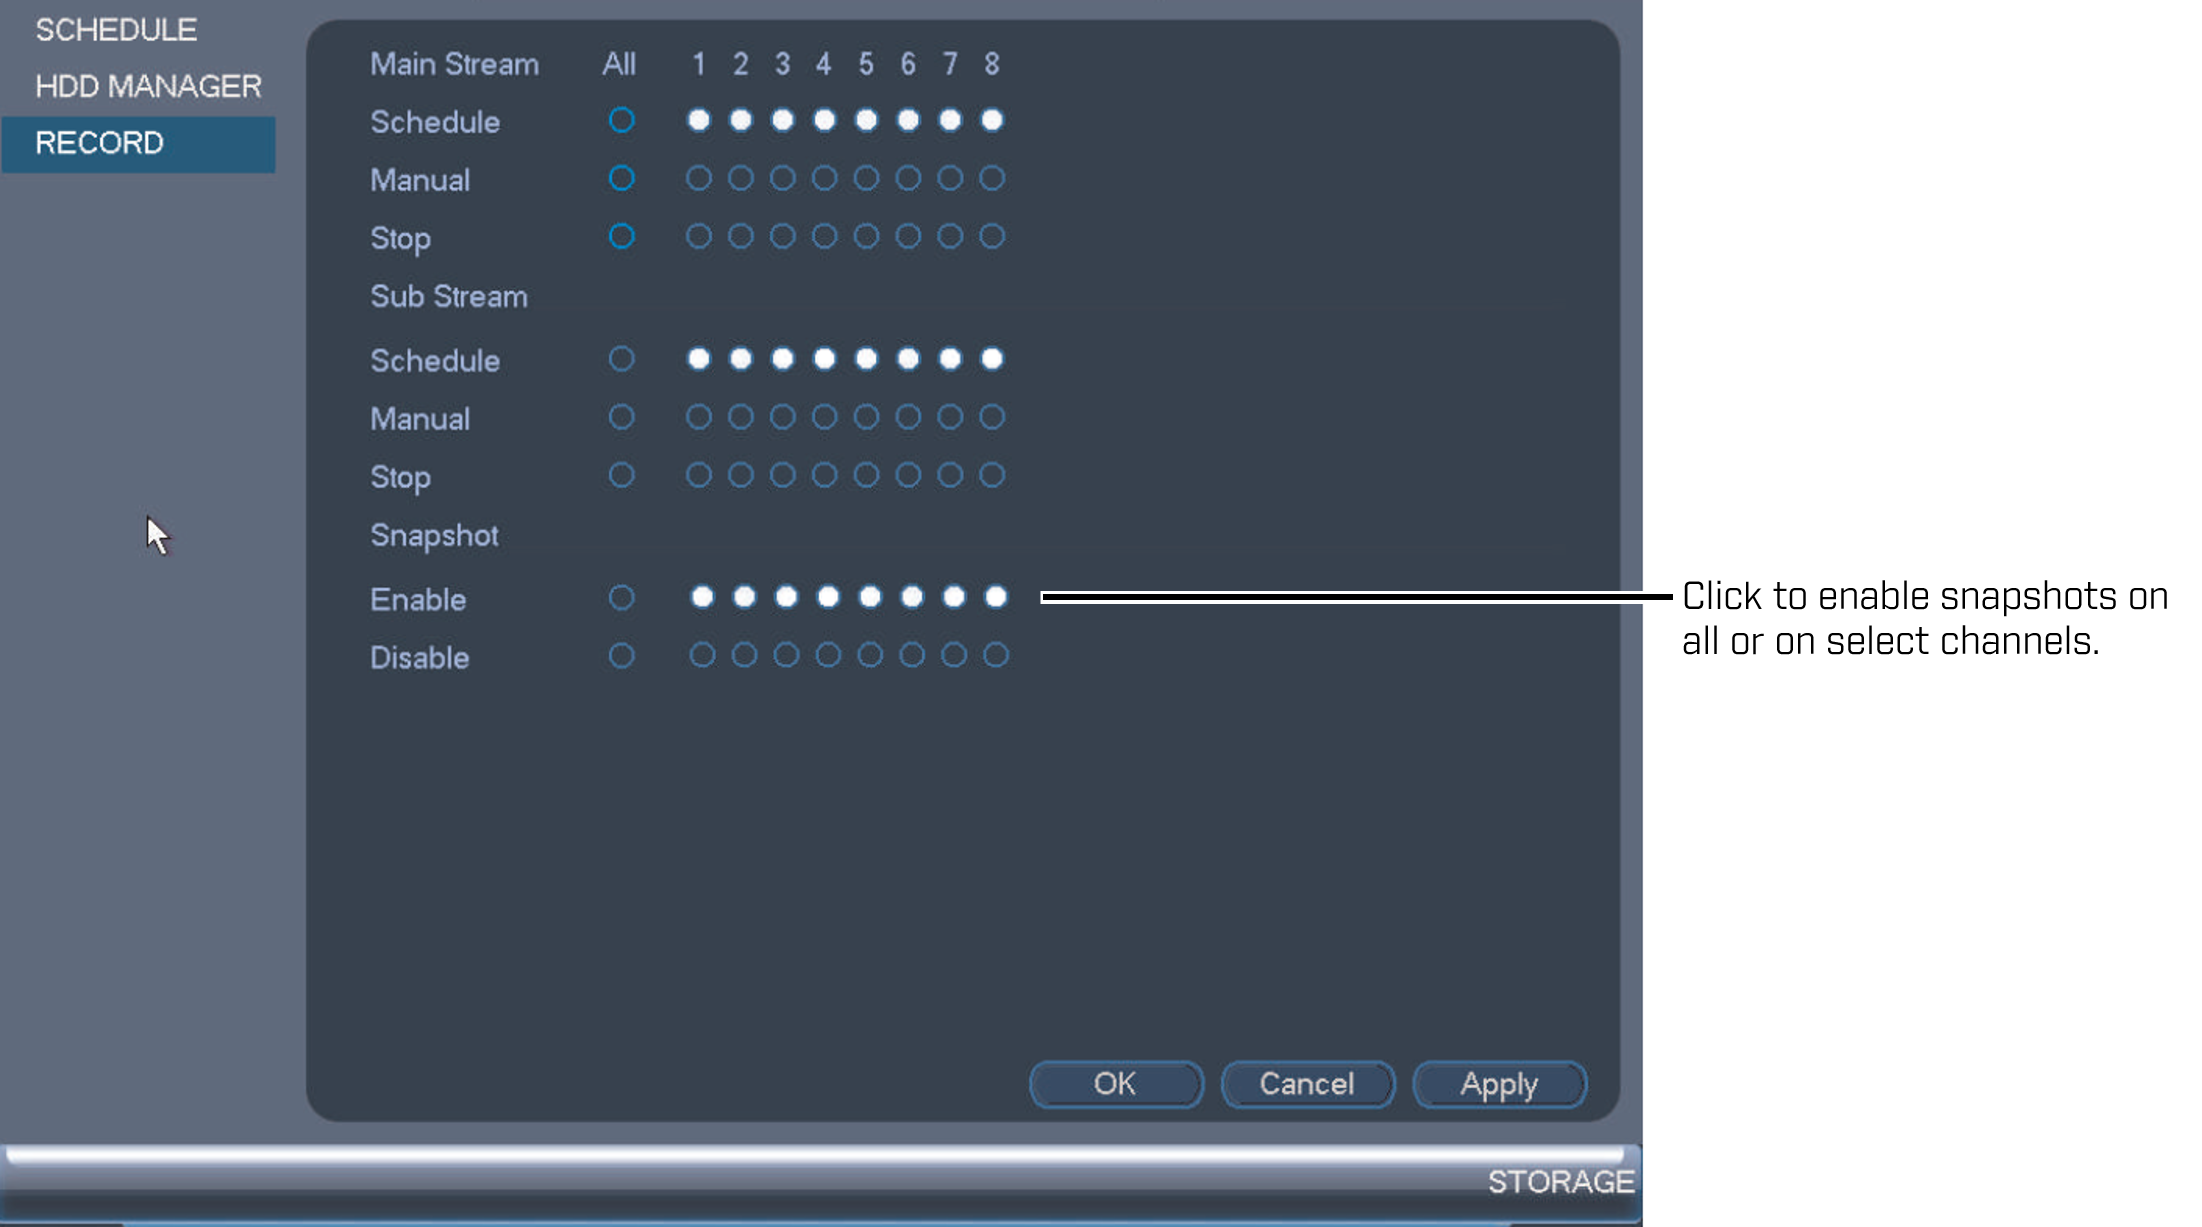
Click Storage > Record.
-
For Snapshot click Enable to allow snapshot recording on all channels, or on select channels.

-
Click Apply to save the settings, and then click OK to exit.
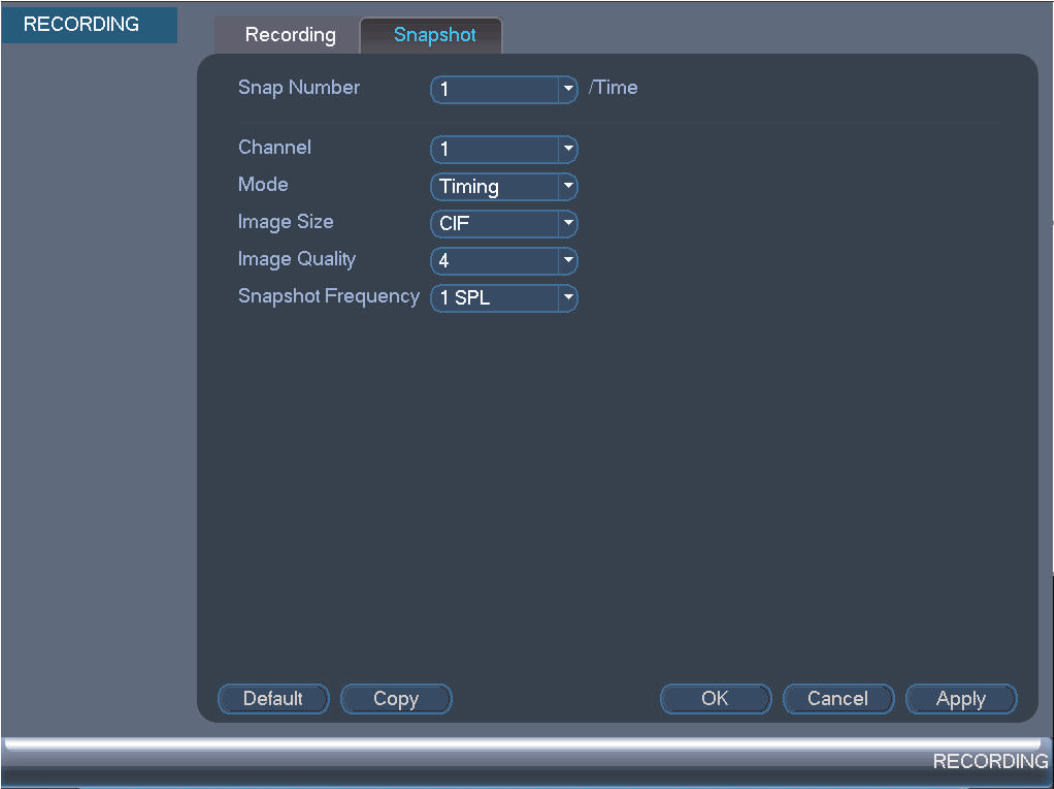
The Snapshot tab in the Recording menu controls the quality and recording parameters of each snapshot.
To configure snapshot settings:
-
Right-click on the live view to access the Quick Menu.
-
Click Main Menu, and then click the Camera icon (
 ).
). -
Click Recording.
-
Click the Snapshot tab.
-
In the Snap Number drop-down, select the number of snapshots to be taken.

-
Configure the following:
-
Channel: Select the channel to be configured.
-
Mode: Select Timing for the system to take snapshots according to the snapshot schedule. Select Trigger for the system to take snapshots only when triggered by motion detection.
REMINDER: If you select Trigger you must enable motion detection alerts.
-
Image Size: Select the resolution of the snapshot.
-
Image Quality: Select the quality of the image from 1 (lowest) to 6 (highest).
-
Snapshot Frequency: Select the number of snapshots the system will take.
-
-
Click Apply to save the settings, and then click OK to exit.
You have now configured your snapshot settings. Next, you must set up your snapshot schedule.